How To Add Camcorder To Streamlabs Obs ?
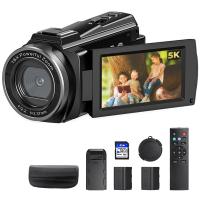
To add a camcorder to Streamlabs OBS, you will need to connect your camcorder to your computer using a compatible cable, such as HDMI or USB. Once connected, open Streamlabs OBS and go to the Sources section. Click on the "+" button and select "Video Capture Device." Give the source a name and click "Add New Source." In the properties window, select your camcorder from the drop-down menu under "Device." Adjust any other settings, such as resolution or frame rate, if needed. Click "OK" to save the changes. Your camcorder should now be added as a source in Streamlabs OBS, and you can position and resize it as desired in your scene.
1、 Connecting the camcorder to your computer via USB or HDMI.
To add a camcorder to Streamlabs OBS, you will need to connect it to your computer using either a USB or HDMI cable. Here's how you can do it:
1. USB Connection:
- Ensure that your camcorder has a USB output port. Most modern camcorders have this feature.
- Connect one end of the USB cable to the camcorder and the other end to an available USB port on your computer.
- Turn on your camcorder and set it to the appropriate mode for streaming or recording.
- Open Streamlabs OBS on your computer and go to the Sources tab.
- Click on the "+" button and select "Video Capture Device."
- In the properties window, choose your camcorder from the drop-down menu.
- Adjust the settings as per your preference and click "OK."
2. HDMI Connection:
- Check if your camcorder has an HDMI output port. If it does, you will need an HDMI cable.
- Connect one end of the HDMI cable to the camcorder and the other end to an available HDMI input port on your computer.
- Power on your camcorder and set it to the appropriate mode for streaming or recording.
- Launch Streamlabs OBS and navigate to the Sources tab.
- Click on the "+" button and select "Video Capture Device."
- In the properties window, choose your camcorder from the drop-down menu.
- Adjust the settings according to your preferences and click "OK."
It's important to note that not all camcorders are compatible with Streamlabs OBS. Ensure that your camcorder is recognized by your computer before attempting to add it as a video source. Additionally, make sure you have the necessary drivers installed for your camcorder to work properly with your computer.
Remember to check for any firmware updates for your camcorder and keep your software up to date for the best streaming experience.
2、 Configuring the camcorder as a video capture device in Streamlabs OBS.
To add a camcorder to Streamlabs OBS, you need to configure it as a video capture device. Here's a step-by-step guide on how to do it:
1. Connect your camcorder to your computer using a USB cable or HDMI cable, depending on the available ports on your camcorder and computer.
2. Open Streamlabs OBS on your computer. If you don't have it installed, you can download it from the Streamlabs website and follow the installation instructions.
3. In Streamlabs OBS, click on the "+" icon in the Sources box to add a new source.
4. From the list of available sources, select "Video Capture Device."
5. A new window will appear. In the "Device" dropdown menu, select your camcorder from the list. If your camcorder is not listed, make sure it is properly connected to your computer and recognized by your operating system.
6. Adjust the settings for your camcorder source, such as resolution, frame rate, and audio input. You can also enable or disable features like autofocus or image stabilization, depending on your camcorder's capabilities.
7. Click "OK" to save the settings and add the camcorder as a source in Streamlabs OBS.
8. You can now position and resize the camcorder source in your scene as desired. You can also add other sources, such as overlays or webcam, to enhance your stream.
Remember to test your camcorder source by previewing your stream before going live. This will ensure that everything is working properly and that your camcorder is capturing the desired video feed.
By following these steps, you should be able to configure your camcorder as a video capture device in Streamlabs OBS and start using it for your live streams or recordings.
3、 Adjusting the camcorder settings for optimal streaming quality.
To add a camcorder to Streamlabs OBS, you will need to follow a few steps. Here's a guide on how to do it:
1. Connect your camcorder to your computer using a USB cable or HDMI cable, depending on the available ports on your camcorder and computer.
2. Open Streamlabs OBS on your computer. If you don't have it installed, you can download it from the Streamlabs website and follow the installation instructions.
3. In Streamlabs OBS, click on the "+" icon in the Sources box to add a new source.
4. From the list of available sources, select "Video Capture Device."
5. A new window will appear, prompting you to name the source. You can name it anything you like, such as "Camcorder."
6. In the Device dropdown menu, select your camcorder from the list. If your camcorder is not listed, make sure it is properly connected to your computer and recognized by your operating system.
7. Adjust the settings for your camcorder source, such as resolution, frame rate, and audio input. These settings will vary depending on your camcorder model and the capabilities of your computer.
8. Once you have adjusted the settings, click "OK" to add the camcorder source to your Streamlabs OBS scene.
9. You can now position and resize the camcorder source within your scene by clicking and dragging it.
10. To start streaming with your camcorder, click on the "Start Streaming" button in Streamlabs OBS.
Remember to adjust the camcorder settings for optimal streaming quality. This includes setting the resolution and frame rate to match your desired streaming output. Additionally, ensure that your camcorder is properly focused and positioned for the best image quality. Experiment with different settings and test your stream to find the optimal configuration for your setup.
It's worth noting that the latest version of Streamlabs OBS may have additional features or improvements related to adding a camcorder as a source. Therefore, it's recommended to check the Streamlabs OBS website or community forums for any updates or specific instructions related to your camcorder model.
4、 Testing the camcorder feed in Streamlabs OBS before going live.
To add a camcorder to Streamlabs OBS, you need to follow a few simple steps. Here's a guide on how to do it:
1. Connect your camcorder to your computer using a USB cable or HDMI cable, depending on the type of camcorder you have. Make sure the camcorder is turned on and set to the appropriate mode for streaming.
2. Open Streamlabs OBS on your computer. If you don't have it installed, you can download it from the Streamlabs website and follow the installation instructions.
3. In Streamlabs OBS, click on the "+" icon in the Sources box to add a new source. From the drop-down menu, select "Video Capture Device."
4. A new window will appear, where you can name your camcorder source. Click on the "Add New Source" button.
5. In the next window, select your camcorder from the "Device" drop-down menu. You should see your camcorder's name listed here. Adjust the other settings, such as resolution and frame rate, according to your preferences.
6. Click on the "OK" button to add the camcorder source to your Streamlabs OBS scene.
7. You can now position and resize the camcorder feed within your scene by clicking and dragging it.
8. To test the camcorder feed, click on the "Start Streaming" button in Streamlabs OBS. You should see the camcorder feed appear in the preview window.
9. Adjust the settings and make any necessary changes to the camcorder feed until you are satisfied with the quality and appearance.
10. Once you are ready to go live, click on the "Go Live" button to start streaming with your camcorder feed.
Remember to check your audio settings as well to ensure that the sound from your camcorder is being captured correctly. With these steps, you can easily add and test your camcorder feed in Streamlabs OBS before going live.










There are no comments for this blog.