How To Add Filters On Canon Eos300 Camera ?
To add filters on a Canon EOS 300 camera, you will need to follow these steps:
1. Identify the filter thread size: Check the front of your camera lens for the symbol "Ø" followed by a number (e.g., Ø58mm). This number represents the filter thread size.
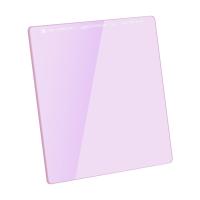
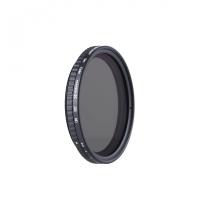
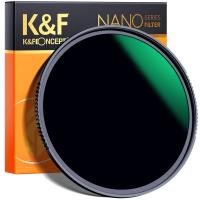
2. Purchase the appropriate filters: Once you know the filter thread size, you can buy filters that match that size. There are various types of filters available, such as UV filters, polarizing filters, and neutral density filters, each serving different purposes.
3. Attach the filter: Hold the camera lens firmly and screw the filter onto the front of the lens in a clockwise direction. Make sure it is securely attached but avoid overtightening.
4. Adjust settings if necessary: Depending on the type of filter you are using, you may need to adjust camera settings accordingly. For example, a polarizing filter may require adjustments to the exposure or white balance settings.
5. Start shooting: Once the filter is attached and settings are adjusted, you can start capturing photos or videos with the desired filter effect.
Remember to handle filters with care to avoid scratches or damage, and always refer to the camera's manual for specific instructions related to your Canon EOS 300 model.
1、 Understanding the lens filter thread size on Canon EOS300
Understanding the lens filter thread size on Canon EOS300 is essential for adding filters to your camera. The lens filter thread size refers to the diameter of the front of the lens where filters can be attached. It is usually indicated by a symbol that looks like a circle with a line through it followed by a number, such as Ø58mm.
To add filters on the Canon EOS300, you need to determine the lens filter thread size of your specific lens. This can be found either on the lens itself or in the lens specifications. Once you know the thread size, you can purchase filters that match that size.
To attach a filter, simply screw it onto the front of the lens in a clockwise direction. Make sure it is securely attached but be careful not to overtighten it, as this could damage the lens or filter.
Filters can enhance your photography in various ways. For example, a UV filter can protect your lens from scratches and reduce haze, while a polarizing filter can reduce reflections and enhance colors. There are also neutral density filters that can help you achieve longer exposures or create motion blur effects.
It is important to note that not all lenses have the same filter thread size. If you have multiple lenses, you may need to purchase filters in different sizes to fit each lens. Additionally, some lenses may have a different type of filter attachment system, such as a bayonet mount, which requires a specific type of filter.
In conclusion, understanding the lens filter thread size on the Canon EOS300 is crucial for adding filters to your camera. By knowing the thread size of your lens, you can easily attach filters to enhance your photography and explore creative possibilities.
2、 Types of filters compatible with Canon EOS300 camera
To add filters on a Canon EOS300 camera, follow these steps:
1. Determine the filter size: The Canon EOS300 camera has a filter thread size of 58mm. This means that any filter you purchase should have a diameter of 58mm to fit properly.
2. Choose the type of filter: There are various types of filters available for the Canon EOS300 camera. Some common types include UV filters, polarizing filters, neutral density filters, and color filters. Each filter serves a different purpose and can enhance your photography in different ways.
3. Screw on the filter: Once you have chosen the type of filter you want to use, simply screw it onto the front of your lens. Make sure to align the threads properly and tighten it securely.
4. Adjust the settings: Depending on the type of filter you are using, you may need to make adjustments to your camera settings. For example, if you are using a polarizing filter, you will need to rotate the filter to achieve the desired effect.
It's important to note that the Canon EOS300 camera is an older model, and newer Canon cameras may have different filter sizes or compatibility. Therefore, it's always a good idea to check the camera's manual or consult with a professional to ensure compatibility.
In conclusion, adding filters to a Canon EOS300 camera is a simple process. By following these steps and choosing the right filter for your needs, you can enhance your photography and capture stunning images.
3、 Step-by-step guide to attaching a filter on Canon EOS300
Step-by-step guide to attaching a filter on Canon EOS300:
1. Choose the right filter: There are various types of filters available for the Canon EOS300 camera, such as UV filters, polarizing filters, and neutral density filters. Determine the purpose of your photography and select the appropriate filter accordingly.
2. Remove the lens cap: Before attaching the filter, make sure to remove the lens cap from your camera lens.
3. Check the filter thread size: Look for the filter thread size on your lens. It is usually indicated by a symbol that looks like a circle with a line through it followed by a number (e.g., Ø58mm). This number represents the diameter of the filter thread.
4. Purchase the correct filter size: Once you know the filter thread size, purchase a filter that matches the diameter of your lens. It is important to get the right size to ensure a proper fit.
5. Align the filter: Hold the filter with the front element facing the lens. Align the filter's threads with the lens's filter thread.
6. Screw on the filter: Gently rotate the filter clockwise until it is securely attached to the lens. Be careful not to overtighten it, as it may become difficult to remove later.
7. Test the filter: Once the filter is attached, turn on your camera and check if the filter is functioning as desired. For example, if you attached a polarizing filter, rotate it to adjust the polarization effect.
Remember to clean your filter regularly to maintain its effectiveness. Additionally, always handle the filter with care to avoid any damage.
4、 Exploring the effects of different filters on Canon EOS300
To add filters on a Canon EOS300 camera, follow these steps:
1. Determine the filter size: Check the diameter of your camera lens to determine the filter size you need. It is usually mentioned on the front of the lens or in the camera's manual.
2. Purchase the filters: There are various types of filters available, each producing different effects. Some common filters include UV filters, polarizing filters, neutral density filters, and color filters. Choose the filters that suit your photography style and objectives.
3. Attach the filter: Once you have the appropriate filter, carefully screw it onto the front of the lens. Make sure it is securely attached to avoid any accidental damage.
4. Adjust camera settings: Depending on the type of filter you are using, you may need to adjust your camera settings accordingly. For example, a polarizing filter may require adjusting the exposure or white balance settings.
5. Experiment and explore: Now that you have added the filter, it's time to explore the effects it produces. Take photos in different lighting conditions and subjects to see how the filter enhances or alters the image. Experiment with different filters to understand their impact on your photography.
It's worth noting that the Canon EOS300 is an older model, and newer Canon cameras may have more advanced features and built-in filter options. However, using external filters can still provide creative opportunities and unique effects.
