How To Attach A Camera To Axis Tripod ?
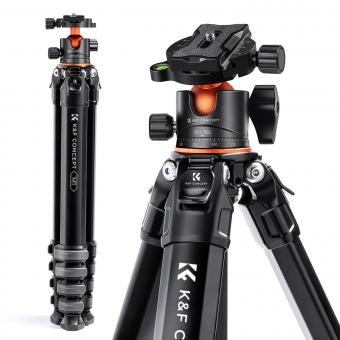
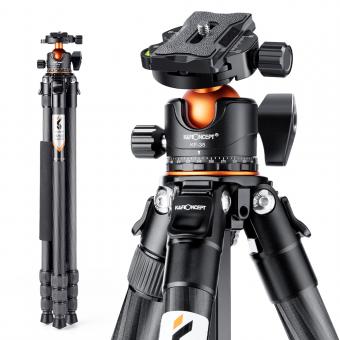
To attach a camera to an Axis tripod, first, ensure that the tripod is set up and stable. Locate the mounting plate on the tripod head, which is usually a flat, rectangular piece with a screw hole in the center. Align the bottom of the camera with the mounting plate and ensure that the camera's tripod socket is directly above the screw hole.
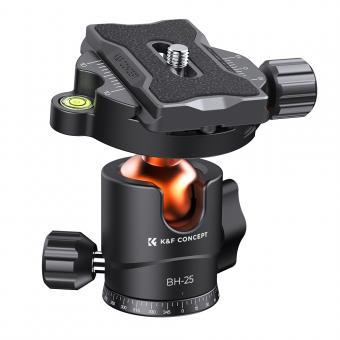
Next, use the camera's tripod screw to attach it to the mounting plate. Insert the screw into the camera's tripod socket and tighten it securely. Some tripods may have a quick-release system, in which case you need to slide the mounting plate onto the tripod head and lock it in place using the quick-release mechanism.
Once the camera is securely attached, check that it is stable and properly balanced on the tripod. Adjust the tripod head as needed to achieve the desired framing and composition. Finally, tighten any locking mechanisms on the tripod head to ensure that the camera remains securely attached during use.
1、 Camera Mounting Plate Compatibility with Axis Tripod
To attach a camera to an Axis tripod, you will need to ensure that the camera mounting plate is compatible with the tripod. The camera mounting plate is the piece that connects the camera to the tripod head.
First, check the type of mounting plate that your Axis tripod uses. Most Axis tripods use a standard 1/4-inch screw thread, which is the most common type of mounting plate used in the industry. However, it is always a good idea to double-check the specifications of your specific tripod model to confirm the compatibility.
Once you have confirmed the compatibility, attach the camera mounting plate to the bottom of your camera. This is usually done by screwing it into the tripod socket located on the bottom of the camera. Make sure to tighten it securely to ensure that the camera is stable when mounted on the tripod.
Next, locate the mounting plate receiver on the tripod head. This is usually a flat surface with a screw hole in the center. Align the camera mounting plate with the receiver and insert the screw into the hole. Use a coin or a screwdriver to tighten the screw, securing the camera to the tripod.
It is important to note that some Axis tripods may have specific features or mechanisms for attaching the camera mounting plate. Therefore, it is always recommended to refer to the user manual or contact Axis customer support for the most accurate and up-to-date information on attaching a camera to their specific tripod models.
2、 Securing the Camera to the Axis Tripod Head
Securing the Camera to the Axis Tripod Head
Attaching a camera to an Axis tripod head is a relatively straightforward process that ensures stability and allows for smooth panning and tilting movements. Here's a step-by-step guide on how to securely attach your camera to an Axis tripod:
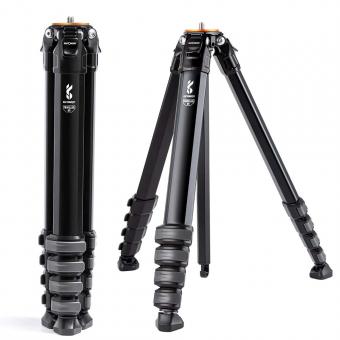
1. Start by ensuring that the tripod is set up on a stable surface. Extend the tripod legs to the desired height and lock them in place.
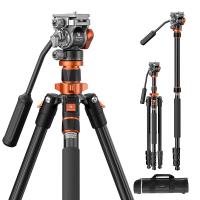
2. Locate the quick release plate on the top of the tripod head. This plate is designed to securely hold your camera in place while allowing for easy attachment and detachment.
3. Align the camera's tripod mount with the quick release plate. The mount is usually located on the bottom of the camera and has a threaded hole.
4. Once aligned, slide the camera onto the quick release plate. Make sure the camera is centered and secure.
5. Tighten the screw on the quick release plate to secure the camera in place. Use a coin or a screwdriver to ensure a tight fit, but be careful not to overtighten and damage the camera.
6. Double-check that the camera is securely attached by gently tugging on it. It should not move or wobble.
7. Adjust the tripod head to the desired angle and tighten the locking knobs to secure it in place. This will allow you to pan and tilt the camera smoothly while maintaining stability.
It's important to note that the specific steps may vary slightly depending on the model of the Axis tripod head you are using. Always refer to the manufacturer's instructions for detailed guidance.
In conclusion, attaching a camera to an Axis tripod head involves aligning the camera's tripod mount with the quick release plate, sliding the camera onto the plate, and tightening the screw to secure it in place. This ensures stability and allows for smooth movements while capturing your shots.
3、 Adjusting the Camera Position on the Axis Tripod
To attach a camera to an Axis tripod, follow these steps:
1. Start by ensuring that the tripod is set up on a stable surface. Extend the tripod legs and lock them in place to provide a sturdy base.
2. Locate the camera mounting plate on the top of the tripod. This plate usually has a screw attachment that matches the camera's tripod socket.
3. Align the camera's tripod socket with the mounting plate's screw attachment. Insert the screw into the socket and tighten it securely using a coin or a screwdriver, depending on the type of screw.
4. Once the camera is securely attached to the mounting plate, check that it is properly balanced. Adjust the position of the camera on the plate if necessary to ensure that it is centered and stable.
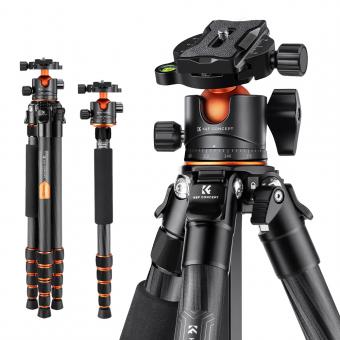
5. Use the tripod's pan and tilt controls to adjust the camera's position. The pan control allows you to rotate the camera horizontally, while the tilt control allows for vertical adjustment. These controls are usually located on the tripod head.
6. Adjust the camera's position to achieve the desired framing and composition. This may involve tilting the camera up or down, panning left or right, or a combination of both.
7. Once you have adjusted the camera position, tighten the pan and tilt controls to lock it in place. This will prevent any unwanted movement during shooting.
Remember to always follow the manufacturer's instructions for your specific Axis tripod model, as the attachment and adjustment process may vary slightly.
4、 Ensuring Stability and Balance on the Axis Tripod
To attach a camera to an Axis tripod, follow these steps to ensure stability and balance:
1. Choose the appropriate tripod plate: Most Axis tripods come with a quick-release plate system. Select the plate that matches your camera's mounting screw size (usually 1/4" or 3/8").
2. Align the plate with the camera: Locate the tripod socket on the bottom of your camera and align it with the plate's mounting screw. Ensure that the plate is securely attached to the camera.
3. Attach the plate to the tripod head: Slide the plate into the tripod head's quick-release mechanism. Make sure it locks securely in place. Some Axis tripods have a safety lock to prevent accidental release.
4. Adjust the camera position: Use the tripod head's pan and tilt controls to position the camera as desired. Ensure that the camera is level and balanced on the tripod.
5. Secure the camera: Once the camera is in the desired position, tighten the tripod head's locking knobs to secure the camera in place. Avoid overtightening, as it may damage the equipment.
6. Check stability: Gently nudge the camera to ensure it is securely attached and balanced. If the camera wobbles or feels unstable, readjust the position and tighten the knobs further.
The latest point of view on attaching cameras to Axis tripods emphasizes the importance of using a quick-release plate system for convenience and efficiency. Additionally, some Axis tripods now feature advanced stabilization technologies, such as built-in gyroscopes or counterweights, to further enhance stability and balance. These innovations help minimize camera shake and ensure smooth, professional-quality footage or images.
