How To Build A Tripod Stand ?
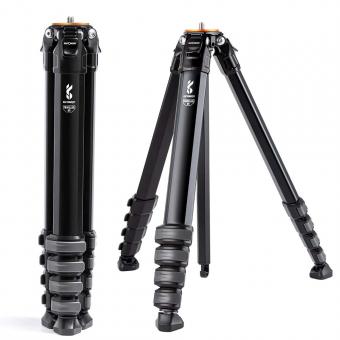
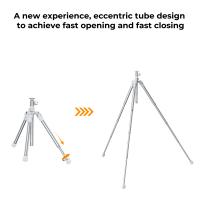
To build a tripod stand, you will need three equal-length poles or legs and a connector at the top. Start by positioning the three poles in a triangular shape, with the bottoms forming the base of the tripod. Make sure the poles are evenly spaced apart. Then, secure the poles together at the top using a connector, such as a metal bracket or a rope tied in a knot. Ensure that the connector is tightly fastened to provide stability. You can also reinforce the joints with screws or nails for added strength. Once the tripod stand is assembled, test its stability by gently pushing on it from different angles. Adjust the positioning or tighten the connections if needed. Finally, place the desired object or equipment on top of the tripod stand, making sure it is balanced and secure.
1、 Materials and Tools Needed for Building a Tripod Stand
How to Build a Tripod Stand: Materials and Tools Needed
Building a tripod stand can be a useful project for photographers, videographers, or anyone in need of a stable and adjustable support system. Here are the materials and tools needed to construct a tripod stand:
Materials:
1. Three sturdy legs: These can be made of wood, aluminum, or any other strong material that can support the weight of the equipment.
2. Leg connectors: These are used to join the legs together at the top, forming a stable base for the tripod.
3. Center column: This is the adjustable part of the tripod that allows for height adjustments. It should be made of a durable material that can withstand the weight of the equipment.
4. Mounting plate: This is the part that attaches the camera or other equipment to the tripod. It should be compatible with the equipment being used.
5. Screws and bolts: These are used to secure the various parts of the tripod together.
Tools:
1. Saw: A saw is needed to cut the legs to the desired length.
2. Drill: A drill is necessary for making holes in the legs and other parts of the tripod.
3. Screwdriver: A screwdriver is needed to tighten the screws and bolts.
4. Measuring tape: This is used to ensure accurate measurements when cutting the legs and center column.
5. Sandpaper: Sandpaper is used to smooth any rough edges on the legs and other parts of the tripod.
It is important to note that building a tripod stand requires some level of woodworking or metalworking skills. If you are not confident in your abilities, it may be best to purchase a pre-made tripod stand. Additionally, it is always a good idea to consult online tutorials or seek advice from experienced builders to ensure the tripod stand is constructed safely and effectively.
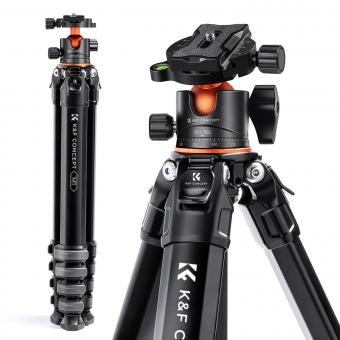
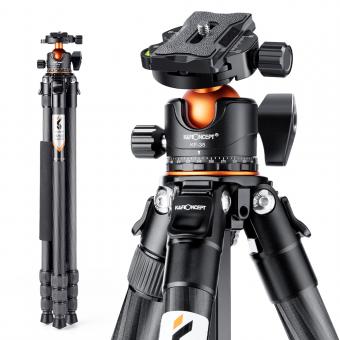
In recent years, there have been advancements in tripod technology, with the introduction of lightweight and compact options. These newer tripod stands often utilize carbon fiber legs, which offer increased strength and stability while reducing overall weight. Additionally, some tripod stands now come with built-in levelers and quick-release mechanisms for faster and more convenient setup. These features can greatly enhance the user experience and make tripod stands more versatile for various shooting situations.
In conclusion, building a tripod stand requires the appropriate materials and tools, as well as some woodworking or metalworking skills. However, with careful planning and execution, constructing a tripod stand can be a rewarding project that provides a stable and adjustable support system for photography and videography needs.

2、 Step-by-Step Guide to Constructing a Tripod Stand
Step-by-Step Guide to Constructing a Tripod Stand
A tripod stand is a versatile and essential tool for various activities such as photography, camping, and even cooking. Building your own tripod stand can be a rewarding and cost-effective project. Here is a step-by-step guide to help you construct a sturdy and reliable tripod stand.
1. Gather the materials: You will need three wooden or metal poles of equal length, a drill, screws, a saw, a measuring tape, and sandpaper. Ensure that the poles are strong enough to support the weight you intend to put on the stand.
2. Measure and cut the poles: Determine the desired height of your tripod stand and cut the poles accordingly. It is recommended to have a height that is comfortable for your intended use.
3. Sand the poles: Smooth out any rough edges or splinters on the poles using sandpaper. This will prevent any injuries and make the stand more aesthetically pleasing.
4. Drill holes: On one end of each pole, drill a hole large enough to fit a screw through. These holes will be used to connect the poles together.
5. Connect the poles: Align the holes on the poles and insert screws through them. Tighten the screws securely to ensure stability.
6. Test the stability: Once the poles are connected, stand the tripod up and check for any wobbling or instability. If needed, adjust the screws or reinforce the connections.
7. Optional additions: Depending on your intended use, you can add additional features to your tripod stand. For example, you can attach a platform or a mount for a camera or other equipment.
8. Finishing touches: Sand any rough areas or sharp edges on the stand to ensure safety and a polished appearance. You can also apply a protective coat of paint or varnish to enhance durability.
Building your own tripod stand allows you to customize it to your specific needs and preferences. It is important to ensure that the stand is stable and secure before using it. Always follow safety guidelines and consult professional advice if needed.
3、 Safety Precautions to Consider When Building a Tripod Stand
Safety Precautions to Consider When Building a Tripod Stand
Building a tripod stand can be a useful project for various purposes, such as photography, camping, or even construction work. However, it is crucial to prioritize safety when constructing a tripod stand to prevent accidents and ensure stability. Here are some safety precautions to consider when building a tripod stand:
1. Choose the right materials: Select sturdy and durable materials that can withstand the weight and pressure of the intended use. Avoid using weak or damaged materials that may compromise the stability of the tripod stand.
2. Follow a reliable design: Use a well-designed blueprint or follow a trusted set of instructions to ensure the stability and functionality of the tripod stand. This will help prevent any structural weaknesses that could lead to accidents.
3. Use proper tools and equipment: Ensure that you have the necessary tools and equipment to build the tripod stand safely. This includes using appropriate fasteners, such as screws or bolts, and using tools that are in good condition.
4. Secure all connections: Double-check that all connections and joints are securely fastened. Loose connections can lead to instability and collapse, posing a risk to anyone using the tripod stand.
5. Test for stability: Before using the tripod stand, conduct a stability test to ensure it can support the intended load. Apply pressure and check for any wobbling or signs of weakness. Make any necessary adjustments or reinforcements before using the stand.
6. Consider the environment: Take into account the terrain and environmental conditions where the tripod stand will be used. Uneven ground or strong winds can affect stability, so take appropriate measures to secure the stand in these situations.
7. Regular maintenance: Periodically inspect the tripod stand for any signs of wear and tear. Replace any damaged parts or make necessary repairs to maintain its stability and safety.
It is important to note that these safety precautions are general guidelines and may vary depending on the specific type of tripod stand being built. Always consult professional advice or manufacturer instructions for specific safety recommendations.
In light of the COVID-19 pandemic, it is also essential to follow any relevant health and safety guidelines provided by local authorities. This may include practicing social distancing, wearing personal protective equipment, and sanitizing tools and equipment before and after use.

4、 Tips for Ensuring Stability and Durability of the Tripod Stand
Tips for Ensuring Stability and Durability of the Tripod Stand
A tripod stand is an essential tool for photographers, videographers, and anyone who needs a stable platform for their camera or equipment. To ensure stability and durability, here are some tips to consider when building a tripod stand:
1. Choose the right materials: Start by selecting high-quality materials that can withstand the weight of your equipment. Aluminum and carbon fiber are popular choices due to their strength and lightweight properties.
2. Opt for a sturdy design: Look for a tripod stand with a robust design that includes reinforced legs and a strong center column. This will provide added stability and prevent wobbling or tipping over.
3. Check the weight capacity: Make sure the tripod stand can support the weight of your camera and accessories. It's always better to choose a tripod with a higher weight capacity than you actually need to ensure stability.
4. Consider the leg locks: Leg locks are crucial for keeping the tripod stand securely in place. Look for tripod stands with reliable and easy-to-use leg locks that can be tightened firmly.
5. Use a leveling base: A leveling base is a useful accessory that allows you to adjust the tripod stand on uneven surfaces. This ensures that your camera remains level and stable, even on challenging terrain.
6. Maintain proper maintenance: Regularly clean and inspect your tripod stand for any signs of wear or damage. Lubricate the moving parts and tighten any loose screws to ensure its longevity.
7. Consider the latest advancements: Keep an eye out for the latest advancements in tripod stand technology. Manufacturers are constantly improving their designs to provide better stability, durability, and ease of use.
By following these tips, you can build a tripod stand that offers maximum stability and durability, ensuring that your camera or equipment remains secure and steady during your photography or videography sessions.
