How To Change Nd Filter Air 2s ?
To change the ND filter on the Air 2S drone, follow these steps:
1. Power off the drone and remove the propellers for safety.
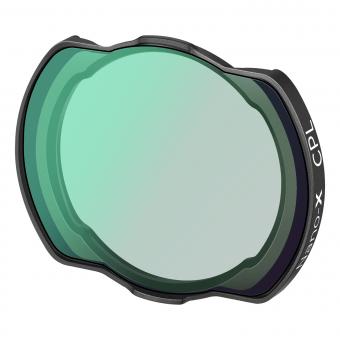
2. Locate the ND filter on the camera gimbal. It is a small circular piece that can be unscrewed.
3. Gently rotate the ND filter counterclockwise to loosen it.
4. Once it is loose, carefully remove the ND filter from the camera gimbal.
5. Take the new ND filter and align it with the threads on the camera gimbal.
6. Slowly rotate the new ND filter clockwise to tighten it onto the camera gimbal.
7. Ensure that the ND filter is securely attached but be careful not to overtighten it.
8. Power on the drone and check the camera feed to ensure that the new ND filter is properly installed.
Note: It is important to use the correct ND filter for your specific needs and lighting conditions. ND filters help control the amount of light entering the camera, allowing you to capture better-exposed footage in bright conditions.
1、 Understanding ND filters and their purpose in photography
To change the ND filter on the DJI Air 2S drone, follow these steps:
1. Power off the drone: Before attempting to change the ND filter, make sure the drone is powered off to avoid any accidents or damage.
2. Locate the ND filter: The ND filter on the Air 2S is located on the camera gimbal. It is a small circular attachment that can be easily removed and replaced.
3. Remove the existing ND filter: Gently twist the existing ND filter counterclockwise to remove it from the camera gimbal. Be careful not to apply too much force to avoid damaging the filter or the gimbal.
4. Attach the new ND filter: Take the new ND filter and align it with the camera gimbal. Gently twist it clockwise until it is securely attached. Ensure that it is properly aligned and seated in place.
5. Power on the drone: Once the new ND filter is attached, power on the drone and check the camera feed to ensure that the filter is functioning correctly.
ND filters, or Neutral Density filters, are essential tools in photography and videography. They are designed to reduce the amount of light entering the camera lens without affecting the color or quality of the image. This allows photographers to have more control over the exposure settings and capture creative shots in various lighting conditions.
ND filters are particularly useful in situations where there is too much light, such as bright sunny days or when shooting long exposures. By reducing the amount of light, ND filters help to achieve slower shutter speeds, which can create motion blur effects or allow for wider apertures without overexposing the image.
The latest point of view regarding ND filters is that they are becoming increasingly popular among drone photographers and videographers. With the advancement of drone technology, more and more enthusiasts are using drones to capture stunning aerial shots. ND filters play a crucial role in achieving professional-looking results by balancing the exposure and enhancing the overall image quality.
In conclusion, changing the ND filter on the DJI Air 2S drone is a simple process that involves powering off the drone, removing the existing filter, attaching the new filter, and powering on the drone. ND filters are essential tools in photography, allowing for greater control over exposure settings and enabling creative shots in various lighting conditions.
2、 Identifying the correct ND filter size for the Air 2S
Identifying the correct ND filter size for the Air 2S can be a bit tricky, but with the right information, you can easily find the perfect fit for your drone. ND filters are essential for aerial photography and videography as they help control the amount of light entering the camera, allowing you to capture stunning shots even in bright conditions.
To determine the correct ND filter size for the Air 2S, you need to consider the diameter of the lens. The Air 2S has a fixed lens with a diameter of 12mm. Therefore, you will need an ND filter specifically designed for a 12mm lens.
When purchasing an ND filter, make sure to check the product description or consult with the manufacturer to ensure compatibility with the Air 2S. Many reputable filter manufacturers offer filters specifically designed for popular drone models, including the Air 2S.
It's also worth noting that some filters come with a step-up or step-down ring, which allows you to use the filter on lenses with different diameters. This can be useful if you plan on using the same filter on multiple drones or cameras.
Lastly, it's always a good idea to read reviews and seek recommendations from other drone enthusiasts to ensure you're getting a high-quality ND filter that meets your specific needs.
In conclusion, to change the ND filter on the Air 2S, you need to identify the correct filter size, which is 12mm for this particular drone. By considering the lens diameter and consulting with the manufacturer or trusted sources, you can find the perfect ND filter to enhance your aerial photography and videography experience.
3、 Removing the existing ND filter from the Air 2S
To remove the existing ND filter from the Air 2S, follow these steps:
1. Power off the drone: Before attempting to remove the ND filter, ensure that the drone is powered off to avoid any accidents or damage.
2. Locate the ND filter: The ND filter is typically located on the camera lens of the Air 2S. It is a small circular attachment that helps control the amount of light entering the lens.
3. Twist and unscrew: Gently hold the drone's body with one hand and use your other hand to twist the ND filter counterclockwise. Apply a moderate amount of pressure while turning to loosen the filter.
4. Remove the ND filter: Once the filter is loose, carefully lift it off the lens. Be cautious not to touch the lens directly to avoid smudges or scratches.
5. Clean the lens: Before attaching a new ND filter, it is recommended to clean the lens using a microfiber cloth or lens cleaning solution. This will ensure optimal image quality.
6. Attach a new ND filter: If you wish to replace the existing ND filter with a new one, align the filter with the lens and gently twist it clockwise until it is securely in place.
It's important to note that the process of changing the ND filter may vary slightly depending on the specific model of the Air 2S or any updates made by the manufacturer. Therefore, it is always advisable to consult the user manual or refer to the manufacturer's instructions for the most accurate and up-to-date information.
4、 Installing a new ND filter on the Air 2S
Installing a new ND filter on the Air 2S is a relatively straightforward process that can greatly enhance your aerial photography and videography capabilities. ND filters are essential for controlling the amount of light that enters the camera sensor, allowing you to capture well-exposed shots even in bright conditions. Here's a step-by-step guide on how to change the ND filter on the Air 2S:
1. Start by powering off the drone and removing the propellers for safety.
2. Locate the camera gimbal on the front of the drone. The ND filter is attached to the camera lens.
3. Gently unscrew the existing ND filter by rotating it counterclockwise. Be careful not to apply too much force to avoid damaging the lens or filter.
4. Once the old filter is removed, carefully inspect the lens for any dust or debris. Use a microfiber cloth or lens cleaning solution to clean the lens if necessary.
5. Take your new ND filter and align it with the lens. Make sure the threads on the filter match those on the lens.
6. Slowly rotate the new filter clockwise until it is securely attached to the lens. Ensure that it is tightened enough to prevent any movement during flight.
7. Power on the drone and check the camera feed to ensure that the new ND filter is properly installed. Adjust the exposure settings as needed to achieve the desired effect.
It's worth noting that the Air 2S is equipped with a built-in light sensor that automatically adjusts the camera settings based on the available light. However, using an ND filter allows you to have more control over the exposure and achieve creative effects such as motion blur or smooth footage.
Always remember to handle the ND filter and camera lens with care to avoid scratches or damage. Additionally, it's recommended to invest in a set of ND filters with different levels of light reduction to cater to various lighting conditions.
