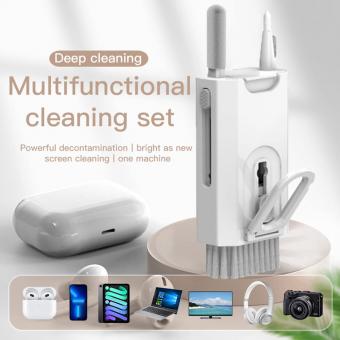
How To Clean A Keyboard ?
To clean a keyboard, start by turning off your computer and unplugging the keyboard. Use a can of compressed air to blow away any loose debris and dust from between the keys. Next, dampen a cloth or cotton swab with isopropyl alcohol or a mild cleaning solution and gently wipe the keys and surfaces of the keyboard. Be careful not to use excessive liquid, as it can damage the keyboard. For stubborn stains or grime, you can use a small amount of rubbing alcohol on a cloth. Allow the keyboard to dry completely before plugging it back in and turning on your computer. Regularly cleaning your keyboard can help maintain its functionality and prevent the buildup of dirt and germs.
1、 Removing Keycaps
Removing Keycaps is one of the most effective ways to clean a keyboard thoroughly. Over time, keyboards can accumulate dust, dirt, and debris between the keys, which can affect their performance and hygiene. By removing the keycaps, you can access the nooks and crannies of the keyboard, allowing for a more thorough cleaning.
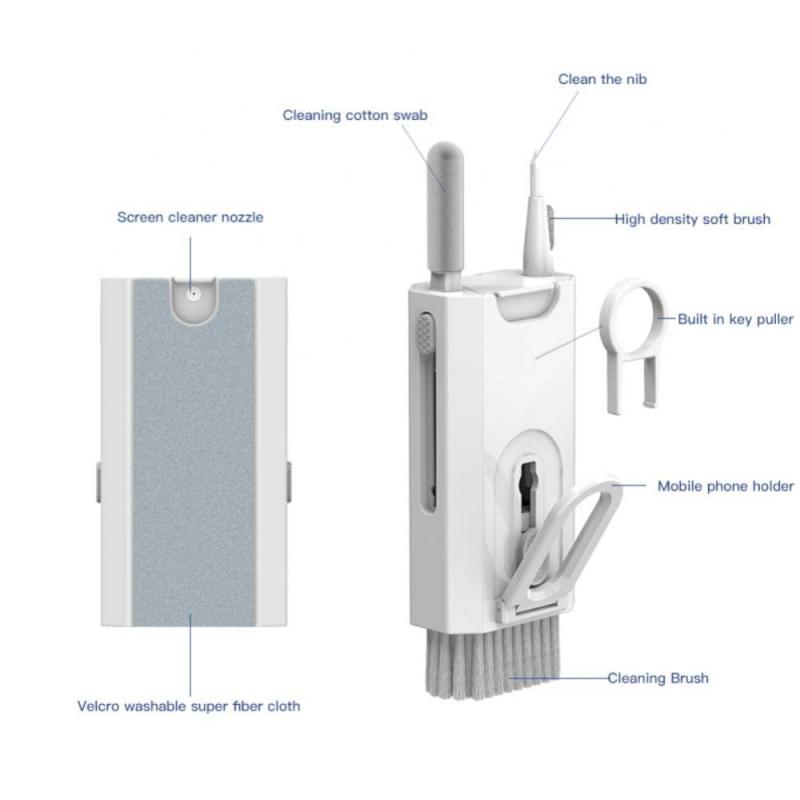
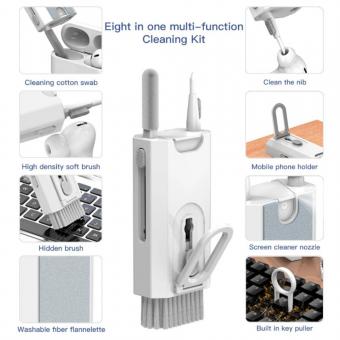
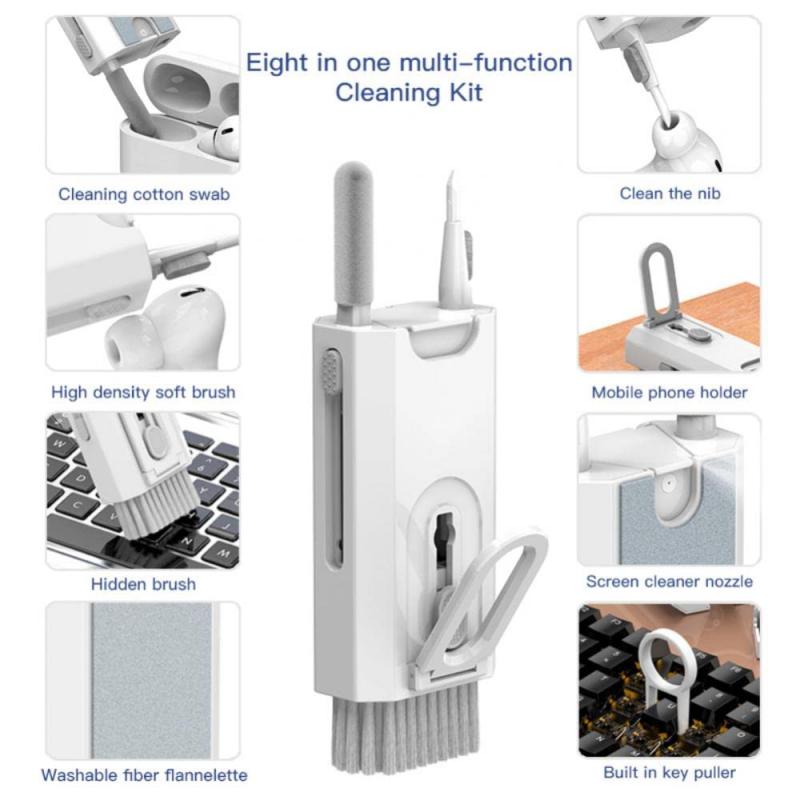
To remove keycaps, start by turning off your computer and unplugging the keyboard. Gently pry off the keycaps using a keycap puller or a small flathead screwdriver. Be careful not to apply too much force to avoid damaging the keys or the keyboard itself. Once the keycaps are removed, you can clean them individually using a mild detergent or a keyboard cleaning solution. Use a soft brush or a cloth to remove any dirt or grime from the keycaps.
While the keycaps are removed, take the opportunity to clean the exposed keyboard surface as well. Use compressed air or a small vacuum cleaner to remove any loose debris. For stubborn dirt or stains, you can use a cotton swab dipped in isopropyl alcohol to gently clean the affected areas.
After cleaning the keycaps and the keyboard surface, allow them to dry completely before reassembling the keyboard. Carefully place the keycaps back onto the keyboard, ensuring that each key is properly aligned and seated. Apply gentle pressure to snap them back into place.
It's worth noting that not all keyboards have removable keycaps. Some keyboards, especially those with low-profile or laptop-style keys, may have keys that are not easily removable. In such cases, using compressed air and a soft brush to clean between the keys can still be effective.
Regularly cleaning your keyboard, including removing keycaps, can help maintain its performance and prolong its lifespan. It also promotes better hygiene by eliminating the buildup of dirt and bacteria.
2、 Cleaning with Compressed Air
Cleaning with Compressed Air is a popular and effective method for cleaning keyboards. It is a quick and easy way to remove dust, debris, and crumbs that accumulate between the keys. However, it is important to note that this method may not be suitable for all types of keyboards, especially those with mechanical switches.
To clean a keyboard with compressed air, follow these steps:
1. Turn off your computer and unplug the keyboard. This will prevent any accidental keystrokes or damage to your computer.
2. Hold the keyboard upside down and gently tap it to dislodge any loose debris. This will help to remove larger particles that may be stuck between the keys.
3. Use a can of compressed air to blow out the remaining dust and debris. Hold the can upright and use short bursts of air to avoid damaging the keyboard. Pay special attention to the areas between the keys and around the edges.
4. If necessary, you can use a soft brush or cotton swabs dipped in isopropyl alcohol to clean stubborn stains or sticky residue. Be sure to wring out any excess liquid before using it on the keyboard.
5. Allow the keyboard to dry completely before plugging it back in and turning on your computer.
It is worth mentioning that some experts advise against using compressed air on mechanical keyboards, as the force of the air can potentially damage the delicate switches. In such cases, it is recommended to consult the manufacturer's guidelines or consider alternative cleaning methods, such as using a vacuum cleaner with a brush attachment or cleaning the keys individually with a damp cloth.
3、 Using Isopropyl Alcohol
Using Isopropyl Alcohol to clean a keyboard is a widely recommended method due to its effectiveness in removing dirt, grime, and germs. However, it is important to note that the latest point of view suggests being cautious when using Isopropyl Alcohol on certain types of keyboards, such as those with a rubberized or soft-touch coating.
To clean a keyboard using Isopropyl Alcohol, follow these steps:
1. Turn off your computer and unplug the keyboard to avoid any electrical damage or accidents.
2. Shake the keyboard gently to remove loose debris and crumbs.
3. Dampen a lint-free cloth or cotton swab with Isopropyl Alcohol. It is recommended to use a concentration of at least 70% Isopropyl Alcohol.
4. Gently wipe the keys, paying extra attention to areas that are frequently touched or visibly dirty. Avoid excessive moisture, as it can damage the keyboard.
5. For hard-to-reach areas, use a cotton swab dipped in Isopropyl Alcohol to clean between the keys.
6. Allow the keyboard to air dry completely before plugging it back in and turning on your computer.
It is worth mentioning that some keyboard manufacturers advise against using Isopropyl Alcohol on keyboards with rubberized or soft-touch coatings, as it may cause discoloration or damage. In such cases, it is recommended to consult the manufacturer's guidelines or use alternative cleaning methods, such as using compressed air or a vacuum cleaner to remove debris, and wiping the keys with a mild soap solution or disinfectant wipes.
Always exercise caution when cleaning your keyboard and refer to the latest guidelines from the manufacturer to ensure the longevity and proper functioning of your keyboard.

4、 Cleaning the Keyboard Frame
Cleaning the keyboard frame is an essential part of maintaining a clean and hygienic workspace. Over time, dust, dirt, and debris can accumulate in the crevices of the keyboard, making it not only unsightly but also a breeding ground for bacteria. Here's a step-by-step guide on how to clean a keyboard frame effectively:
1. Turn off your computer and unplug the keyboard to avoid any electrical mishaps.
2. Shake the keyboard gently upside down to dislodge any loose debris. You can also use compressed air to blow away the dust from hard-to-reach areas.
3. Dampen a microfiber cloth with a small amount of isopropyl alcohol or a mild cleaning solution. Avoid using excessive liquid to prevent damage to the keyboard.
4. Gently wipe the keyboard frame, paying extra attention to the areas between the keys. Use a cotton swab dipped in the cleaning solution to clean the narrow spaces.
5. For stubborn stains or grime, you can use a soft-bristled brush to scrub the affected areas gently.
6. Once you have cleaned the entire keyboard frame, use a dry microfiber cloth to remove any excess moisture.
7. Allow the keyboard to air dry completely before plugging it back in and turning on your computer.
It is worth noting that in light of the COVID-19 pandemic, it is crucial to maintain proper hygiene practices. Regularly cleaning and disinfecting your keyboard can help minimize the risk of spreading germs. Follow the manufacturer's guidelines and recommendations for cleaning your specific keyboard model, as some keyboards may have special cleaning instructions.
