How To Connect Camcorder To Obs ?
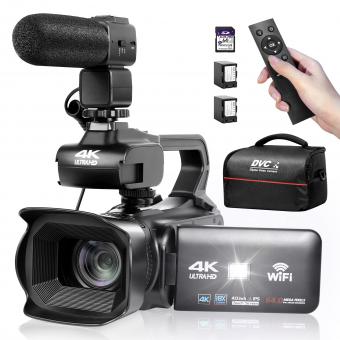
To connect a camcorder to OBS, you will need to follow these steps:
1. Connect your camcorder to your computer using a USB cable or HDMI cable.
2. Open OBS and click on the "+" icon under the "Sources" box.
3. Select "Video Capture Device" from the drop-down menu.
4. Give your device a name and click "OK."
5. In the "Device" drop-down menu, select your camcorder.
6. Adjust the settings as needed, such as resolution and frame rate.
7. Click "OK" to save your settings.
Your camcorder should now be connected to OBS and ready to use for recording or streaming.
1、 Check camcorder compatibility with OBS
How to connect camcorder to OBS:
1. Connect your camcorder to your computer using a USB cable or HDMI cable.
2. Open OBS and click on the "+" icon under the "Sources" section.
3. Select "Video Capture Device" and give it a name.
4. Choose your camcorder from the dropdown menu under "Device."
5. Adjust the settings as needed, such as resolution and frame rate.
6. Click "OK" to add the camcorder as a source in OBS.
It's important to note that not all camcorders are compatible with OBS. Some camcorders may require additional software or drivers to be installed on your computer before they can be used with OBS. It's also important to check the specifications of your camcorder to ensure that it meets the minimum requirements for OBS.
Additionally, it's worth noting that OBS is constantly being updated with new features and improvements. It's always a good idea to check for updates and stay up-to-date with the latest version of OBS to ensure the best possible performance and compatibility with your camcorder.
2、 Install necessary drivers and software
To connect a camcorder to OBS, you need to follow a few simple steps. The first step is to install the necessary drivers and software. This will ensure that your computer recognizes the camcorder and allows you to use it with OBS.
To install the drivers and software, you need to check the manufacturer's website for the latest version. Download and install the software on your computer. Once the software is installed, connect your camcorder to your computer using a USB cable.
Next, open OBS and go to the "Sources" section. Click on the "+" button and select "Video Capture Device". In the "Device" dropdown menu, select your camcorder. You can also adjust the settings such as resolution, frame rate, and audio input.
Once you have selected your camcorder, you can start recording or streaming your video content. OBS is a powerful tool that allows you to customize your video output and add overlays, text, and other effects.
It is important to note that some camcorders may require additional settings or configurations to work with OBS. You may need to consult the manufacturer's documentation or forums for more information.
In conclusion, connecting a camcorder to OBS is a simple process that requires you to install the necessary drivers and software. With OBS, you can create high-quality video content and customize your output to suit your needs.

3、 Connect camcorder to computer via USB or HDMI
To connect a camcorder to OBS, there are a few steps you need to follow. The first step is to ensure that your camcorder has a USB or HDMI output port. Once you have confirmed this, you can proceed to connect your camcorder to your computer.
If your camcorder has a USB output port, you can connect it to your computer using a USB cable. Once you have connected your camcorder to your computer, you can open OBS and select your camcorder as the video source. OBS should automatically detect your camcorder and allow you to use it as a video source.
If your camcorder has an HDMI output port, you can connect it to your computer using an HDMI cable. Once you have connected your camcorder to your computer, you can open OBS and select your camcorder as the video source. OBS should automatically detect your camcorder and allow you to use it as a video source.
It is important to note that the latest point of view is that using a USB connection may not provide the best quality video output. It is recommended to use an HDMI connection for better video quality. Additionally, some camcorders may require additional software or drivers to be installed on your computer before they can be used with OBS. It is important to check the manufacturer's website for any necessary software or drivers before attempting to connect your camcorder to OBS.
4、 Configure OBS settings for camcorder input
Configure OBS settings for camcorder input. To connect a camcorder to OBS, you will need to configure the settings in OBS to recognize the camcorder as a video input source. Here are the steps to follow:
1. Connect the camcorder to your computer using a USB cable or HDMI cable.
2. Open OBS and click on the "+" icon under the "Sources" section.
3. Select "Video Capture Device" from the list of options.
4. In the "Device" dropdown menu, select your camcorder.
5. Adjust the settings for your camcorder input, such as resolution and frame rate, in the "Video" tab.
6. In the "Audio" tab, select the audio input source for your camcorder.
7. Click "OK" to save the settings.
Once you have configured the settings for your camcorder input, you can start recording or streaming using OBS. It is important to note that the specific steps for connecting a camcorder to OBS may vary depending on the type of camcorder and the version of OBS you are using.
As of the latest point of view, OBS has continued to improve its compatibility with various camcorders and video input sources. Users can now easily connect their camcorders to OBS and use them as a video input source for recording or streaming. OBS also offers a range of advanced settings and features for users to customize their camcorder input, such as adjusting the color balance and exposure settings.
