How To Connect Endoscope Camera To Pc ?
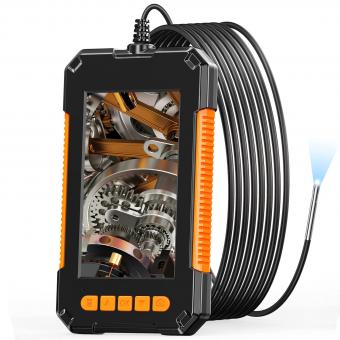
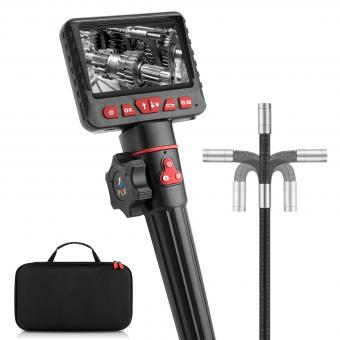
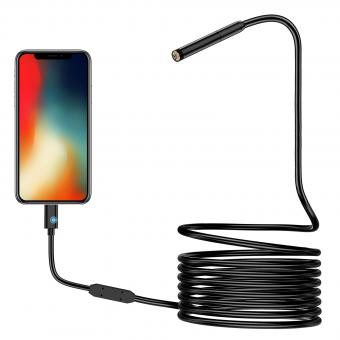
To connect an endoscope camera to a PC, you will need to follow these steps:
1. Start by ensuring that your PC has a USB port available. Most endoscope cameras use a USB connection for connectivity.
2. Connect the endoscope camera to your PC using the provided USB cable. Insert one end of the cable into the camera's USB port and the other end into an available USB port on your PC.
3. Once connected, your PC should automatically detect the endoscope camera. If not, you may need to install any necessary drivers or software that came with the camera. Check the camera's user manual or the manufacturer's website for instructions on driver installation.
4. Open the software or application that is compatible with your endoscope camera on your PC. This software will allow you to view and capture images or videos from the camera.
5. Follow the instructions provided by the software to configure the camera settings, such as resolution, brightness, or focus.
6. Once configured, you should be able to see the live feed from the endoscope camera on your PC screen. You can now use the camera for various applications, such as medical examinations, inspections, or other tasks that require visual inspection in hard-to-reach areas.
1、 USB Endoscope Camera: Connecting to PC for Live Viewing
To connect an endoscope camera to a PC for live viewing, you will need to follow a few simple steps. Here's a step-by-step guide on how to do it:
1. Check the compatibility: Ensure that your endoscope camera is compatible with your PC. Most endoscope cameras come with a USB connection, which makes them compatible with most PCs.
2. Install the software: Some endoscope cameras require specific software to be installed on your PC. Check the manufacturer's website or the user manual to find the appropriate software and download it onto your PC. Install the software following the provided instructions.
3. Connect the camera: Plug the USB end of the endoscope camera into an available USB port on your PC. Make sure the connection is secure.
4. Open the software: Launch the software that you installed in step 2. The software should automatically detect the connected endoscope camera. If not, look for an option to manually connect the camera within the software.
5. Adjust settings: Once the camera is connected, you may need to adjust some settings within the software. This may include selecting the camera as the video input source, adjusting the resolution, or configuring any other desired settings.
6. Start live viewing: With the camera connected and the settings adjusted, you should now be able to start live viewing. The software should display the live feed from the endoscope camera on your PC screen.
It's worth noting that the latest point of view is that many endoscope cameras now come with Wi-Fi capabilities, allowing you to connect them to your PC wirelessly. In such cases, you would need to connect both the camera and your PC to the same Wi-Fi network and use the manufacturer's app or software to establish the connection. This wireless connection option provides more flexibility and convenience in terms of camera placement and mobility.
2、 Wireless Endoscope Camera: Pairing and Connecting to PC
To connect an endoscope camera to a PC, you have two options: wired or wireless. In this case, we will focus on the wireless endoscope camera and how to pair and connect it to your PC.
1. Check the compatibility: Ensure that your PC has Bluetooth capabilities or a Wi-Fi connection. Most wireless endoscope cameras use either Bluetooth or Wi-Fi to establish a connection.
2. Install the necessary software: Some wireless endoscope cameras require specific software to be installed on your PC. Check the manufacturer's website or the user manual for instructions on how to download and install the software.
3. Turn on the endoscope camera: Power on the wireless endoscope camera and make sure it is in pairing mode. This usually involves pressing a button or holding down a combination of buttons until a light or indicator starts flashing.
4. Enable Bluetooth or Wi-Fi on your PC: If using Bluetooth, turn on Bluetooth on your PC and make it discoverable. If using Wi-Fi, connect your PC to the same Wi-Fi network as the endoscope camera.
5. Pair and connect: On your PC, open the software that you installed earlier. Look for an option to pair or connect a device. Follow the on-screen instructions to search for and connect to the wireless endoscope camera.
6. Adjust settings and start using: Once the connection is established, you may need to adjust settings such as resolution or lighting. After that, you should be able to view the live feed from the endoscope camera on your PC screen.
It's important to note that the specific steps may vary depending on the brand and model of the wireless endoscope camera you are using. Always refer to the user manual or manufacturer's instructions for the most accurate and up-to-date information.
3、 Endoscope Camera Software: Installing and Configuring for PC Connection
To connect an endoscope camera to a PC, you will need to follow a few steps to ensure proper installation and configuration of the necessary software. Here is a guide on how to connect an endoscope camera to a PC:
1. Check the compatibility: Before connecting the endoscope camera to your PC, make sure that it is compatible with your operating system. Most endoscope cameras are compatible with Windows-based PCs.
2. Install the software: The first step is to install the software that comes with the endoscope camera. Insert the installation CD or download the software from the manufacturer's website. Follow the on-screen instructions to complete the installation process.
3. Connect the camera: Once the software is installed, connect the endoscope camera to your PC using the provided USB cable. Make sure the camera is powered on.
4. Configure the software: Open the software on your PC and navigate to the settings or configuration menu. Here, you may need to select the camera model and adjust any necessary settings such as resolution or frame rate.
5. Test the connection: After configuring the software, you can test the connection by selecting the live view option. The camera feed should now be displayed on your PC screen.
6. Capture and record: With the endoscope camera successfully connected to your PC, you can now capture images or record videos using the software. You may also have the option to adjust lighting or zoom in on specific areas.
It is important to note that the steps mentioned above may vary slightly depending on the specific endoscope camera model and software. Therefore, it is always recommended to refer to the user manual or contact the manufacturer for detailed instructions.
In the latest point of view, advancements in technology have led to the development of wireless endoscope cameras that can be connected to PCs via Wi-Fi or Bluetooth. These wireless cameras eliminate the need for a physical USB connection and provide more flexibility in terms of camera placement. Additionally, some endoscope camera software now offers advanced features such as image enhancement, measurement tools, and compatibility with virtual reality (VR) headsets for a more immersive experience.

4、 Troubleshooting Endoscope Camera Connection Issues with PC
To connect an endoscope camera to a PC, follow these steps:
1. Check the compatibility: Ensure that your endoscope camera is compatible with your PC. Most endoscope cameras use a USB connection, so make sure your PC has a USB port.
2. Install the software: Some endoscope cameras require specific software to be installed on your PC. Check the manufacturer's website for any necessary software and download it onto your computer.
3. Connect the camera: Plug the USB end of the endoscope camera into an available USB port on your PC. Make sure the connection is secure.
4. Power on the camera: Turn on the endoscope camera by pressing the power button or switch. Some cameras may require batteries or external power sources, so ensure they are properly connected or charged.
5. Launch the software: Open the software that you installed earlier. It should detect the endoscope camera automatically. If not, look for an option to manually connect the camera within the software.
6. Adjust settings: Once the camera is connected, you may need to adjust settings such as resolution, brightness, or focus within the software to optimize the image quality.
7. Start using the camera: With the camera connected and settings adjusted, you can now use the endoscope camera on your PC. The software should provide options for capturing images or recording videos.
If you encounter any issues during the connection process, here are some troubleshooting tips:
- Ensure that the USB cable is not damaged and is securely connected to both the camera and the PC.
- Try using a different USB port on your PC.
- Restart your PC and try connecting the camera again.
- Update the software and drivers for the endoscope camera. Check the manufacturer's website for any available updates.
- If possible, test the camera on a different PC to determine if the issue is with the camera or your PC.
Remember to consult the user manual or contact the manufacturer for specific instructions or support tailored to your endoscope camera model.
