How To Connect Microphone To Camera ?
To connect a microphone to a camera, you will typically need a microphone with the appropriate connector and a camera with a microphone input. Most cameras have a 3.5mm microphone input, so you will need a microphone with a 3.5mm jack. Simply plug the microphone into the camera's microphone input, making sure it is securely connected. Some cameras may require you to enable the microphone input in the camera's settings menu. Once connected, test the microphone to ensure it is working properly by recording a sample audio or video.
1、 Wired connection using an audio cable
To connect a microphone to a camera, you can use a wired connection using an audio cable. This method allows you to capture high-quality audio directly into your camera while recording videos. Here's how you can do it:
1. Check the microphone and camera compatibility: Ensure that your camera has an audio input port, usually a 3.5mm jack, and that your microphone has a corresponding output port.
2. Choose the right audio cable: Depending on the ports available on your camera and microphone, select an appropriate audio cable. Common options include a 3.5mm to 3.5mm cable, XLR to 3.5mm cable, or XLR to XLR cable.
3. Connect the microphone to the camera: Plug one end of the audio cable into the microphone's output port and the other end into the camera's audio input port. Make sure the connections are secure.
4. Adjust audio settings: Once connected, access your camera's audio settings to ensure the microphone is selected as the audio input source. You may need to navigate through the camera's menu or settings to find this option.
5. Test the audio: Before recording, perform a quick audio test to ensure the microphone is working correctly. Speak into the microphone and monitor the audio levels on the camera to ensure they are picking up sound.
It's worth noting that while a wired connection using an audio cable is a reliable method, some cameras may have limitations in terms of audio quality or compatibility with certain microphones. In such cases, you may consider using an external audio recorder or a wireless microphone system for better results. Always refer to the camera and microphone manuals for specific instructions and recommendations.
2、 Wireless connection using a Bluetooth microphone
To connect a microphone to a camera, you have a few options depending on the type of microphone and camera you are using. Here's a step-by-step guide on how to connect a microphone to a camera:
1. Determine the type of microphone: There are different types of microphones, such as shotgun microphones, lavalier microphones, and handheld microphones. Choose the one that suits your needs.
2. Check the camera's compatibility: Ensure that your camera has a microphone input jack. Most cameras have a 3.5mm audio input, but some professional cameras may have XLR inputs.
3. Connect the microphone: Plug the microphone's cable into the camera's microphone input jack. Make sure it is securely connected.
4. Adjust the audio settings: Access the camera's menu and navigate to the audio settings. Adjust the audio levels and select the appropriate input source (external microphone).
5. Test the audio: Record a short video clip while speaking into the microphone. Play it back to ensure that the audio is being captured correctly.
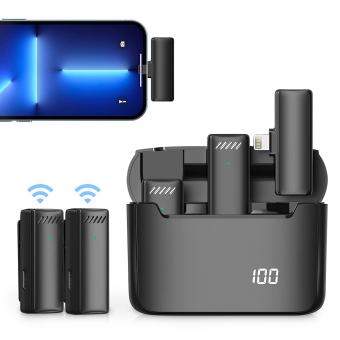
Now, if you want to explore wireless options, you can use a Bluetooth microphone. Bluetooth microphones offer the convenience of wireless connectivity, allowing you to move freely without being tethered to the camera. Here's how to connect a Bluetooth microphone to a camera:
1. Ensure camera compatibility: Check if your camera has built-in Bluetooth or supports external Bluetooth adapters.
2. Pair the microphone: Put the Bluetooth microphone in pairing mode and follow the camera's instructions to connect it. This usually involves accessing the camera's Bluetooth settings and searching for available devices.
3. Adjust audio settings: Once connected, access the camera's audio settings and select the Bluetooth microphone as the input source. Adjust the audio levels as needed.
4. Test the audio: Record a short video clip while speaking into the Bluetooth microphone. Play it back to ensure that the audio is being captured correctly.
It's important to note that not all cameras support Bluetooth microphones, so make sure to check your camera's specifications or consult the manufacturer's website for compatibility information.
In conclusion, connecting a microphone to a camera can be done through a wired connection using the microphone input jack or wirelessly using a Bluetooth microphone, if supported. Both options have their advantages and limitations, so choose the one that best suits your needs and equipment.
3、 Wireless connection using a dedicated microphone receiver
To connect a microphone to a camera, there are two main methods: using a wired connection or a wireless connection.
For a wired connection, you will need a microphone with a compatible output, such as a 3.5mm audio jack or XLR connector. Most cameras have a microphone input, usually a 3.5mm audio jack, where you can plug in the microphone directly. Make sure to check the camera's manual to locate the microphone input and adjust the audio settings accordingly. This method is straightforward and reliable, but it limits the mobility of the person using the microphone.
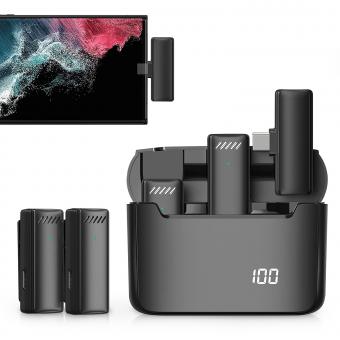
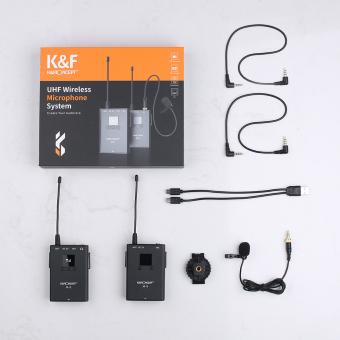
On the other hand, a wireless connection using a dedicated microphone receiver offers more flexibility. This method involves using a wireless microphone system that consists of a transmitter and a receiver. The microphone is connected to the transmitter, which wirelessly sends the audio signal to the receiver attached to the camera. The receiver is then connected to the camera's audio input. This setup allows the person using the microphone to move freely without being restricted by cables. However, it requires additional equipment and may be more expensive compared to a wired connection.
In recent years, wireless microphone systems have become more advanced, offering improved audio quality and range. Some systems even feature digital transmission technology, which provides a more reliable and interference-free connection. Additionally, there are now compact and lightweight wireless microphone systems available, making them more convenient for on-the-go videography.
Ultimately, the choice between a wired or wireless connection depends on your specific needs and budget. Both methods have their advantages and disadvantages, so it's important to consider factors such as mobility, audio quality, and cost when deciding how to connect a microphone to a camera.
4、 USB connection using a USB microphone
To connect a microphone to a camera, you have a few options depending on the type of microphone and camera you are using. One common method is to use a USB connection with a USB microphone. This method has gained popularity in recent years due to the convenience and versatility it offers.
To connect a USB microphone to a camera, follow these steps:
1. Check compatibility: Ensure that your camera supports USB audio input. Most modern cameras have a USB port that can be used for this purpose, but it's always a good idea to consult your camera's manual or manufacturer's website to confirm.
2. Choose a USB microphone: There are various USB microphones available in the market, ranging from basic models to professional-grade options. Consider your specific needs and budget when selecting a microphone.
3. Connect the microphone: Plug the USB cable of the microphone into the USB port on your camera. Some cameras may require an adapter or additional cables, so make sure you have the necessary accessories.
4. Configure settings: Once the microphone is connected, access your camera's settings menu to enable USB audio input. This option may be located under the audio or input settings. Adjust the microphone's volume level as needed.
5. Test the setup: Record a short video or audio clip to ensure that the microphone is working properly. Monitor the audio levels and make any necessary adjustments to achieve the desired sound quality.
Using a USB microphone with your camera offers several advantages. It eliminates the need for additional audio recording equipment, simplifies the setup process, and allows for direct recording into the camera. Additionally, USB microphones often offer high-quality audio capture and can be used for various purposes such as vlogging, interviews, or recording music.
However, it's important to note that the audio quality of USB microphones may not match that of dedicated external microphones. If you require professional-grade audio or have specific recording needs, you may want to consider using XLR microphones with an audio interface instead.
