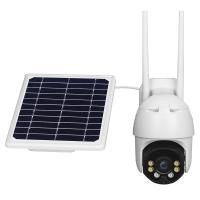
How To Connect Multiple Wifi Cameras ?
To connect multiple WiFi cameras, you will need to follow these general steps:
1. Ensure that each camera is powered on and connected to a power source.
2. Install the necessary mobile app or software provided by the camera manufacturer on your smartphone, tablet, or computer.
3. Open the app or software and create an account if required.
4. Follow the on-screen instructions to add each camera to your network. This typically involves scanning a QR code or entering a unique camera ID.
5. Connect each camera to your WiFi network by entering your network's SSID (name) and password.
6. Once connected, you can usually customize camera settings, such as motion detection, recording schedules, and notifications, through the app or software.
7. Repeat the process for each additional camera you want to connect.
It's important to note that the specific steps may vary depending on the brand and model of your WiFi cameras. Always refer to the manufacturer's instructions for detailed guidance.
1、 Wireless Network Compatibility and Range
To connect multiple WiFi cameras, you need to consider two main factors: wireless network compatibility and range.
Firstly, ensure that the WiFi cameras you are using are compatible with your wireless network. Most WiFi cameras use the 2.4GHz frequency band, which is widely supported by most routers. However, some newer cameras also support the 5GHz band, which offers faster speeds and less interference. Check the specifications of your cameras and make sure they are compatible with your router's frequency band.
Next, consider the range of your WiFi network. The range of your WiFi cameras will depend on the strength of your router's signal and any obstacles that may interfere with the signal, such as walls or other electronic devices. To ensure a strong and stable connection, place your router in a central location and avoid obstructions. If the range of your WiFi network is not sufficient to cover all the areas where you want to install the cameras, you may need to invest in a WiFi range extender or a mesh WiFi system to extend the coverage.
Additionally, it is important to secure your WiFi network to prevent unauthorized access to your cameras. Set a strong password for your WiFi network and enable encryption, such as WPA2, to protect your cameras and the data they transmit.
Lastly, consider using a dedicated network for your WiFi cameras. This can help reduce congestion on your main network and ensure a more reliable connection for your cameras.
In conclusion, to connect multiple WiFi cameras, ensure compatibility with your wireless network and consider the range of your network. Take steps to secure your network and consider using a dedicated network for your cameras if necessary.

2、 Camera Configuration and Setup
To connect multiple WiFi cameras, you will need to follow a few steps for camera configuration and setup. Here's a guide to help you with the process:
1. Choose a central location: Select a central location for your WiFi cameras where they can get a strong and stable WiFi signal. This will ensure that all cameras can connect to your network without any issues.
2. Install the cameras: Install each camera in the desired location, making sure they are securely mounted and have a clear view of the area you want to monitor.
3. Power on the cameras: Connect each camera to a power source and ensure they are powered on. Most WiFi cameras come with a power adapter that needs to be plugged into an electrical outlet.
4. Connect to the network: Use the camera's mobile app or web interface to connect each camera to your WiFi network. Follow the instructions provided by the manufacturer to complete the setup process. This usually involves scanning a QR code or entering your WiFi network credentials.
5. Assign unique IP addresses: Once connected to the network, assign unique IP addresses to each camera. This will help you identify and access each camera individually.
6. Test the connection: After configuring each camera, test the connection by accessing the camera's live feed on your smartphone or computer. Make sure you can view the video feed from each camera without any interruptions.
7. Set up remote access: If you want to access the cameras remotely, configure port forwarding on your router and set up a dynamic DNS service. This will allow you to access the cameras from anywhere using a smartphone or computer.
It's important to note that the specific steps may vary depending on the brand and model of your WiFi cameras. Always refer to the manufacturer's instructions for detailed setup guidance.
In the latest point of view, advancements in technology have made it easier to connect multiple WiFi cameras. Many cameras now come with simplified setup processes, such as QR code scanning, which eliminates the need for manual configuration. Additionally, some cameras offer seamless integration with smart home platforms, allowing you to control and monitor all your cameras from a single app. This makes managing multiple cameras more convenient and user-friendly.

3、 Network Bandwidth and Internet Speed
To connect multiple WiFi cameras, you need to consider both network bandwidth and internet speed. Here's how you can ensure a smooth and reliable connection for multiple cameras:
1. Assess your network bandwidth: Determine the maximum bandwidth your network can handle. This depends on your internet service provider (ISP) and the type of connection you have (e.g., DSL, cable, fiber). Check your ISP's website or contact their customer support to find out your maximum upload and download speeds.
2. Calculate camera bandwidth requirements: Each camera will consume a portion of your network bandwidth. Check the camera specifications or contact the manufacturer to find out the required bandwidth for each camera. Multiply this value by the number of cameras you plan to connect to get an estimate of the total bandwidth needed.
3. Upgrade your internet plan if necessary: If your current internet plan doesn't provide enough bandwidth for all the cameras, consider upgrading to a higher-speed plan. This will ensure that your cameras can transmit data without causing network congestion or slowdowns.
4. Optimize your WiFi network: Position your WiFi router in a central location to ensure maximum coverage. Avoid physical obstructions and interference from other devices. Consider using a dual-band router that supports both 2.4GHz and 5GHz frequencies, as this can help distribute the camera connections more efficiently.
5. Use a dedicated network for cameras: If you have a large number of cameras or require high-quality video streaming, consider setting up a separate network solely for the cameras. This can help reduce interference and ensure a stable connection.
6. Monitor network performance: Regularly check your network's performance using speed testing tools. If you notice any issues, such as slow speeds or dropped connections, troubleshoot the problem by adjusting router settings or contacting your ISP for assistance.
It's important to note that the latest point of view on network bandwidth and internet speed is that technology is constantly evolving, and new advancements are being made to improve network performance. Therefore, it's always a good idea to stay updated with the latest developments in networking technology to ensure the best possible connection for your WiFi cameras.
4、 Security and Encryption Protocols
To connect multiple WiFi cameras, you need to follow a few steps:
1. Choose a central hub or network video recorder (NVR): An NVR acts as a central hub that connects and manages multiple WiFi cameras. It allows you to view and record footage from all cameras in one place.
2. Ensure compatibility: Make sure that the WiFi cameras you choose are compatible with the NVR or hub you plan to use. Check for compatibility in terms of protocols, such as ONVIF (Open Network Video Interface Forum), which ensures interoperability between different brands.
3. Set up the NVR: Connect the NVR to your home network using an Ethernet cable. Follow the manufacturer's instructions to set up the NVR, including configuring network settings and creating user accounts.
4. Connect the cameras: Power on the WiFi cameras and connect them to your home network. Most cameras have a setup wizard that guides you through the process. You will need to enter your WiFi network credentials and configure other settings, such as IP addresses and ports.
5. Configure security and encryption protocols: It is crucial to ensure the security of your WiFi cameras. Use strong passwords for your cameras and NVR, and enable encryption protocols such as WPA2 (Wi-Fi Protected Access 2) for your WiFi network. Regularly update the firmware of your cameras and NVR to protect against vulnerabilities.
6. Test and monitor: Once all cameras are connected, test their functionality and ensure that they are capturing and transmitting video properly. Monitor the cameras regularly to ensure they are functioning correctly and to address any issues promptly.
It is important to stay updated with the latest security and encryption protocols. As technology advances, new protocols may emerge to enhance the security of WiFi cameras. Stay informed about the latest developments and implement them as appropriate to ensure the highest level of security for your WiFi camera system.


