How To Copy Negatives With Digital Camera ?
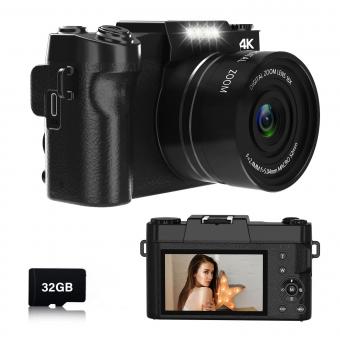
To copy negatives with a digital camera, you will need a light source, a negative holder, and a digital camera with macro capabilities. Start by setting up the light source, such as a lightbox or a tablet screen, to illuminate the negatives evenly. Place the negative holder on top of the light source and position the negative you want to copy within the holder. Make sure the negative is clean and free from dust or fingerprints.
Next, set up your digital camera on a tripod or stable surface. Adjust the camera settings to macro mode or close-up photography mode to capture fine details. Align the camera lens with the negative and adjust the focus until the image appears sharp on the camera's LCD screen.
Take a test shot and review the image on the camera's screen. Adjust the exposure settings if necessary to achieve a balanced and accurate representation of the negative. Once you are satisfied with the settings, capture the image by pressing the shutter button.
Transfer the captured image from the camera to a computer for further editing or processing. Use photo editing software to invert the colors and make any necessary adjustments to enhance the image quality.
1、 Negative Scanning Techniques for Digital Cameras
To copy negatives with a digital camera, you can follow the Negative Scanning Techniques for Digital Cameras. This method allows you to convert your film negatives into digital images using the capabilities of your digital camera. Here's a step-by-step guide:
1. Set up a light source: Place your negatives on a light table or use a lightbox to illuminate them evenly. This will help you capture the details and colors accurately.
2. Position your camera: Mount your digital camera on a tripod to ensure stability and consistent framing. Adjust the camera's position so that it is directly above the negatives, parallel to the surface.
3. Adjust camera settings: Set your camera to manual mode to have full control over the exposure settings. Use a low ISO setting to minimize noise and select a small aperture (high f-stop number) for a greater depth of field. Adjust the shutter speed accordingly to achieve a well-exposed image.
4. Focus and frame: Use manual focus to ensure sharpness. Zoom in on the negative and adjust the focus until the details are clear. Frame the negative within the camera's viewfinder or LCD screen.
5. Capture the image: Use the camera's self-timer or a remote shutter release to avoid any camera shake when capturing the image. Take multiple shots of each negative to increase the chances of getting a sharp and well-exposed image.
6. Transfer and edit: Transfer the captured images to your computer and use photo editing software to invert the colors and make any necessary adjustments. This will convert the negative image into a positive one.
It's worth noting that advancements in technology have led to the development of specialized negative scanners that offer higher resolution and better color accuracy compared to using a digital camera. However, if you don't have access to a negative scanner, the above technique can still yield satisfactory results.
2、 Choosing the Right Equipment for Copying Negatives
Choosing the Right Equipment for Copying Negatives
Copying negatives with a digital camera can be a great way to preserve and digitize your film photographs. To ensure the best results, it is important to choose the right equipment for the task. Here are some key considerations when selecting the equipment for copying negatives:
1. Digital Camera: Look for a camera with a high-resolution sensor and manual controls. This will allow you to capture the fine details and adjust settings such as exposure and white balance for accurate reproduction.
2. Macro Lens: A macro lens is essential for capturing the small details on the negative. Look for a lens with a high magnification ratio and good optical quality to ensure sharp and detailed images.
3. Light Source: Proper lighting is crucial for capturing accurate colors and minimizing reflections. Consider using a lightbox or a light table specifically designed for negative copying. These provide even illumination and help to eliminate any unwanted shadows or hotspots.
4. Negative Holder: Using a negative holder or a film holder is important to keep the negative flat and in focus. Look for a holder that is compatible with your camera and provides a secure and stable platform for the negative.
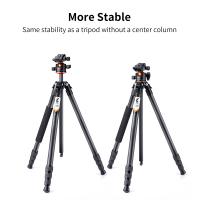
5. Tripod: To ensure sharp and steady images, use a tripod to stabilize your camera. This is especially important when using longer exposure times or when capturing multiple negatives in a single shot.
6. Software: After capturing the images, you will need software to process and edit the digital files. Look for software that supports negative conversion and has tools for adjusting exposure, color balance, and removing dust or scratches.
It is worth noting that technology is constantly evolving, and new equipment and techniques may emerge. Stay updated with the latest developments in the field to ensure you are using the most advanced and efficient equipment for copying negatives with a digital camera.

3、 Lighting and Exposure Tips for Capturing Negatives with a Digital Camera
How to Copy Negatives with a Digital Camera: Lighting and Exposure Tips
Copying negatives with a digital camera can be a cost-effective and convenient way to digitize your film collection. However, it requires careful attention to lighting and exposure to ensure accurate and high-quality results. Here are some tips to help you achieve the best possible outcome:
1. Use a lightbox or backlight: Place your negatives on a lightbox or backlight to illuminate them evenly. This will help to reveal the details and minimize any unwanted shadows or reflections. Alternatively, you can use a window as a natural light source, but be cautious of direct sunlight, as it can cause overexposure and color distortion.
2. Adjust exposure settings: Set your camera to manual mode to have full control over exposure settings. Start with a low ISO setting (e.g., ISO 100) to minimize noise and maintain image quality. Experiment with different aperture and shutter speed combinations to achieve the desired exposure. Bracketing exposures can also be helpful to capture a range of tones.
3. White balance calibration: Negatives often have an orange or blue color cast. To correct this, adjust the white balance settings on your camera. You can use a gray card or a neutral target to ensure accurate color reproduction. Alternatively, you can adjust the white balance during post-processing.
4. Focus and sharpness: Achieving sharp focus is crucial when copying negatives. Use manual focus and zoom in on the negative to ensure precise focus. A tripod can be helpful to eliminate camera shake and maintain stability.
5. Post-processing: After capturing the negative, you will need to invert the image to obtain a positive. This can be done using photo editing software such as Adobe Photoshop or specialized negative scanning software. Adjustments to contrast, brightness, and color balance may also be necessary to enhance the final result.
It's important to note that the latest point of view on copying negatives with a digital camera includes advancements in technology, such as dedicated film scanners or specialized negative digitizing services. These options often provide higher resolution and more accurate color reproduction compared to using a digital camera. However, if you don't have access to these resources, following the above tips can still yield satisfactory results.
4、 Post-Processing and Editing Techniques for Negative Reproduction
To copy negatives with a digital camera, you will need a few essential tools and follow specific post-processing and editing techniques. Here's a step-by-step guide to help you achieve accurate and high-quality negative reproduction:
1. Gather the necessary equipment: You will need a digital camera with manual controls, a macro lens or extension tubes for close-up shots, a light table or a lightbox to illuminate the negatives, and a tripod for stability.
2. Set up the lighting: Place the negatives on the light table or lightbox, ensuring they are clean and free from dust or scratches. Adjust the lighting to evenly illuminate the negatives, avoiding any harsh reflections or shadows.
3. Position the camera: Mount your camera on a tripod and position it directly above the negatives. Ensure that the camera is parallel to the negatives to avoid distortion.
4. Adjust camera settings: Set your camera to manual mode and adjust the ISO, aperture, and shutter speed according to the lighting conditions. Use a low ISO to minimize noise, a small aperture (high f-stop) for increased depth of field, and a slow shutter speed to capture enough light.
5. Capture the image: Use the camera's live view mode to focus accurately on the negatives. Take multiple shots at different exposures to ensure you capture the full dynamic range of the negatives.
6. Transfer the images to a computer: Connect your camera to a computer and transfer the captured images. Use RAW format if possible to retain maximum image information.
7. Post-processing and editing: Use photo editing software like Adobe Lightroom or Photoshop to invert the negatives, adjust the exposure, contrast, and color balance, and remove any dust or scratches. Experiment with different settings to achieve the desired look.
It's worth noting that advancements in technology have led to the development of specialized film scanners that can produce higher-quality results compared to using a digital camera. However, if you don't have access to a film scanner, following the above steps can still yield satisfactory results.
