How To Fit A Camera On A Tripod ?
To fit a camera on a tripod, first, ensure that the tripod is set up and stable on a flat surface. Then, locate the mounting plate on the tripod head. Attach the mounting plate securely to the bottom of the camera by aligning the screw hole on the plate with the camera's tripod socket. Use the provided screw to fasten the plate to the camera tightly.
Once the mounting plate is securely attached to the camera, align the plate with the tripod head's quick-release mechanism. Slide the plate into the head until it clicks into place. Make sure it is firmly locked in position.
To ensure stability, check that the camera is balanced on the tripod. Adjust the position of the camera by loosening the tripod head's adjustment knobs and moving the camera forward or backward until it is balanced. Once balanced, tighten the adjustment knobs to secure the camera in place.
Finally, test the stability of the camera by gently nudging it to ensure it remains steady on the tripod. Adjust the tripod legs if necessary to achieve the desired framing and stability.
1、 Camera Mounting Mechanisms on Tripods
Camera Mounting Mechanisms on Tripods
Mounting a camera on a tripod is a fundamental skill for photographers and videographers. It ensures stability, reduces camera shake, and allows for precise framing and composition. The process of fitting a camera on a tripod involves a few simple steps:
1. Choose a compatible tripod: Tripods come in various sizes and weight capacities. Ensure that your tripod is suitable for the weight and size of your camera equipment. Most tripods have a standard 1/4-inch screw mount, which is compatible with the majority of cameras.
2. Locate the tripod mount on your camera: The tripod mount is usually located on the bottom of the camera body. It is a threaded hole with a metal ring around it. This is where the camera will attach to the tripod.
3. Align the camera with the tripod head: The tripod head is the part that attaches to the tripod legs and allows for movement and adjustment. Line up the camera's tripod mount with the screw on the tripod head.
4. Screw the camera onto the tripod: Once aligned, gently screw the camera onto the tripod head. Be careful not to overtighten, as this can damage the camera or tripod.
5. Secure the camera: Once the camera is attached, ensure that it is securely fastened. Give it a gentle tug to check for any looseness. If necessary, use the locking mechanism on the tripod head to further secure the camera.
It is worth noting that some tripods offer quick-release plates, which allow for easy attachment and detachment of the camera. These plates typically attach to the camera's tripod mount and can be quickly mounted or removed from the tripod head.
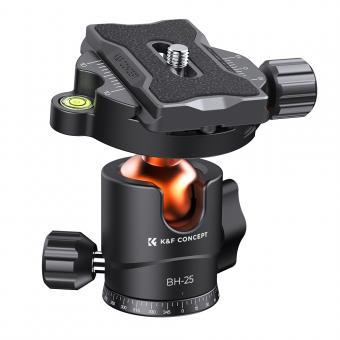
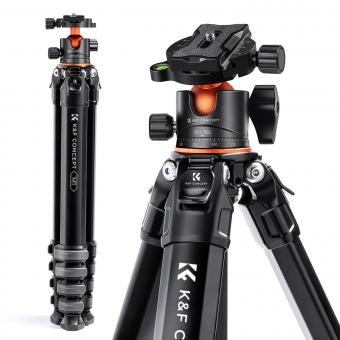
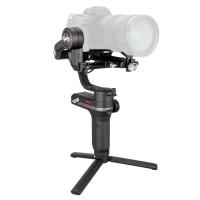
In recent years, advancements in camera mounting mechanisms have led to the development of more versatile tripod heads. For example, ball heads offer smooth and precise movement in all directions, allowing for quick adjustments and creative shooting angles. Gimbal heads are specifically designed for long telephoto lenses, providing stability and fluid movement for wildlife and sports photography.
In conclusion, fitting a camera on a tripod involves aligning the camera's tripod mount with the tripod head and securely fastening it. The process is straightforward and ensures stability and precision in photography and videography.
2、 Types of Tripod Heads for Camera Attachment
To fit a camera on a tripod, follow these steps:
1. Ensure that your camera has a tripod socket: Most cameras have a standard tripod socket located on the bottom. It is usually a threaded hole that allows you to attach the camera to a tripod.
2. Choose a compatible tripod: Tripods come in various sizes and weight capacities. Select a tripod that can support the weight of your camera and lens. Make sure the tripod has a quick-release plate system, which allows for easy attachment and detachment of the camera.
3. Attach the quick-release plate: The quick-release plate is a small metal or plastic plate that attaches to the bottom of your camera. It usually has a threaded screw that matches the tripod socket on your camera. Align the plate with the socket and screw it in securely.
4. Mount the camera on the tripod: Once the quick-release plate is attached to your camera, you can mount it on the tripod. Most tripods have a quick-release mechanism that allows you to slide the plate into a compatible mount and lock it in place.
5. Adjust the camera position: Once the camera is securely attached to the tripod, you can adjust its position. Use the tripod's pan and tilt controls to level the camera and frame your shot.
Types of Tripod Heads for Camera Attachment:
1. Ball Head: This type of tripod head allows for quick and easy adjustments in any direction. It features a ball and socket mechanism that allows you to tilt and pan the camera smoothly.
2. Pan/Tilt Head: This traditional tripod head consists of separate controls for horizontal and vertical movements. It provides precise control over the camera's positioning.
3. Gimbal Head: Primarily used for telephoto lenses, a gimbal head provides smooth and balanced movement for heavy camera setups. It allows for easy tracking of moving subjects.
4. Fluid Head: Commonly used in video production, a fluid head provides smooth and fluid movements. It features a damping system that allows for precise control over panning and tilting.
5. Three-Way Head: This type of tripod head has separate controls for horizontal and vertical movements, as well as a control for rotating the camera. It offers precise adjustments and is suitable for both photography and videography.
It's important to choose a tripod head that suits your specific needs and shooting style. Consider factors such as weight capacity, ease of use, and the type of photography or videography you plan to do.

3、 Quick Release Systems for Easy Camera Mounting
Quick Release Systems for Easy Camera Mounting
Mounting a camera on a tripod is a fundamental skill for photographers and videographers. It ensures stability, reduces camera shake, and allows for precise framing and composition. One of the most efficient ways to attach a camera to a tripod is by using a quick release system.
A quick release system consists of two parts: a plate that attaches to the camera and a mount that attaches to the tripod. The plate is securely attached to the camera's tripod socket, while the mount is fixed onto the tripod head. When it's time to mount the camera, the plate slides into the mount and locks into place, providing a secure connection.
To fit a camera on a tripod using a quick release system, follow these steps:
1. Attach the mount to the tripod head: Most tripods come with a built-in mount or a compatible mount that can be screwed onto the tripod head. Ensure that it is securely fastened.
2. Attach the plate to the camera: Locate the camera's tripod socket, usually found on the bottom. Align the plate's screw with the socket and tighten it using a coin or a screwdriver. Make sure it is firmly attached to the camera.
3. Slide the plate into the mount: With the camera turned off, hold the camera and slide the plate into the mount on the tripod head. Ensure that the plate is fully inserted and aligned with the mount.
4. Lock the plate into place: Most quick release systems have a locking mechanism to secure the plate. This can be a lever, a knob, or a screw. Engage the locking mechanism to prevent the plate from accidentally sliding out.
Quick release systems have become increasingly popular due to their convenience and time-saving benefits. They allow photographers and videographers to quickly switch between handheld shooting and tripod-mounted setups. Additionally, some quick release systems offer additional features such as bubble levels, spirit levels, and adjustable tension for added precision and ease of use.
In recent years, advancements in quick release systems have focused on improving the overall stability and security of the connection. Manufacturers have introduced more robust locking mechanisms, anti-twist designs, and compatibility with different camera models. Some systems even incorporate Arca-Swiss style plates, which have become a standard in the industry due to their versatility and widespread adoption.
In conclusion, fitting a camera on a tripod using a quick release system is a straightforward process that provides numerous benefits to photographers and videographers. It ensures stability, reduces camera shake, and allows for quick and easy adjustments. With the latest advancements in quick release systems, photographers can enjoy improved stability and security, making their shooting experience even more efficient and enjoyable.
4、 Adjusting Camera Position and Angle on a Tripod
Adjusting Camera Position and Angle on a Tripod
Fitting a camera on a tripod is a fundamental skill that every photographer should master. A tripod provides stability and allows for precise positioning of the camera, resulting in sharper and more professional-looking photographs. Here is a step-by-step guide on how to fit a camera on a tripod:
1. Extend the tripod legs: Start by extending the tripod legs to a comfortable height. Ensure that the tripod is stable and level on the ground.
2. Attach the camera plate: Most tripods come with a quick-release plate that attaches to the bottom of the camera. Align the plate with the camera's tripod mount and securely tighten it in place.
3. Mount the camera: Once the plate is attached, slide it into the tripod head's quick-release mechanism. Make sure it locks securely into place.
4. Adjust the camera position: Use the tripod's pan and tilt controls to adjust the camera's position. The pan control allows you to rotate the camera horizontally, while the tilt control allows for vertical adjustments. Take your time to find the desired composition.
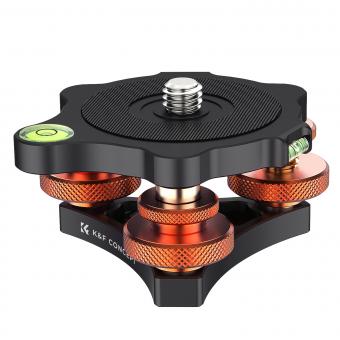
5. Level the camera: Use the tripod's built-in bubble level or a separate leveling tool to ensure that the camera is perfectly level. This is especially important for landscape and architectural photography.
6. Fine-tune the camera angle: If needed, adjust the camera angle by loosening the tripod head's locking mechanism. This allows you to tilt the camera up or down to capture the desired perspective.
7. Lock the tripod head: Once you have achieved the desired camera position and angle, tighten the tripod head's locking mechanism to secure the camera in place.
It's worth noting that some tripods offer additional features such as a center column that allows for vertical adjustments or a ball head that provides more flexibility in positioning the camera. Always refer to the manufacturer's instructions for specific details on fitting your camera to a tripod.
In recent years, advancements in tripod technology have introduced innovative features such as quick-release systems with improved stability and compatibility. Additionally, some tripods now come with built-in smartphone mounts, making it easier to fit and stabilize mobile devices for photography or videography purposes.
Remember, fitting a camera on a tripod is just the first step. To capture stunning images, experiment with different camera settings, compositions, and lighting conditions. Practice and experience will help you refine your skills and achieve the best results.


