How To Fix Camera In Tripod ?
To fix a camera in a tripod, first, ensure that the tripod is set up on a stable surface. Then, attach the camera to the tripod head by aligning the camera's mounting screw with the tripod's quick-release plate or mounting plate. Tighten the screw securely to hold the camera in place. Adjust the tripod head to position the camera at the desired angle and tighten any locking mechanisms to secure it. Finally, check that the camera is stable and level by gently nudging it and making any necessary adjustments to the tripod legs or head.
1、 Adjusting the tripod legs for stability
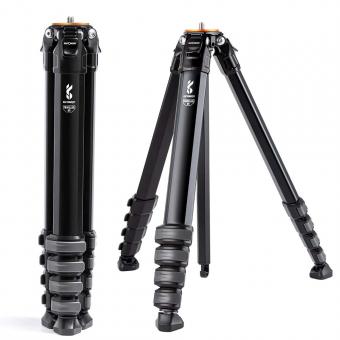
To fix a camera in a tripod, the first step is to ensure that the tripod legs are adjusted for stability. This is crucial to prevent any unwanted movement or shaking of the camera during use. Here's how you can adjust the tripod legs for maximum stability:
1. Extend the legs: Start by extending the tripod legs to the desired height. Make sure all the leg sections are securely locked in place. Avoid extending the legs to their maximum height unless necessary, as this can compromise stability.
2. Spread the legs: Position the tripod on a flat surface and spread the legs evenly. Adjust the leg angles to create a stable base. Most tripods have adjustable leg angles that allow you to set up on uneven terrain.
3. Use the center column sparingly: If your tripod has a center column, avoid extending it fully unless needed. The center column can introduce instability, especially when fully extended. Instead, try to keep the center column as short as possible to maintain stability.
4. Add weight: If you're shooting in windy conditions or on an unstable surface, adding weight to the tripod can help improve stability. Some tripods have a hook at the bottom of the center column where you can hang a bag or other heavy objects.
5. Use a tripod stabilizer: In some cases, using a tripod stabilizer can further enhance stability. These accessories attach to the tripod legs and provide additional support, reducing vibrations and movement.
It's important to note that the latest point of view in tripod stability emphasizes the use of high-quality tripods made from sturdy materials. Investing in a reliable tripod can significantly improve stability and minimize camera shake. Additionally, some tripods now come with advanced features like built-in levels and adjustable leg tension, allowing for even greater stability and ease of use.
2、 Mounting the camera securely on the tripod head
To fix a camera securely on a tripod, follow these steps:
1. Ensure that the tripod is stable and properly set up on a level surface. Adjust the tripod legs to the desired height and lock them in place.
2. Locate the tripod head, which is the part that holds the camera. Most tripods have a quick-release plate system, where a plate is attached to the camera and then mounted onto the tripod head. If your tripod has this system, attach the plate to the bottom of the camera using the provided screw. Make sure it is securely tightened.
3. Align the plate with the tripod head and slide it into place. There is usually a locking mechanism that needs to be engaged to secure the plate onto the head. This can be a lever, a knob, or a screw. Tighten it until the camera feels secure and doesn't move.
4. Once the camera is mounted, check its stability by gently nudging it. If it wobbles or feels loose, double-check the locking mechanism and tighten it further if necessary.
5. Adjust the camera's position by using the tripod head's pan and tilt controls. These controls allow you to move the camera horizontally (pan) and vertically (tilt) to frame your shot.
6. Finally, check the camera's level using the built-in level indicator or a separate bubble level. Adjust the tripod legs if needed to ensure the camera is perfectly level.
In recent years, some tripods have introduced innovative features such as quick-release systems with improved locking mechanisms, built-in bubble levels, and even electronic leveling systems. These advancements make it easier and more convenient to mount the camera securely on a tripod. Additionally, some tripods now offer compatibility with smartphones and action cameras, providing a wider range of options for photographers and videographers.
3、 Leveling the camera on the tripod
Leveling the camera on a tripod is an essential step to ensure stability and achieve accurate and balanced shots. Here's how to fix the camera in a tripod and level it properly:
1. Set up the tripod: Extend the tripod legs to a comfortable height and make sure they are securely locked in place. Spread the legs wide for added stability.
2. Attach the camera: Most tripods have a quick-release plate that attaches to the camera's tripod mount. Align the plate with the camera's base and tighten the screw to secure it in place.
3. Mount the camera on the tripod: Locate the tripod head and slide the quick-release plate into the corresponding slot. Ensure it is securely locked in place.
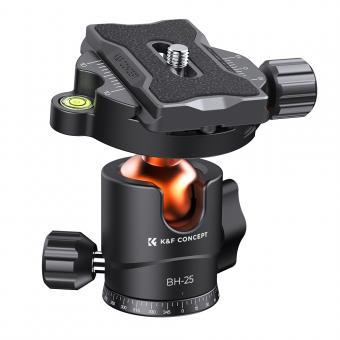
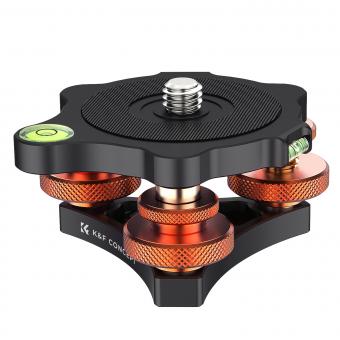
4. Adjust the tripod head: Most tripods have a leveling bubble or a built-in leveling mechanism. Use these features to adjust the tripod head until the bubble is centered or the leveling indicator shows a balanced position.
5. Fine-tune the leveling: If your tripod doesn't have a built-in leveling mechanism, you can use a small bubble level placed on top of the camera to ensure it is perfectly level. Adjust the tripod legs' length or position until the bubble is centered.
6. Lock the tripod head: Once the camera is level, tighten the tripod head's locking mechanism to secure it in place. Ensure it is tight enough to prevent any movement but not too tight to make adjustments difficult.
7. Test the stability: Gently nudge the camera to check if it remains stable. If it moves, readjust the tripod head until it is secure.
From a latest point of view, some tripods now come with advanced features like electronic leveling systems or built-in bubble levels, making it easier to level the camera accurately. Additionally, some tripods have a ball head that allows for smooth and precise adjustments in multiple directions, enhancing the overall shooting experience.
4、 Adjusting the tripod head for desired camera angle
To fix a camera in a tripod, the first step is to ensure that the tripod is set up on a stable surface. Once the tripod is securely positioned, the camera can be attached to the tripod head. Most tripods have a quick-release plate that attaches to the bottom of the camera, allowing for easy attachment and detachment.
To adjust the tripod head for the desired camera angle, start by loosening the tripod head's locking mechanism. This will allow the head to move freely. Next, use the pan and tilt controls to adjust the camera horizontally and vertically. The pan control allows for horizontal movement, while the tilt control allows for vertical movement. These controls can be adjusted by turning the handles or knobs on the tripod head.
Once the camera is positioned at the desired angle, tighten the locking mechanism to secure the tripod head in place. It is important to ensure that the camera is stable and won't move during use. Additionally, check that the camera is level by using the built-in level or a separate bubble level.
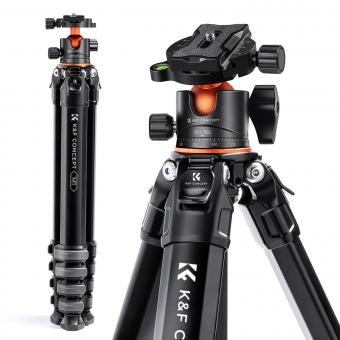
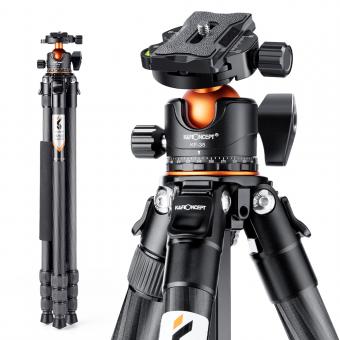
In the latest point of view, some tripods now come with additional features such as a ball head, which allows for smoother and more precise adjustments. These ball heads offer a greater range of motion and flexibility, making it easier to achieve the desired camera angle. Additionally, some tripods also have a built-in level on the tripod head itself, eliminating the need for a separate level.
Overall, adjusting the tripod head for the desired camera angle is a simple process that can be done by loosening the locking mechanism, using the pan and tilt controls, and tightening the locking mechanism once the desired angle is achieved.






-200x200.jpg)
