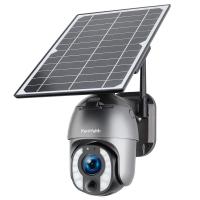
How To Install Cloud Wifi Camera ?
To install a cloud WiFi camera, follow these general steps:
1. Choose a suitable location for the camera where it can capture the desired area.
2. Ensure that you have a stable WiFi network available in the camera's location.
3. Power on the camera and connect it to a power source.
4. Download and install the camera's companion app on your smartphone or tablet.
5. Open the app and create an account if required.
6. Follow the app's instructions to connect the camera to your WiFi network.
7. Once connected, configure the camera settings such as motion detection, recording preferences, and notifications.
8. Test the camera by accessing the live feed through the app.
9. If desired, set up cloud storage for video recordings by subscribing to a compatible service.
10. Mount or position the camera securely in its final location.
Please note that specific instructions may vary depending on the brand and model of the cloud WiFi camera you are installing. It is recommended to refer to the camera's user manual or manufacturer's website for detailed instructions.
1、 Selecting the right cloud wifi camera for your needs
Selecting the right cloud wifi camera for your needs is crucial to ensure the security and surveillance of your home or business. With the advancements in technology, cloud wifi cameras have become increasingly popular due to their convenience and ease of use. These cameras allow you to monitor your property remotely through a smartphone or computer, providing peace of mind even when you are away.
When it comes to installing a cloud wifi camera, the process can vary depending on the brand and model you choose. However, there are some general steps that you can follow:
1. Choose the right location: Before installing the camera, determine the areas you want to monitor and select suitable locations for optimal coverage. Consider factors such as visibility, power source availability, and Wi-Fi signal strength.
2. Mount the camera: Most cloud wifi cameras come with mounting brackets or adhesive pads for easy installation. Follow the manufacturer's instructions to securely mount the camera in the desired location.
3. Connect to power: Cloud wifi cameras typically require a power source. Ensure that the camera is connected to a power outlet or use a battery-powered camera if you prefer a wireless setup.
4. Connect to Wi-Fi: Follow the camera's instructions to connect it to your Wi-Fi network. This usually involves using a smartphone app or a computer to scan for available networks and entering your Wi-Fi credentials.
5. Set up the camera: Once connected to Wi-Fi, you may need to create an account with the camera's manufacturer and follow the setup process outlined in the app or software. This may include naming the camera, setting up motion detection, and adjusting other settings according to your preferences.
6. Test the camera: After completing the setup, test the camera to ensure it is functioning properly. Check the live feed on your smartphone or computer to verify that the camera is capturing and transmitting video.
It is important to note that the installation process may vary depending on the specific camera model and brand. Always refer to the manufacturer's instructions for detailed guidance.
In terms of the latest point of view, cloud wifi cameras have seen advancements in features such as higher resolution video, improved night vision capabilities, and enhanced motion detection algorithms. Some cameras now offer two-way audio, allowing you to communicate with people near the camera remotely. Additionally, cloud storage options have become more accessible, providing convenient and secure storage for recorded footage.
When selecting a cloud wifi camera, consider factors such as video quality, field of view, storage options, and compatibility with other smart home devices. It is also important to ensure that the camera has robust security features to protect your privacy.
In conclusion, installing a cloud wifi camera involves selecting the right location, mounting the camera, connecting it to power and Wi-Fi, setting it up through the manufacturer's app or software, and testing its functionality. Stay informed about the latest advancements in cloud wifi cameras to make an informed decision that meets your specific surveillance needs.
2、 Setting up the camera's hardware and power source
To install a cloud WiFi camera, you need to follow a few steps. The first step is to set up the camera's hardware and power source. This involves finding a suitable location for the camera and ensuring it has a stable power supply.
Start by selecting a location for the camera that provides a good view of the area you want to monitor. It should be placed at a height and angle that captures the desired field of view. Make sure the camera is protected from harsh weather conditions if it is intended for outdoor use.
Next, connect the camera to a power source. Most cloud WiFi cameras come with a power adapter that needs to be plugged into a nearby electrical outlet. Ensure that the power source is stable and reliable to avoid any interruptions in the camera's operation.
Once the camera is connected to power, it will start initializing. Follow the manufacturer's instructions to complete the setup process. This usually involves connecting the camera to your WiFi network. Use the camera's mobile app or web interface to enter your WiFi network credentials and establish a connection.
After the camera is connected to your WiFi network, you can access its live feed and configure additional settings through the manufacturer's app or web portal. This may include setting up motion detection, adjusting video quality, or enabling cloud storage for recorded footage.
It's important to note that the specific steps for installing a cloud WiFi camera may vary depending on the brand and model you are using. Always refer to the manufacturer's instructions for detailed guidance.
3、 Connecting the camera to your wifi network
Connecting a cloud wifi camera to your wifi network is a relatively straightforward process that can be done in a few simple steps. Here's a guide on how to install a cloud wifi camera and connect it to your wifi network.
1. Choose the right camera: Before starting the installation process, make sure you have a cloud wifi camera that is compatible with your wifi network. Check the camera's specifications and ensure it supports the same wifi standard as your network (e.g., 802.11ac, 802.11n).
2. Position the camera: Decide where you want to install the camera. It should be placed in a location that provides a good view of the area you want to monitor. Ensure it is within range of your wifi network.
3. Power up the camera: Connect the camera to a power source using the provided power adapter. Make sure the camera is receiving power and turned on.
4. Download the camera's app: Most cloud wifi cameras come with a dedicated mobile app. Download the app from the App Store or Google Play Store onto your smartphone or tablet.
5. Create an account: Open the app and create a new account if required. This account will be used to access and manage your camera remotely.
6. Add the camera to the app: Follow the app's instructions to add the camera to your account. This usually involves scanning a QR code on the camera or entering a unique camera ID.
7. Connect to your wifi network: Once the camera is added to the app, you will be prompted to connect it to your wifi network. Select your network from the list of available networks and enter the wifi password when prompted.
8. Complete the setup: The app will guide you through the remaining setup process, which may include configuring camera settings, such as motion detection or video quality.
9. Test the connection: Once the setup is complete, test the camera's connection by accessing the live video feed through the app. Ensure the camera is capturing and transmitting video properly.
It's worth noting that the specific steps may vary slightly depending on the brand and model of the cloud wifi camera you are installing. Always refer to the manufacturer's instructions for detailed guidance.
4、 Creating an account and configuring the camera's settings
To install a cloud WiFi camera, you need to follow a few steps. The first step is to create an account with the camera's manufacturer or the cloud service provider. This account will allow you to access and manage your camera remotely. You can usually create an account through the manufacturer's website or by downloading their mobile app.
Once you have created an account, you will need to configure the camera's settings. This typically involves connecting the camera to your WiFi network. Most cameras have a setup wizard that will guide you through the process. You will need to enter your WiFi network name and password to establish a connection.
After the camera is connected to your WiFi network, you can customize its settings according to your preferences. This may include adjusting the camera's resolution, enabling motion detection, setting up alerts, and configuring storage options. Some cameras also offer advanced features like two-way audio, night vision, and pan-tilt-zoom capabilities.
It is important to keep the camera's firmware up to date to ensure optimal performance and security. Manufacturers often release firmware updates that fix bugs and vulnerabilities, so it is recommended to check for updates regularly.
In addition to the basic setup, you may also want to consider additional security measures. This can include setting up strong passwords for your camera and WiFi network, enabling encryption, and restricting access to the camera's feed.
Overall, installing a cloud WiFi camera involves creating an account and configuring the camera's settings. This process is usually straightforward and can be done through the manufacturer's website or mobile app.
