How To Install Home Cctv Camera ?
To install a home CCTV camera, start by selecting a suitable location for the camera that provides a clear view of the area you want to monitor. Next, mount the camera securely using the provided brackets or mounts. Ensure that the camera is positioned at the desired angle and height for optimal coverage.
Next, connect the camera to a power source using the provided power adapter or by wiring it directly to a power supply. If the camera is wireless, follow the manufacturer's instructions to connect it to your home Wi-Fi network.
Once the camera is powered on and connected, you may need to configure it using the manufacturer's software or mobile app. This typically involves creating an account, connecting the camera to your network, and adjusting settings such as motion detection or recording preferences.
Finally, test the camera to ensure it is functioning properly by monitoring the live feed or reviewing recorded footage. Adjust the camera's settings as needed to achieve the desired surveillance coverage.
1、 Camera Placement and Field of View
To install a home CCTV camera, you need to consider camera placement and field of view. Here's a step-by-step guide on how to install a home CCTV camera:
1. Determine the areas you want to monitor: Identify the vulnerable areas of your home that you want to keep an eye on. This could include entry points, driveways, or backyard.
2. Choose the right camera: Select a camera that suits your needs. Consider factors like resolution, night vision capabilities, and weather resistance.
3. Mount the camera: Install the camera at a height that provides a clear view of the area. Ensure it is securely mounted to prevent tampering or theft.
4. Adjust the field of view: Position the camera to cover the desired area. Adjust the camera angle and lens to achieve the desired field of view. Consider the camera's focal length and zoom capabilities to capture specific details.
5. Connect the camera: Connect the camera to a power source and ensure it is properly wired. If using a wireless camera, follow the manufacturer's instructions for connecting it to your home network.
6. Set up the recording system: Install a DVR (Digital Video Recorder) or NVR (Network Video Recorder) to store and manage the camera footage. Connect the camera to the recording system using cables or wirelessly.
7. Test the camera: Ensure the camera is functioning properly by testing the live feed and recording capabilities. Adjust the camera settings as needed.
8. Monitor the footage: Set up a monitor or connect to a mobile app to view the camera footage in real-time. Configure motion detection alerts to receive notifications when activity is detected.
Remember to check local regulations and laws regarding CCTV camera installation and privacy. Additionally, consider the latest advancements in CCTV technology, such as AI-powered cameras that offer enhanced features like facial recognition or smart home integration.
2、 Power and Connectivity Setup
Power and Connectivity Setup for installing a home CCTV camera is a crucial step to ensure the system functions properly. Here's a step-by-step guide on how to accomplish this task effectively.
1. Determine camera placement: Before starting the installation process, identify the areas where you want to install the CCTV cameras. Consider factors such as coverage, visibility, and accessibility.
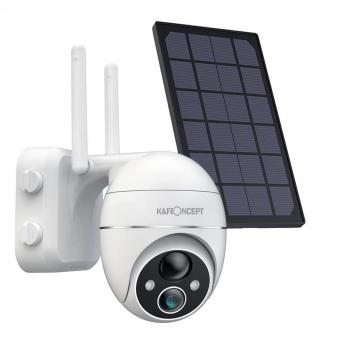
2. Power source: CCTV cameras require a power source to operate. You can choose between wired or wireless cameras. Wired cameras need to be connected to a power outlet using a power adapter and cable. Wireless cameras, on the other hand, are powered by batteries or solar panels.
3. Power cables: If you opt for wired cameras, measure the distance between the camera and the power outlet. Use appropriate power cables to connect the camera to the power source. Ensure the cables are hidden or protected to prevent tampering.
4. Connectivity: For remote monitoring, you need to connect the CCTV camera to a network. This can be done through Ethernet cables or wirelessly using Wi-Fi. Ensure the camera is compatible with your network setup and follow the manufacturer's instructions for connectivity.
5. Network configuration: Configure the camera's network settings according to your home network. This may involve assigning an IP address, setting up port forwarding, or configuring Wi-Fi settings. Refer to the camera's user manual or manufacturer's website for detailed instructions.
6. Test the setup: Once the power and connectivity are established, test the camera's functionality. Ensure the camera is capturing clear footage and transmitting it to your desired monitoring device, such as a computer or smartphone.
7. Additional considerations: Keep in mind the latest advancements in CCTV technology, such as cameras with built-in storage or cloud-based storage options. These can enhance the convenience and security of your home surveillance system.
Remember to prioritize privacy and security when installing CCTV cameras. Ensure the cameras are not invading anyone's privacy and take necessary precautions to protect the footage from unauthorized access.
3、 Mounting and Installation of the Camera
Mounting and installation of a home CCTV camera is a crucial step in ensuring the security and surveillance of your property. With advancements in technology, setting up a CCTV camera has become easier and more accessible for homeowners. Here is a step-by-step guide on how to install a home CCTV camera:
1. Determine the ideal location: Identify the areas you want to monitor and choose suitable locations for camera placement. Consider factors such as visibility, coverage, and accessibility to power sources.
2. Purchase the necessary equipment: Invest in a high-quality CCTV camera system that suits your needs. Ensure it includes cameras, cables, a digital video recorder (DVR), and power adapters.
3. Install the camera brackets: Use the provided brackets to mount the cameras securely. Ensure they are positioned at the desired angle and height for optimal coverage.
4. Connect the cables: Run the cables from the cameras to the DVR. Conceal the cables to prevent tampering or damage. If wireless cameras are being used, follow the manufacturer's instructions for installation.
5. Connect the DVR: Connect the cameras to the DVR using the provided cables. Ensure the connections are secure and properly aligned.
6. Power up the system: Connect the power adapters to the cameras and DVR. Ensure a stable power supply to avoid interruptions in surveillance.
7. Configure the system: Follow the manufacturer's instructions to set up the CCTV camera system. This may involve connecting to a monitor or a smartphone app for remote viewing.
8. Test the system: Verify that the cameras are functioning correctly by checking the live feed on the monitor or smartphone app. Adjust camera angles if necessary.
9. Secure the DVR: Place the DVR in a secure location to prevent unauthorized access. Consider using a lockbox or installing it in a hidden area.
10. Regular maintenance: Keep the cameras clean and free from obstructions. Regularly check the system for any issues and ensure the DVR's storage capacity is sufficient.
It is important to note that laws and regulations regarding CCTV camera installation may vary depending on your location. It is advisable to consult local authorities or seek professional assistance to ensure compliance with legal requirements.
In conclusion, mounting and installing a home CCTV camera involves careful planning, proper equipment, and attention to detail. By following these steps, you can enhance the security of your property and have peace of mind knowing that your home is under surveillance.
4、 Configuring the Camera Settings
To install a home CCTV camera, follow these steps:
1. Choose the right camera: Select a camera that suits your needs, such as a wired or wireless camera, indoor or outdoor camera, and one with the desired resolution and features.
2. Determine camera placement: Identify the areas you want to monitor and choose suitable locations for the cameras. Consider factors like visibility, coverage, and accessibility to power sources and cables.
3. Install the camera bracket: Use the provided bracket to mount the camera securely. Ensure it is positioned at the desired angle and direction for optimal coverage.
4. Connect the camera: If using a wired camera, run the cables from the camera to the recording device or monitor. For wireless cameras, follow the manufacturer's instructions to connect it to your Wi-Fi network.
5. Power the camera: Plug the camera into a power source. If using a wired camera, connect it to a power outlet using the provided power adapter. Wireless cameras may have built-in rechargeable batteries or require a separate power source.
6. Configure camera settings: Access the camera's settings through a computer or mobile app. Follow the manufacturer's instructions to set up features like motion detection, recording schedules, and remote access.
7. Test the camera: Ensure the camera is functioning properly by checking the live feed on your computer or mobile device. Adjust the camera's position or settings if necessary.
8. Secure the camera: Change the default password and enable encryption to protect your camera from unauthorized access. Regularly update the camera's firmware to ensure it has the latest security patches.
Remember to comply with local laws and regulations regarding CCTV camera installation and privacy. Additionally, consider consulting a professional if you are unsure about any aspect of the installation process.
