How To Install Outdoor Wifi Security Camera ?
To install an outdoor WiFi security camera, follow these general steps:
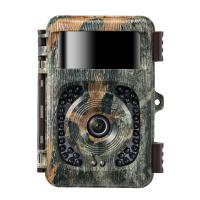
1. Choose the right camera: Select a camera that is specifically designed for outdoor use and has WiFi connectivity.
2. Determine camera placement: Identify the best location for the camera, considering factors like coverage area, line of sight, and power source availability.
3. Mount the camera: Use the provided mounting bracket or hardware to securely attach the camera to a wall, ceiling, or other suitable surface.
4. Connect to power: Ensure the camera is powered by either plugging it into an electrical outlet or using a battery, depending on the camera model.
5. Connect to WiFi: Follow the camera's instructions to connect it to your WiFi network. Typically, this involves accessing the camera's settings through a mobile app or web interface and entering your WiFi network details.
6. Adjust camera settings: Configure the camera settings, such as motion detection sensitivity, recording options, and notifications, according to your preferences.
7. Test and monitor: Verify that the camera is functioning properly by testing the live feed and reviewing recorded footage. Regularly monitor the camera's performance and make any necessary adjustments.
Note: The specific installation process may vary depending on the camera brand and model, so it's important to refer to the manufacturer's instructions for detailed guidance.
1、 Camera Placement: Choosing the optimal location for outdoor surveillance.
Camera Placement: Choosing the optimal location for outdoor surveillance.
When it comes to installing an outdoor WiFi security camera, one of the most crucial factors to consider is the camera placement. Choosing the optimal location for your camera will ensure maximum coverage and effectiveness in monitoring your property. Here are some key points to keep in mind:
1. Coverage Area: Before installing the camera, determine the specific areas you want to monitor. This could include entrances, driveways, or high-risk areas. Understanding the coverage area will help you decide the number and placement of cameras needed.
2. Height and Angle: Mount the camera at a height that provides a clear view of the desired area. A higher placement can help prevent tampering or vandalism. Additionally, consider the angle at which the camera is positioned. Aim for a downward angle to capture faces and activities more effectively.
3. Power and Connectivity: Ensure that the camera is within range of a power source and WiFi connectivity. This will ensure uninterrupted surveillance and prevent any potential blind spots.
4. Weatherproofing: Outdoor cameras should be weatherproof to withstand various weather conditions. Look for cameras with an IP rating of at least IP65, which indicates resistance to dust and water.
5. Lighting Conditions: Consider the lighting conditions in the area you want to monitor. If the area is poorly lit, choose a camera with night vision capabilities or install additional lighting to enhance visibility.
6. Privacy Considerations: Be mindful of privacy laws and regulations when placing your camera. Avoid pointing the camera towards areas where privacy is expected, such as neighboring properties or public spaces.
7. Regular Maintenance: Once the camera is installed, regularly check for any obstructions or changes in the environment that may affect its performance. Clean the lens periodically to ensure clear footage.
It is important to note that technology and best practices for camera placement are constantly evolving. Stay updated with the latest advancements and consult with professionals or manufacturers for specific recommendations based on your needs.
2、 Power and Connectivity: Ensuring proper power supply and internet connection.
Power and Connectivity: Ensuring proper power supply and internet connection.
When it comes to installing an outdoor WiFi security camera, one of the most crucial aspects to consider is power and connectivity. Without a reliable power supply and a stable internet connection, your camera will not be able to function effectively. Here are some steps to ensure proper power supply and internet connectivity for your outdoor WiFi security camera installation.
1. Power Source: Determine the power source for your camera. You can choose between wired or wireless options. If you opt for a wired camera, ensure that you have a nearby power outlet or consider hiring an electrician to install one. For wireless cameras, make sure you have a reliable power source such as a battery or solar panel.
2. Internet Connection: Check the strength and stability of your WiFi signal in the area where you plan to install the camera. Weak or intermittent signals can affect the camera's performance. Consider using a WiFi range extender or a mesh network system to improve connectivity.
3. Network Security: Protect your camera and network from unauthorized access by setting up strong passwords and enabling encryption. Regularly update your camera's firmware to ensure it has the latest security patches.
4. Weatherproofing: Outdoor cameras are exposed to various weather conditions, so it's essential to choose a camera that is specifically designed for outdoor use. Ensure that the camera is weatherproof and can withstand rain, snow, and extreme temperatures.
5. Mounting and Positioning: Properly mount and position the camera to get the best coverage of the area you want to monitor. Consider factors such as the camera's field of view, angle, and height for optimal surveillance.
6. Regular Maintenance: Regularly check the camera's power supply, internet connection, and overall performance. Clean the lens and housing to ensure clear footage.
In conclusion, ensuring a proper power supply and internet connection is crucial for the installation of an outdoor WiFi security camera. By following these steps, you can ensure that your camera functions effectively and provides reliable surveillance for your outdoor space.

3、 Mounting and Installation: Securing the camera in the desired position.
Mounting and Installation: Securing the camera in the desired position.
Installing an outdoor WiFi security camera is a great way to enhance the security of your property. With advancements in technology, these cameras have become more accessible and easier to install. Here is a step-by-step guide on how to install an outdoor WiFi security camera.
1. Choose the right location: Before installing the camera, carefully select the location where you want to mount it. Consider areas that provide a wide field of view and cover the most vulnerable areas of your property. Ensure that the camera is placed high enough to avoid tampering but low enough to capture clear footage.
2. Check the WiFi signal strength: Before mounting the camera, check the WiFi signal strength in the chosen location. A weak signal can result in poor video quality or intermittent connectivity. If the signal is weak, consider installing a WiFi extender or a mesh network system to improve the coverage.
3. Mount the camera: Once you have chosen the location and checked the WiFi signal strength, it's time to mount the camera. Most outdoor WiFi security cameras come with mounting brackets and screws. Follow the manufacturer's instructions to securely attach the camera to the desired position. Ensure that the camera is properly aligned and tightened to avoid any movement or misalignment.
4. Connect the camera to power: Outdoor WiFi security cameras require a power source to operate. Depending on the camera model, you may need to connect it to a power outlet or use a power over Ethernet (PoE) adapter. Follow the manufacturer's instructions to connect the camera to power.
5. Connect the camera to your WiFi network: Once the camera is mounted and powered, you need to connect it to your WiFi network. Most cameras have a companion mobile app or software that guides you through the setup process. Follow the instructions to connect the camera to your WiFi network and configure any additional settings, such as motion detection or recording schedules.
6. Test the camera: After completing the setup, it's essential to test the camera to ensure it is functioning correctly. Check the live feed on your mobile device or computer to verify the video quality and coverage. Adjust the camera's position if necessary to optimize the view.
7. Secure the camera: Lastly, it's crucial to secure the camera to prevent theft or tampering. Consider using tamper-proof screws or installing a protective housing around the camera. Additionally, ensure that the camera is not easily accessible to potential intruders.
In conclusion, mounting and securing an outdoor WiFi security camera is a crucial step in enhancing the security of your property. By carefully selecting the location, ensuring a strong WiFi signal, and following the manufacturer's instructions, you can install the camera effectively. Regularly check the camera's functionality and take necessary precautions to protect it from theft or tampering.
4、 Network Configuration: Setting up the camera on your Wi-Fi network.
Installing an outdoor Wi-Fi security camera is a great way to enhance the security of your property. To ensure a successful installation, follow these steps:
1. Choose the right camera: Select a camera that is specifically designed for outdoor use and has the features you need, such as night vision, motion detection, and weather resistance.
2. Determine the camera's location: Find the optimal spot to mount the camera, considering factors like the area you want to monitor and the Wi-Fi signal strength in that area.
3. Mount the camera: Use the provided mounting bracket and screws to securely attach the camera to a wall or other suitable surface. Ensure that the camera is positioned at the desired angle and offers a clear view of the area.
4. Network Configuration: Setting up the camera on your Wi-Fi network is crucial for remote access and monitoring. Follow the manufacturer's instructions to connect the camera to your Wi-Fi network. This typically involves using a mobile app or a web interface to scan for available networks, entering your Wi-Fi credentials, and establishing a connection.
5. Test the connection: Once the camera is connected to your Wi-Fi network, verify the connection by accessing the camera's live feed on your smartphone or computer. Ensure that the video quality is satisfactory and that you can receive motion alerts if applicable.
6. Secure your camera: Change the default username and password for the camera's admin account to prevent unauthorized access. Additionally, consider enabling encryption and two-factor authentication for added security.
7. Regular maintenance: Keep the camera's firmware up to date to ensure optimal performance and security. Regularly check the camera's positioning and clean the lens to maintain clear video footage.
Remember to check local regulations regarding the use of outdoor security cameras, as there may be restrictions on where and how they can be installed.
