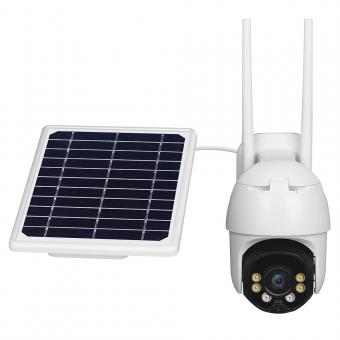
How To Install Ptz Wireless Network Camera ?
To install a PTZ wireless network camera, follow these steps:
1. Choose a location for the camera that provides a good view of the area you want to monitor.
2. Mount the camera securely using the included mounting hardware.
3. Connect the camera to power using the included power adapter.
4. Connect the camera to your wireless network using the included instructions and software.
5. Configure the camera settings, such as resolution, frame rate, and motion detection, using the included software or web interface.
6. Test the camera to ensure it is working properly and adjust the settings as needed.
It is important to follow the manufacturer's instructions carefully to ensure proper installation and operation of the camera. Additionally, it is recommended to use strong passwords and enable encryption to protect the camera and your network from unauthorized access.
1、 Determine camera placement and power source
"How to install PTZ wireless network camera" involves several steps, and one of the most important steps is to determine the camera placement and power source. This step is crucial because it will determine the effectiveness of the camera in capturing footage and the reliability of the power source.
To determine the camera placement, you need to identify the areas that require surveillance and the best angle to capture the footage. You should also consider the distance between the camera and the wireless network to ensure a stable connection. It is recommended to place the camera in a high location to get a wider view and avoid obstructions.
Once you have identified the camera placement, you need to determine the power source. PTZ wireless network cameras can be powered by either a power adapter or a PoE (Power over Ethernet) switch. If you choose to use a power adapter, ensure that the power source is close to the camera to avoid cable length limitations. On the other hand, if you choose to use a PoE switch, ensure that the switch is compatible with the camera and has enough power to support it.
It is also important to consider the latest point of view when installing a PTZ wireless network camera. With advancements in technology, some cameras come with features such as motion detection, night vision, and remote access. These features can enhance the effectiveness of the camera and provide better surveillance.
In conclusion, determining the camera placement and power source is a crucial step when installing a PTZ wireless network camera. It ensures that the camera captures footage effectively and has a reliable power source. With the latest advancements in technology, it is important to consider the latest point of view when installing the camera to enhance its effectiveness.
2、 Connect camera to wireless network
How to install PTZ wireless network camera:
1. Choose a suitable location for the camera: The first step is to choose a suitable location for the camera. It should be placed in a location that provides a clear view of the area you want to monitor.
2. Mount the camera: Once you have chosen the location, mount the camera using the mounting bracket that comes with it. Make sure it is securely attached to the wall or ceiling.
3. Connect the camera to power: Connect the camera to a power source using the power adapter that comes with it.
4. Connect the camera to the network: Connect the camera to your wireless network using the instructions provided in the user manual. This usually involves entering your network name and password.
5. Configure the camera: Once the camera is connected to the network, you can configure it using the software provided by the manufacturer. This will allow you to adjust settings such as motion detection, recording schedules, and image quality.
6. Test the camera: Once the camera is configured, test it to make sure it is working properly. You can do this by accessing the camera's live feed from a computer or mobile device.
Connect camera to wireless network:
1. Connect the camera to power: Connect the camera to a power source using the power adapter that comes with it.
2. Connect the camera to your router: Connect the camera to your router using an Ethernet cable. This will allow the camera to communicate with your network.
3. Configure the camera: Once the camera is connected to the network, you can configure it using the software provided by the manufacturer. This will allow you to adjust settings such as motion detection, recording schedules, and image quality.
4. Connect to the camera wirelessly: Once the camera is configured, you can disconnect the Ethernet cable and connect to the camera wirelessly using the instructions provided in the user manual.
5. Test the camera: Once the camera is connected wirelessly, test it to make sure it is working properly. You can do this by accessing the camera's live feed from a computer or mobile device.
It is important to note that the specific steps for installing and connecting a PTZ wireless network camera may vary depending on the manufacturer and model. It is always recommended to refer to the user manual for detailed instructions. Additionally, some cameras may require additional setup steps such as port forwarding or configuring a static IP address.
3、 Configure camera settings and IP address
How to install PTZ wireless network camera:
1. Choose a suitable location for the camera: The first step is to choose a suitable location for the camera. It should be placed in a location that provides a clear view of the area you want to monitor.
2. Mount the camera: Once you have chosen the location, mount the camera using the appropriate mounting hardware. Make sure the camera is securely mounted and is pointing in the right direction.
3. Connect the camera to power: Connect the camera to a power source using the power adapter that came with the camera.
4. Connect the camera to the network: Connect the camera to your wireless network using the instructions provided by the manufacturer. This usually involves entering your network name and password.
5. Configure camera settings and IP address: Once the camera is connected to the network, you need to configure its settings and IP address. This can be done using the camera's web interface or software provided by the manufacturer. You will need to set the camera's IP address, subnet mask, gateway, and DNS settings.
6. Test the camera: Once the camera is configured, test it to make sure it is working properly. You can do this by accessing the camera's web interface or using the manufacturer's software.
7. Set up remote access: If you want to access the camera remotely, you will need to set up remote access. This usually involves setting up port forwarding on your router and configuring the camera's settings to allow remote access.
In conclusion, installing a PTZ wireless network camera involves choosing a suitable location, mounting the camera, connecting it to power and the network, configuring its settings and IP address, testing it, and setting up remote access if necessary. It is important to follow the manufacturer's instructions carefully to ensure the camera is installed and configured correctly.

4、 Install camera mounting bracket
How to install PTZ wireless network camera:
1. Choose the location: First, choose the location where you want to install the PTZ wireless network camera. Make sure that the location is suitable for the camera's range and angle of view.
2. Mount the camera: Once you have chosen the location, mount the camera using the camera mounting bracket. The bracket should be securely attached to the wall or ceiling using screws and anchors.
3. Connect the camera: After mounting the camera, connect it to the power source and the network. The camera should come with a power adapter and an Ethernet cable. Connect the power adapter to the camera and plug it into an electrical outlet. Then, connect the Ethernet cable to the camera and to your router or switch.
4. Configure the camera: Once the camera is connected to the network, you need to configure it. You can do this by accessing the camera's web interface using a web browser. Enter the camera's IP address in the address bar of your browser and log in using the default username and password.
5. Set up the PTZ function: If your camera has PTZ (pan-tilt-zoom) function, you need to set it up. This can be done through the camera's web interface. You can adjust the camera's pan, tilt, and zoom settings to get the best view.
6. Test the camera: After configuring the camera, test it to make sure it is working properly. You can do this by accessing the camera's live view through the web interface or using a mobile app.
Install camera mounting bracket:
1. Choose the location: First, choose the location where you want to install the camera mounting bracket. Make sure that the location is suitable for the camera's range and angle of view.
2. Mark the holes: Once you have chosen the location, mark the holes for the screws. Use a pencil or a marker to mark the holes on the wall or ceiling.
3. Drill the holes: After marking the holes, drill them using a drill bit that is suitable for the type of wall or ceiling you are mounting the bracket on.
4. Insert the anchors: Once the holes are drilled, insert the anchors into the holes. Make sure that the anchors are flush with the wall or ceiling.
5. Attach the bracket: After inserting the anchors, attach the bracket to the wall or ceiling using screws. Make sure that the bracket is securely attached to the wall or ceiling.
6. Mount the camera: Once the bracket is attached, mount the camera on the bracket using the screws that came with the camera. Make sure that the camera is securely attached to the bracket and that it is level.
7. Adjust the angle: After mounting the camera, adjust the angle to get the best view. You can do this by loosening the screws on the bracket and adjusting the angle of the camera. Once you have the desired angle, tighten the screws to secure the camera in place.
