How To Install Security Cameras Outdoor ?
To install security cameras outdoors, follow these general steps:
1. Choose the right cameras: Select weatherproof cameras designed for outdoor use. Consider factors like resolution, night vision, and field of view.
2. Determine camera locations: Identify areas that require surveillance and decide where to mount the cameras. Consider factors like coverage, accessibility, and power source availability.
3. Install mounting brackets: Use appropriate brackets to securely attach the cameras to walls, ceilings, or other surfaces. Ensure they are positioned at the desired angle and provide a clear view.
4. Run cables: Connect the cameras to a power source and a recording device or monitor. Use weatherproof cables and conduits to protect the wiring from the elements.
5. Adjust camera settings: Configure camera settings such as motion detection, recording modes, and image quality according to your preferences.
6. Test the system: Verify that the cameras are functioning properly by checking the live feed and reviewing recorded footage.
7. Maintain and monitor: Regularly clean the cameras, check connections, and ensure they are working correctly. Monitor the system for any issues or suspicious activities.
Note: It is recommended to consult the specific installation instructions provided by the manufacturer for your security camera model.
1、 Camera Placement: Optimal locations for outdoor security camera installation.
Camera Placement: Optimal locations for outdoor security camera installation.
Installing security cameras outdoors is an effective way to enhance the safety and security of your property. However, it is crucial to ensure that the cameras are strategically placed to maximize their effectiveness. Here are some optimal locations for outdoor security camera installation:
1. Entry Points: Install cameras near all entry points, such as doors, windows, and garage doors. This will help capture any suspicious activity or potential break-ins.
2. Perimeter Coverage: Place cameras along the perimeter of your property to monitor any unauthorized access or trespassing. This includes areas such as fences, gates, and driveways.
3. Backyard and Patio: If you have a backyard or patio, consider installing cameras to monitor these areas. This can help deter burglars and provide evidence in case of any incidents.
4. High-traffic Areas: Identify high-traffic areas on your property, such as walkways or parking lots, and install cameras to monitor these areas. This can help capture any suspicious behavior or potential threats.
5. Blind Spots: Identify any blind spots or areas with limited visibility on your property and install cameras to cover these areas. This will help eliminate any potential hiding spots for intruders.
6. Height and Angle: Mount the cameras at a height and angle that provides a clear view of the area you want to monitor. This will ensure that the cameras capture high-quality footage and minimize any obstructions.
7. Weatherproofing: Ensure that the cameras you choose are weatherproof and can withstand outdoor conditions. This will ensure their durability and longevity.
8. Lighting: Consider the lighting conditions in the areas where you plan to install the cameras. If the area is poorly lit, consider installing cameras with built-in infrared or night vision capabilities.
It is important to note that the optimal camera placement may vary depending on the layout and specific security needs of your property. Consulting with a professional security camera installer can provide you with expert advice tailored to your specific requirements.
In conclusion, installing security cameras outdoors requires careful consideration of camera placement. By strategically placing cameras at entry points, along the perimeter, in high-traffic areas, and in blind spots, you can maximize the effectiveness of your security system. Additionally, ensuring that the cameras are weatherproof and properly positioned at the right height and angle will help capture clear footage. Stay up to date with the latest advancements in security camera technology to make informed decisions about your outdoor security camera installation.
2、 Weatherproofing: Ensuring cameras are protected from outdoor elements.
Installing security cameras outdoors is an essential step in ensuring the safety and security of your property. However, it is crucial to weatherproof these cameras to protect them from outdoor elements. Here's a step-by-step guide on how to install security cameras outdoors and weatherproof them effectively.
1. Choose the right camera: Select a camera specifically designed for outdoor use. Look for features like weatherproof housing and an IP rating of at least IP65, which ensures protection against dust and water.
2. Determine the camera placement: Identify the areas you want to monitor and choose suitable locations for camera installation. Consider factors like the field of view, lighting conditions, and accessibility for maintenance.
3. Mount the cameras: Use sturdy mounting brackets to secure the cameras in the chosen locations. Ensure they are installed at the right height and angle for optimal coverage.
4. Run the cables: Connect the cameras to a power source and a recording device. Use weatherproof cables and conduit to protect the wiring from moisture and other outdoor elements.
5. Weatherproof the connections: Seal all cable connections with waterproof connectors or silicone sealant to prevent water damage. This step is crucial to ensure the longevity of your cameras.
6. Protect against vandalism: Consider installing cameras with vandal-proof features, such as impact-resistant housing or dome covers, to deter potential tampering or damage.
7. Regular maintenance: Inspect the cameras periodically to ensure they are functioning properly. Clean the lenses and check for any signs of damage or wear.
The latest point of view in outdoor camera installation emphasizes the use of advanced technology, such as wireless cameras or cameras with built-in Wi-Fi capabilities. These options eliminate the need for extensive wiring and make installation easier. Additionally, some cameras now come with advanced weatherproofing features, such as built-in heaters or cooling systems, to withstand extreme temperatures.
In conclusion, installing security cameras outdoors is a crucial step in protecting your property. By following these steps and considering the latest advancements in technology, you can ensure that your cameras are effectively weatherproofed and provide reliable surveillance for years to come.
3、 Power Source: Options for powering outdoor security cameras.
Power Source: Options for powering outdoor security cameras
When it comes to installing security cameras outdoors, one of the crucial aspects to consider is the power source. Without a reliable power supply, your cameras won't be able to function effectively. Here are some options for powering outdoor security cameras:
1. Wired Power: This is the most traditional and reliable method of powering outdoor cameras. It involves running power cables from an electrical outlet to each camera. While this method ensures a constant power supply, it can be challenging to conceal the cables and may require professional installation.
2. Battery-Powered: Battery-powered cameras are becoming increasingly popular due to their flexibility and ease of installation. These cameras are equipped with rechargeable batteries that can last for several months. They are wireless, making them easy to install and move around. However, you need to regularly recharge or replace the batteries, which can be inconvenient.
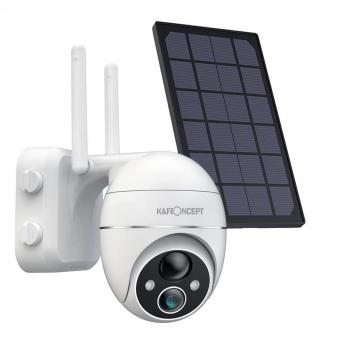
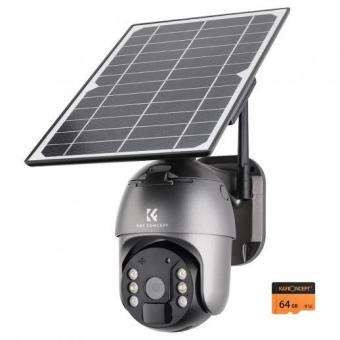
3. Solar-Powered: Solar-powered cameras are an eco-friendly option that harnesses energy from the sun to power the cameras. They come with built-in solar panels that charge the batteries during the day, ensuring continuous operation. This option is ideal for remote locations or areas with limited access to electricity. However, they may not be suitable for regions with limited sunlight or during cloudy days.
4. PoE (Power over Ethernet): PoE cameras use a single Ethernet cable to transmit both power and data. This method eliminates the need for separate power cables, simplifying installation. PoE cameras require a PoE switch or injector to provide power, and they are best suited for locations with existing Ethernet infrastructure.
It's important to choose a power source that suits your specific needs and location. Consider factors such as accessibility, reliability, and convenience when deciding on the best option for powering your outdoor security cameras.
4、 Connectivity: Establishing a reliable connection for remote monitoring.
Connectivity: Establishing a reliable connection for remote monitoring
When it comes to installing security cameras outdoors, ensuring a reliable connection for remote monitoring is crucial. Here's a step-by-step guide on how to achieve this:
1. Determine the camera placement: Start by identifying the areas you want to monitor and choose suitable locations for your cameras. Consider factors like coverage, visibility, and potential obstructions.
2. Select the right cameras: Opt for outdoor cameras specifically designed to withstand harsh weather conditions. Look for features like weatherproofing, night vision, and high-resolution capabilities.
3. Choose a network connection: Decide whether you want to connect your cameras via Wi-Fi or Ethernet. Wi-Fi offers flexibility but may be subject to signal interference, while Ethernet provides a more stable connection.
4. Set up a network video recorder (NVR): An NVR acts as a central hub for your security cameras. Connect it to your router using an Ethernet cable and ensure it has sufficient storage capacity for recording footage.
5. Connect the cameras: If using Wi-Fi, follow the manufacturer's instructions to connect each camera to your home network. If using Ethernet, run cables from each camera to the NVR.
6. Test the connection: Once all cameras are connected, test the connection by accessing the live feed remotely. Ensure the video quality is satisfactory and there are no connectivity issues.
7. Enhance connectivity: To improve connectivity, consider the following options:
- Position your router closer to the cameras or use Wi-Fi extenders to boost the signal.
- Use Power over Ethernet (PoE) technology to provide both power and data transmission over a single Ethernet cable.
- Invest in a mesh Wi-Fi system to create a strong and reliable network throughout your property.
8. Regular maintenance: Periodically check the cameras and connections to ensure they are functioning properly. Clean the lenses, update firmware, and replace any faulty equipment as needed.
In today's digital age, remote monitoring is an essential aspect of security camera installations. By following these steps and considering the latest advancements in connectivity technology, you can establish a reliable connection for seamless remote monitoring of your outdoor security cameras.
