How To Install Wifi Cctv Camera At Home ?
To install a WiFi CCTV camera at home, follow these steps:
1. Choose a location: Decide where you want to install the camera. It should be placed in a location that provides a clear view of the area you want to monitor.
2. Install the camera bracket: Use the screws and brackets provided with the camera to mount it on the wall or ceiling.
3. Connect the camera to power: Plug the camera into a power outlet using the power adapter provided.
4. Connect the camera to WiFi: Follow the instructions provided with the camera to connect it to your home WiFi network.
5. Install the camera app: Download and install the camera app on your smartphone or tablet.
6. Configure the camera: Use the app to configure the camera settings, such as motion detection, recording schedule, and alerts.
7. Test the camera: Make sure the camera is working properly by checking the live feed on your smartphone or tablet.
8. Secure the camera: Change the default password and enable two-factor authentication to secure the camera from unauthorized access.
9. Monitor the camera: Use the app to monitor the camera feed and receive alerts when motion is detected.
1、 Selecting a suitable location for the camera
Selecting a suitable location for the camera is crucial when installing a WiFi CCTV camera at home. The location should provide a clear view of the area you want to monitor. It should also be out of reach of potential intruders to prevent tampering or damage to the camera.
One of the latest points of view when selecting a location for the camera is to consider the lighting conditions. If the area is poorly lit, it may be difficult for the camera to capture clear footage. Therefore, it is recommended to install the camera in a well-lit area or use a camera with night vision capabilities.
Another important factor to consider is the WiFi signal strength. The camera should be placed in an area where it can receive a strong and stable WiFi signal. This will ensure that the camera can transmit footage to your device without interruption.
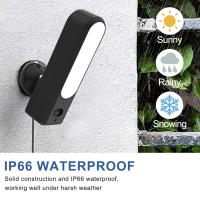
It is also important to consider the weather conditions in your area. If you live in an area with extreme weather conditions, such as heavy rain or snow, it is recommended to install the camera in a weatherproof housing to protect it from damage.
In summary, selecting a suitable location for your WiFi CCTV camera is crucial for effective monitoring. Consider the lighting conditions, WiFi signal strength, and weather conditions in your area when selecting a location for the camera.
2、 Connecting the camera to a power source
How to install wifi CCTV camera at home? The first step is to choose the right camera for your needs. Once you have selected the camera, the next step is to connect it to a power source. This can be done by plugging the camera into a power outlet or by using a power adapter.
It is important to ensure that the camera is placed in a location where it can get a good wifi signal. This will ensure that the camera can transmit the video feed to your smartphone or computer without any interruptions.
Once the camera is connected to a power source, you will need to download the app that is associated with the camera. This app will allow you to view the video feed from the camera on your smartphone or computer.
After downloading the app, you will need to follow the instructions to connect the camera to your wifi network. This will involve entering the wifi network name and password into the app.
Once the camera is connected to your wifi network, you can start using it to monitor your home. You can set up alerts to notify you when the camera detects motion or sound, and you can also view the video feed in real-time.
In conclusion, installing a wifi CCTV camera at home is a simple process that can be done by anyone. By following the steps outlined above, you can ensure that your home is secure and that you can monitor it from anywhere using your smartphone or computer.

3、 Connecting the camera to a Wi-Fi network
To install a WiFi CCTV camera at home, you need to follow a few simple steps. The first step is to choose the right camera for your needs. There are many different types of WiFi CCTV cameras available, so it's important to choose one that suits your specific requirements.
Once you have chosen your camera, the next step is to connect it to your home WiFi network. This can usually be done by following the instructions provided with the camera. Most cameras will require you to download an app to your smartphone or tablet, which will guide you through the setup process.
Connecting the camera to a Wi-Fi network is a crucial step in the installation process. This will allow you to access the camera remotely from your smartphone or tablet, so you can monitor your home from anywhere in the world. It's important to ensure that your WiFi network is secure, as this will help to prevent unauthorized access to your camera.
Once your camera is connected to your WiFi network, you can start using it to monitor your home. You can set up alerts to notify you when motion is detected, and you can view live footage from the camera at any time. Some cameras also come with additional features, such as night vision and two-way audio, which can be useful for monitoring your home in different situations.
In conclusion, installing a WiFi CCTV camera at home is a simple process that can provide you with peace of mind and added security. By following the steps outlined above, you can easily connect your camera to your WiFi network and start monitoring your home from anywhere in the world.
4、 Configuring camera settings and accessing the live feed
How to install wifi CCTV camera at home:
1. Choose the right camera: Before installing a wifi CCTV camera, it is important to choose the right camera that suits your needs. Consider factors such as resolution, field of view, and night vision capabilities.
2. Install the camera: Once you have chosen the right camera, it is time to install it. Follow the manufacturer's instructions carefully to ensure that the camera is installed correctly.
3. Connect the camera to your wifi network: Most wifi CCTV cameras require a wifi connection to function. Follow the manufacturer's instructions to connect the camera to your wifi network.
4. Configure camera settings: Once the camera is connected to your wifi network, you can configure its settings. This includes setting up motion detection, adjusting the camera's field of view, and setting up alerts.
5. Access the live feed: Once the camera is installed and configured, you can access the live feed from your smartphone or computer. Most wifi CCTV cameras come with a mobile app that allows you to view the live feed from anywhere.
Configuring camera settings and accessing the live feed:
Configuring camera settings is an important step in setting up a wifi CCTV camera. This includes setting up motion detection, adjusting the camera's field of view, and setting up alerts. It is important to configure these settings carefully to ensure that the camera is functioning correctly.
Accessing the live feed is also an important step in setting up a wifi CCTV camera. Most wifi CCTV cameras come with a mobile app that allows you to view the live feed from anywhere. This is a convenient feature that allows you to keep an eye on your home or business from anywhere in the world.
In conclusion, installing a wifi CCTV camera at home is a great way to enhance your home security. By following the steps outlined above, you can install and configure a wifi CCTV camera in no time. Remember to choose the right camera, install it correctly, configure its settings, and access the live feed from your smartphone or computer.










There are no comments for this blog.