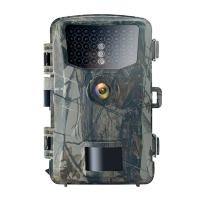
How To Install Wifi Doorbell Camera ?
To install a WiFi doorbell camera, follow these general steps:
1. Choose a suitable location: Select a spot near your front door that provides a clear view of the area you want to monitor.
2. Check compatibility: Ensure that your WiFi doorbell camera is compatible with your smartphone or other devices.
3. Install the mounting bracket: Use the provided screws and a drill to attach the mounting bracket to the wall or door frame.
4. Connect the wires: Follow the manufacturer's instructions to connect the camera's wires to your existing doorbell wiring.
5. Connect to WiFi: Use the camera's mobile app to connect it to your home's WiFi network.
6. Test the camera: Once connected, test the camera to ensure it is functioning properly and capturing the desired footage.
7. Adjust settings: Customize the camera's settings, such as motion detection sensitivity and notification preferences, through the mobile app.
8. Mount the camera: Attach the camera unit to the mounting bracket securely.
9. Secure the camera: Ensure that the camera is properly secured and protected from weather elements.
10. Monitor remotely: Download the camera's mobile app on your smartphone to monitor and control the camera remotely.
Remember to consult the specific installation instructions provided by the manufacturer of your WiFi doorbell camera for detailed guidance.
1、 Selecting a suitable wifi doorbell camera model for installation.
Selecting a suitable wifi doorbell camera model for installation is the first step towards enhancing the security of your home. With the advancement in technology, there are numerous options available in the market, each offering unique features and capabilities. Here are a few factors to consider when choosing a wifi doorbell camera:
1. Video Quality: Look for a camera that offers high-definition video quality, preferably with night vision capabilities. This ensures clear footage, even in low-light conditions.
2. Two-Way Audio: A wifi doorbell camera with two-way audio allows you to communicate with visitors at your doorstep, providing an added layer of convenience and security.
3. Motion Detection: Opt for a camera that has reliable motion detection capabilities. This feature alerts you whenever someone approaches your door, allowing you to monitor any suspicious activity.
4. Cloud Storage: Consider a camera that offers cloud storage for video recordings. This ensures that you have access to footage even if the camera is tampered with or stolen.
5. Compatibility: Ensure that the camera you choose is compatible with your existing wifi network and smartphone operating system. This will make the installation and integration process much smoother.
Once you have selected a suitable wifi doorbell camera, the next step is to install it. Here is a general guide on how to install a wifi doorbell camera:
1. Read the manufacturer's instructions carefully before starting the installation process.
2. Ensure that your wifi network is working properly and has a strong signal strength at the location where you plan to install the camera.
3. Mount the camera on the designated spot near your front door, following the manufacturer's instructions.
4. Connect the camera to your wifi network using the provided app or software. This usually involves scanning a QR code or entering your wifi network credentials.
5. Test the camera by ringing the doorbell and checking if the video feed and audio are working properly on your smartphone or other connected devices.
6. Adjust the camera settings as per your preferences, such as motion detection sensitivity, notification preferences, and video recording options.
7. Consider adding additional security measures, such as setting up a password or PIN for accessing the camera's settings and video feed.
Remember to regularly update the camera's firmware to ensure that you have the latest security patches and features. Additionally, it is important to periodically check the camera's performance and make any necessary adjustments to optimize its functionality.
In conclusion, selecting a suitable wifi doorbell camera model and following the manufacturer's instructions for installation are crucial steps in enhancing the security of your home. With the right camera and proper installation, you can have peace of mind knowing that you have an extra layer of protection for your property.
2、 Preparing the necessary tools and equipment for installation.
Preparing the necessary tools and equipment for installation is an essential step when installing a WiFi doorbell camera. This ensures that you have everything you need to complete the installation process smoothly. Here is a step-by-step guide on how to prepare for the installation:
1. Read the instruction manual: Start by carefully reading the instruction manual provided with your WiFi doorbell camera. This will give you a clear understanding of the installation process and any specific tools or equipment required.
2. Gather the tools: Based on the manufacturer's recommendations, gather the necessary tools and equipment. Typically, you will need a screwdriver (usually Phillips or flathead), a drill with appropriate drill bits, screws, a level, and a ladder if needed.
3. Check the compatibility: Ensure that your WiFi doorbell camera is compatible with your existing doorbell wiring or power source. If not, you may need additional equipment such as a power adapter or transformer.
4. Test your WiFi signal: Before installation, check the WiFi signal strength near your doorbell location. This will help ensure a stable connection for your doorbell camera. If the signal is weak, consider installing a WiFi extender or relocating your router.
5. Prepare the doorbell area: Clean the area around your doorbell and ensure it is free from any obstructions. This will provide a clear space for installation and prevent any interference with the camera's field of view.
6. Charge the doorbell camera: If your WiFi doorbell camera is battery-powered, make sure it is fully charged before installation. This will ensure uninterrupted operation once installed.
By following these steps and preparing the necessary tools and equipment, you will be well-prepared to install your WiFi doorbell camera. Remember to always prioritize safety and consult the manufacturer's instructions for any specific requirements or recommendations.
3、 Mounting the doorbell camera securely on the desired location.
To install a WiFi doorbell camera, the first step is to choose the desired location for mounting. It is important to select a spot that provides a clear view of the area you want to monitor, such as the front door or driveway. Additionally, ensure that the location is within range of your WiFi network for a strong and reliable connection.
Once you have chosen the location, follow these steps to securely mount the doorbell camera:
1. Prepare the mounting area: Clean the surface where you plan to install the camera. Ensure it is free from dust, dirt, and any other debris that may affect the adhesive or screws.
2. Attach the mounting bracket: Most WiFi doorbell cameras come with a mounting bracket. Use screws or adhesive to securely attach the bracket to the chosen location. Make sure it is level and stable.
3. Connect the camera: Depending on the model, you may need to connect the camera to a power source. Some doorbell cameras are battery-powered, while others require a wired connection. Follow the manufacturer's instructions for proper installation.
4. Adjust the camera angle: Once the camera is securely mounted, adjust the angle to ensure it captures the desired view. Most doorbell cameras allow for vertical and horizontal adjustments, so you can position it to your liking.
5. Connect to WiFi: Follow the instructions provided by the manufacturer to connect the doorbell camera to your WiFi network. This usually involves downloading a mobile app and following the setup process.
6. Test the camera: After the installation is complete, test the camera to ensure it is functioning properly. Check the live feed, motion detection, and any other features to ensure everything is working as expected.
It is worth noting that technology is constantly evolving, and new advancements in WiFi doorbell cameras may introduce additional installation steps or features. Always refer to the manufacturer's instructions for the most up-to-date information.
4、 Connecting the doorbell camera to your home's wifi network.
To install a WiFi doorbell camera, you need to follow a few simple steps. Here's a step-by-step guide on how to do it:
1. Choose the right location: Select a suitable spot near your front door where the camera can capture a clear view of visitors. Ensure that it is within range of your WiFi network.
2. Mount the doorbell camera: Use the provided screws and mounting bracket to securely attach the camera to your door frame or wall. Make sure it is level and stable.
3. Power up the camera: Most WiFi doorbell cameras are powered by batteries or wired to your existing doorbell wiring. Follow the manufacturer's instructions to connect the camera to a power source.
4. Download the app: Search for the manufacturer's app on your smartphone's app store and download it. Create an account if required.
5. Connect to WiFi: Open the app and follow the on-screen instructions to connect the doorbell camera to your home's WiFi network. You may need to enter your WiFi password.
6. Test the connection: Once connected, test the camera by pressing the doorbell button or triggering the motion sensor. Check if the live video feed is displayed on your smartphone.
7. Customize settings: Explore the app's settings to adjust motion detection sensitivity, notification preferences, and other features according to your preferences.
It's worth noting that the installation process may vary slightly depending on the brand and model of your WiFi doorbell camera. Always refer to the manufacturer's instructions for specific guidance.
In recent years, WiFi doorbell cameras have become increasingly popular due to their convenience and added security. They allow homeowners to monitor their front door remotely, receive notifications when someone is at the door, and even communicate with visitors through two-way audio. Some advanced models even offer facial recognition and cloud storage options for added convenience and peace of mind.
