How To Install Wireless Surveillance Cameras ?
To install wireless surveillance cameras, first, determine the desired locations for the cameras and ensure they have a clear line of sight to the areas you want to monitor. Next, mount the cameras securely using the provided brackets or mounts. Make sure they are positioned at the desired angle and height for optimal coverage.
Next, connect the cameras to a power source. Wireless cameras typically require a power adapter or batteries. Ensure the power source is reliable and accessible.
Then, connect the cameras to your wireless network. Follow the manufacturer's instructions to connect each camera to your Wi-Fi network. This usually involves accessing the camera's settings through a mobile app or web interface and entering your network credentials.
Once connected, configure the camera settings according to your preferences. This may include adjusting motion detection sensitivity, setting up recording schedules, or enabling remote access.
Finally, test the cameras to ensure they are functioning properly. Monitor the camera feeds on your smartphone, computer, or a dedicated monitor to verify the video quality and coverage.
Remember to consult the specific instructions provided by the camera manufacturer for detailed installation steps and troubleshooting tips.
1、 Camera Placement: Choosing optimal locations for surveillance camera installation.
Camera Placement: Choosing optimal locations for surveillance camera installation.
Installing wireless surveillance cameras can greatly enhance the security of your property. However, it is crucial to choose the optimal locations for camera placement to ensure maximum coverage and effectiveness. Here are some key factors to consider when installing wireless surveillance cameras:
1. Identify vulnerable areas: Assess your property to determine the areas that are most susceptible to break-ins or unauthorized access. These may include entry points such as doors, windows, and gates, as well as blind spots or secluded areas.
2. Coverage range: Consider the range of the wireless cameras and ensure that they can cover the desired areas effectively. Take into account any obstacles such as walls or trees that may interfere with the signal strength.
3. Height and angle: Mount the cameras at an appropriate height and angle to capture clear and comprehensive footage. Aim for a height that is out of reach but still provides a wide field of view. Adjust the angle to minimize blind spots and maximize coverage.
4. Lighting conditions: Take into account the lighting conditions in the areas where the cameras will be installed. Ensure that there is adequate lighting during both day and night to capture clear footage. Consider using cameras with night vision capabilities for areas with low light.
5. Weatherproofing: If the cameras will be installed outdoors, ensure that they are weatherproof and can withstand various weather conditions. This will ensure their durability and longevity.
6. Privacy considerations: Be mindful of privacy laws and regulations when installing surveillance cameras. Avoid pointing cameras towards private areas such as bedrooms or bathrooms.
7. Regular maintenance: Once the cameras are installed, regularly check and clean them to ensure optimal performance. Clear any obstructions that may affect the camera's field of view.
In conclusion, installing wireless surveillance cameras requires careful consideration of camera placement. By identifying vulnerable areas, ensuring adequate coverage, considering lighting conditions, and following privacy regulations, you can maximize the effectiveness of your surveillance system and enhance the security of your property.
2、 Power Source: Determining power options for wireless surveillance camera setup.
Power Source: Determining power options for wireless surveillance camera setup.
When it comes to installing wireless surveillance cameras, determining the power source is a crucial step. Without a reliable power supply, the cameras won't be able to function effectively. There are several power options available for wireless surveillance camera setups, and choosing the right one depends on various factors such as location, accessibility, and budget.
One of the most common power options for wireless surveillance cameras is using a direct power source. This involves connecting the cameras to an electrical outlet using a power adapter. This option is ideal for indoor installations where power outlets are readily available. However, it may not be suitable for outdoor setups or areas where power outlets are limited.
Another option is using a power over Ethernet (PoE) setup. This involves running an Ethernet cable from a PoE switch or injector to the camera. The Ethernet cable not only transmits data but also provides power to the camera. PoE setups are convenient as they eliminate the need for separate power cables, making installation easier. However, they require a PoE switch or injector, which adds to the overall cost.
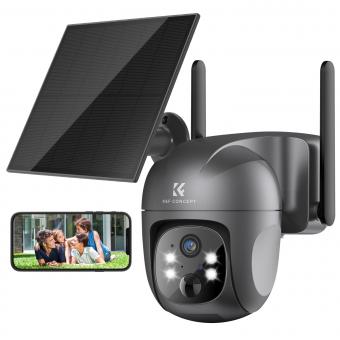
For outdoor installations or areas without access to power outlets, solar-powered cameras are a viable option. These cameras come with built-in solar panels that harness sunlight to charge the camera's batteries. Solar-powered cameras are eco-friendly and offer flexibility in terms of placement. However, they may not be suitable for areas with limited sunlight or during extended periods of cloudy weather.
Battery-powered cameras are another option for wireless surveillance setups. These cameras run on rechargeable batteries, eliminating the need for a constant power source. Battery-powered cameras are easy to install and can be placed anywhere within range of the Wi-Fi network. However, they require regular battery maintenance and may not be suitable for high-traffic areas that require continuous monitoring.
In conclusion, determining the power source for wireless surveillance camera setups involves considering factors such as location, accessibility, and budget. Direct power sources, PoE setups, solar-powered cameras, and battery-powered cameras are all viable options, each with its own advantages and limitations. It is important to assess the specific requirements of the surveillance area and choose the power option that best suits those needs.

3、 Network Connectivity: Establishing a reliable wireless connection for camera operation.
How to Install Wireless Surveillance Cameras: Network Connectivity
Establishing a reliable wireless connection for camera operation is a crucial step in installing wireless surveillance cameras. With advancements in technology, wireless surveillance cameras have become increasingly popular due to their flexibility and ease of installation. Here is a step-by-step guide on how to ensure a stable network connection for your wireless surveillance cameras.
1. Determine the camera's location: Before installation, identify the optimal locations for your cameras. Consider factors such as coverage area, line of sight, and potential obstacles that may interfere with the wireless signal.
2. Check your Wi-Fi signal strength: Ensure that your Wi-Fi signal is strong enough to support the cameras. Weak signals can result in poor video quality or intermittent connectivity. Consider using Wi-Fi range extenders or mesh network systems to boost the signal if needed.
3. Select the appropriate wireless frequency: Most wireless surveillance cameras operate on either 2.4GHz or 5GHz frequencies. Choose the frequency that offers the best balance between range and bandwidth, depending on your specific requirements.
4. Secure your network: Protect your wireless network by enabling encryption, such as WPA2, to prevent unauthorized access. Change the default username and password for your router to enhance security.
5. Position the cameras strategically: Mount the cameras in the designated locations, ensuring they have a clear line of sight to the Wi-Fi router. Avoid placing them near other electronic devices that may cause interference.
6. Test the camera's connectivity: Once installed, verify that each camera has a stable connection to the network. Check the video feed and ensure that there are no connectivity issues or lag.
7. Monitor and maintain the network: Regularly monitor your network to ensure optimal performance. Update firmware for both the cameras and the router to benefit from the latest security patches and performance improvements.
In conclusion, establishing a reliable wireless connection is essential for the successful installation of wireless surveillance cameras. By following these steps and staying up to date with the latest advancements in wireless technology, you can ensure a secure and efficient surveillance system for your home or business.
4、 Camera Configuration: Setting up and adjusting camera settings for optimal performance.
Camera Configuration: Setting up and adjusting camera settings for optimal performance.
Installing wireless surveillance cameras can provide an effective way to monitor your property and enhance security. Here is a step-by-step guide on how to install wireless surveillance cameras:
1. Determine the camera placement: Identify the areas you want to monitor and choose suitable locations for camera installation. Consider factors such as coverage area, line of sight, and potential obstructions.
2. Mount the cameras: Use the mounting brackets provided with the cameras to securely attach them to walls, ceilings, or other surfaces. Ensure that the cameras are positioned at the desired angle and height for optimal coverage.
3. Power the cameras: Connect the cameras to a power source. Wireless cameras typically require a power adapter to be plugged into an electrical outlet nearby. Make sure the power supply is stable and reliable.
4. Connect to the network: Most wireless surveillance cameras connect to your home or office network via Wi-Fi. Follow the manufacturer's instructions to connect the cameras to your network. This usually involves accessing the camera's settings through a web browser or a mobile app and entering your network credentials.
5. Configure camera settings: Once connected, access the camera's configuration settings to adjust various parameters for optimal performance. This may include adjusting resolution, frame rate, motion detection sensitivity, and recording settings. Consult the camera's user manual or online resources for detailed instructions on configuring specific settings.
6. Test the cameras: After configuring the settings, test the cameras to ensure they are functioning correctly. Check the live feed, test motion detection, and verify that recordings are being saved properly.
7. Monitor and manage: Once the cameras are installed and configured, you can monitor the live feed and access recorded footage through a computer, smartphone, or dedicated surveillance software. Set up notifications or alerts to receive updates when motion is detected or specific events occur.
It is important to note that technology and camera models may vary, so always refer to the manufacturer's instructions for specific installation and configuration steps. Additionally, consider consulting a professional if you are unsure about any aspect of the installation process.












There are no comments for this blog.