How To Know Which Nd Filter To Use ?
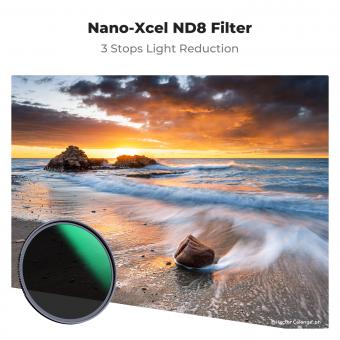
The ND filter strength you need depends on the lighting conditions and the effect you want to achieve. A general rule of thumb is to use an ND filter with a strength that is equal to the number of stops you want to reduce the exposure by. For example, if you want to reduce the exposure by two stops, you would use an ND4 filter. If you want to reduce the exposure by three stops, you would use an ND8 filter.
However, this is just a starting point, and you may need to adjust the strength of the filter based on the specific lighting conditions and the effect you want to achieve. It's also important to consider the type of photography you're doing, as different types of photography may require different ND filter strengths. For example, landscape photography may require a stronger ND filter to achieve a longer exposure time, while portrait photography may require a weaker ND filter to maintain a shallow depth of field.
1、 ND filter basics and types
ND filters, or neutral density filters, are essential tools for photographers and videographers who want to control the amount of light that enters their camera lens. ND filters work by reducing the amount of light that enters the lens without affecting the color or quality of the image. This allows photographers and videographers to use slower shutter speeds or wider apertures in bright conditions, creating a range of creative effects.
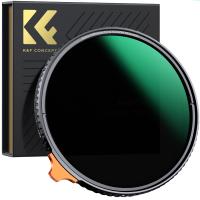
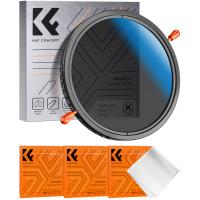
There are several types of ND filters available, including fixed ND filters, variable ND filters, and graduated ND filters. Fixed ND filters have a set density, while variable ND filters allow you to adjust the density by rotating the filter. Graduated ND filters are designed to reduce the amount of light in one part of the image, such as the sky, while leaving the rest of the image unaffected.
When it comes to choosing the right ND filter, there are a few factors to consider. The first is the amount of light you need to reduce. This will depend on the conditions you are shooting in and the effect you want to achieve. For example, if you are shooting in bright sunlight and want to use a wide aperture for a shallow depth of field, you may need a stronger ND filter than if you were shooting in overcast conditions.
Another factor to consider is the type of filter you need. Fixed ND filters are great for situations where you need a consistent level of light reduction, while variable ND filters are more versatile and allow you to adjust the density as needed. Graduated ND filters are ideal for landscape photography, where you may need to reduce the amount of light in the sky without affecting the foreground.
In summary, choosing the right ND filter depends on the amount of light you need to reduce, the conditions you are shooting in, and the effect you want to achieve. It's important to experiment with different filters and settings to find the combination that works best for your needs.
2、 Understanding f-stop and shutter speed
How to know which ND filter to use is a common question among photographers and videographers. ND filters are used to reduce the amount of light entering the camera lens, allowing for longer exposure times or wider apertures without overexposing the image. The strength of an ND filter is measured in stops, with higher numbers indicating greater light reduction.
To determine which ND filter to use, you need to consider the lighting conditions and the effect you want to achieve. For example, if you are shooting in bright sunlight and want to use a wide aperture for a shallow depth of field, you may need a stronger ND filter, such as a 6-stop or 10-stop filter. On the other hand, if you are shooting in low light and want to use a longer exposure time, you may only need a 1-stop or 2-stop filter.
It's also important to consider the type of photography or videography you are doing. For example, landscape photographers may prefer a stronger ND filter to capture long exposures of waterfalls or clouds, while portrait photographers may only need a mild ND filter to achieve a shallow depth of field in bright sunlight.
In addition to considering the lighting conditions and desired effect, it's important to choose a high-quality ND filter to avoid color cast or loss of sharpness. Some popular brands include B+W, Hoya, and Tiffen.
Overall, choosing the right ND filter requires a bit of experimentation and understanding of your equipment and desired outcome. With practice and experience, you'll be able to quickly determine which ND filter to use for any given situation.
3、 Choosing the right ND filter strength
Choosing the right ND filter strength is crucial for achieving the desired effect in your photography or videography. ND filters are used to reduce the amount of light entering the camera lens, allowing you to use slower shutter speeds or wider apertures without overexposing the image. The strength of the ND filter is measured in stops, with higher numbers indicating a stronger filter.
To know which ND filter to use, you need to consider the lighting conditions and the effect you want to achieve. For example, if you are shooting in bright sunlight and want to use a wide aperture for a shallow depth of field, you may need a stronger ND filter, such as a 6-stop or 10-stop filter. On the other hand, if you are shooting in overcast conditions and want to use a slower shutter speed for motion blur, a 2-stop or 3-stop filter may be sufficient.
It's also important to consider the type of photography or videography you are doing. For example, landscape photographers may prefer stronger ND filters to create long exposures and capture movement in the clouds or water, while portrait photographers may prefer lighter ND filters to achieve a shallow depth of field in bright sunlight.
The latest point of view is that some photographers and videographers prefer to use variable ND filters, which allow you to adjust the strength of the filter by rotating the front element. This can be more convenient than carrying multiple filters and allows for more flexibility in changing lighting conditions.
Ultimately, the best way to know which ND filter to use is to experiment and practice with different strengths and effects. With time and experience, you'll develop a better understanding of how to use ND filters to achieve your desired results.
4、 Balancing exposure and creative effects
Balancing exposure and creative effects is a crucial aspect of photography, and using an ND filter can help achieve this balance. However, knowing which ND filter to use can be a bit tricky. Here are some tips to help you choose the right ND filter for your photography needs.
Firstly, determine the amount of light reduction you need. ND filters come in different strengths, usually measured in stops. The higher the number of stops, the more light reduction the filter provides. For example, a 3-stop ND filter reduces the amount of light entering the lens by three stops.
Secondly, consider the shooting conditions. If you're shooting in bright sunlight, you'll need a stronger ND filter to reduce the amount of light entering the lens. On the other hand, if you're shooting in low light conditions, you may not need an ND filter at all.
Thirdly, consider the creative effect you want to achieve. ND filters can be used to create motion blur in waterfalls or to blur out people in a crowded area. The strength of the filter will depend on the effect you want to achieve.
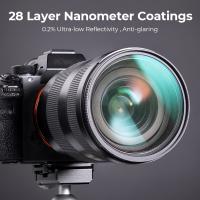
Lastly, it's important to invest in a high-quality ND filter. Cheaper filters can cause color casts and reduce image sharpness. Look for filters made from high-quality materials and with multi-coating to reduce reflections and flare.
In conclusion, choosing the right ND filter requires a balance between the amount of light reduction needed, shooting conditions, creative effects, and quality of the filter. With these tips in mind, you can make an informed decision and achieve the desired results in your photography.


