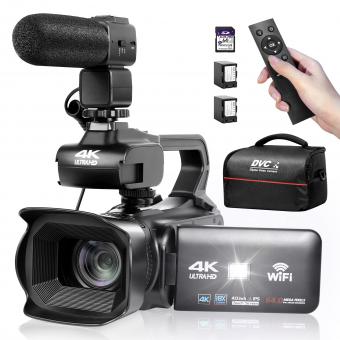
How To Live Stream Hd Camcorder Obs ?
To live stream using an HD camcorder with OBS (Open Broadcaster Software), you will need to follow these steps:
1. Connect your HD camcorder to your computer using a compatible cable (such as HDMI or USB).
2. Install OBS on your computer and open the software.
3. In OBS, click on the "+" icon under the "Sources" section and select "Video Capture Device."
4. Choose your HD camcorder from the drop-down menu and click "OK."
5. Adjust the settings for your video capture device, such as resolution and frame rate, to match your camcorder's capabilities.
6. Configure your streaming settings in OBS, such as selecting the streaming platform and setting up the stream key.
7. Start your live stream by clicking on the "Start Streaming" button in OBS.
Make sure to test your setup before going live to ensure everything is working properly. OBS provides various options for customization and advanced settings, so you can explore those based on your specific requirements.
1、 Setting up your HD camcorder for live streaming with OBS
Setting up your HD camcorder for live streaming with OBS is a relatively straightforward process that can greatly enhance the quality of your live streams. Here's a step-by-step guide to help you get started:
1. Connect your HD camcorder to your computer using an HDMI cable. Make sure the camcorder is powered on and set to the appropriate video output mode.
2. Open OBS (Open Broadcaster Software) on your computer. If you don't have OBS installed, you can download it for free from the official website.
3. In OBS, click on the "+" icon under the "Sources" section and select "Video Capture Device". Give it a name and click "OK".
4. In the properties window that appears, select your HD camcorder from the drop-down menu next to "Device". You should see a live preview of your camcorder's video feed.
5. Adjust the settings as needed. You can choose the resolution, frame rate, and other video settings based on your preferences and the capabilities of your camcorder.
6. Click "OK" to save the settings and close the properties window.
7. Now, you can start your live stream by clicking on the "Start Streaming" button in OBS. Your HD camcorder's video feed will be broadcasted in high definition to your chosen streaming platform.
It's worth noting that OBS is constantly being updated with new features and improvements. Therefore, it's always a good idea to check for the latest version of OBS and any relevant updates to ensure you have the best possible streaming experience.
By following these steps, you can easily set up your HD camcorder for live streaming with OBS and enjoy high-quality video output for your audience.
2、 Configuring OBS for high-quality live streaming from a camcorder
To live stream HD video from a camcorder using OBS (Open Broadcaster Software), you need to configure OBS properly to ensure high-quality streaming. Here's a step-by-step guide to help you get started:
1. Connect your camcorder to your computer using an HDMI or USB cable, depending on the available options.
2. Install OBS on your computer if you haven't already. It is a free and open-source software available for Windows, macOS, and Linux.
3. Launch OBS and go to the "Settings" tab. Under the "Video" section, set the "Base (Canvas) Resolution" and "Output (Scaled) Resolution" to match the resolution of your camcorder. For example, if your camcorder records in 1080p, set both resolutions to 1920x1080.
4. In the same "Video" section, set the "Common FPS Values" to match the frame rate of your camcorder. Most camcorders record at 30 or 60 frames per second (fps).
5. Under the "Output" tab, select the desired streaming platform (e.g., Twitch, YouTube) and configure the streaming settings according to your preferences. Set the "Video Bitrate" to a value that ensures a stable and high-quality stream. Higher bitrates generally result in better video quality but require a faster internet connection.
6. In the "Audio" section, select the audio device that corresponds to your camcorder's audio output.
7. Once you've configured the settings, go back to the main OBS window and click on the "+" icon under the "Sources" box. Select "Video Capture Device" and choose your camcorder from the drop-down menu.
8. Adjust the position and size of the video capture source to fit your streaming layout.
9. Finally, click on the "Start Streaming" button to begin your live stream.
Remember to check for any updates to OBS or your camcorder's drivers to ensure compatibility and access to the latest features. Additionally, make sure you have a stable internet connection and sufficient hardware resources to handle the streaming process smoothly.
By following these steps, you can configure OBS to live stream high-quality video from your camcorder, providing your viewers with an immersive and enjoyable streaming experience.
3、 Optimizing video settings for HD live streaming using OBS
To live stream HD camcorder footage using OBS (Open Broadcaster Software), you need to optimize your video settings for high-quality streaming. Here's a step-by-step guide to help you achieve the best results:
1. Connect your HD camcorder to your computer using an HDMI or USB cable. Make sure it is recognized by your computer and OBS.
2. Open OBS and go to the "Settings" tab. Under the "Video" section, set the "Base (Canvas) Resolution" to match the resolution of your camcorder. For example, if your camcorder records in 1080p, set the base resolution to 1920x1080.
3. In the same "Video" section, set the "Output (Scaled) Resolution" to the desired streaming resolution. It is recommended to stream in 720p or 1080p for high-definition quality.
4. Adjust the "Downscale Filter" to "Lanczos" for better downscaling quality.
5. Set the "Common FPS Values" to match the frame rate of your camcorder. Most camcorders record at 30 or 60 frames per second (fps).
6. Under the "Output" tab, select the desired streaming bitrate. Higher bitrates result in better video quality but require a faster internet connection. It is recommended to use a bitrate between 3000-6000 kbps for HD streaming.
7. Enable hardware encoding if your computer supports it. This offloads the video encoding process to your GPU, resulting in better performance and lower CPU usage.
8. Finally, click "Apply" and then "OK" to save your settings.
It's important to note that OBS is constantly evolving, so it's always a good idea to stay updated with the latest version and check for any new features or improvements that may enhance your streaming experience.
4、 Troubleshooting common issues when live streaming HD camcorder with OBS
Troubleshooting common issues when live streaming HD camcorder with OBS
Live streaming with an HD camcorder using OBS (Open Broadcaster Software) can be a great way to share high-quality video content with your audience. However, there are some common issues that you may encounter while setting up and streaming. Here are some troubleshooting tips to help you overcome these challenges:
1. Check your hardware: Ensure that your HD camcorder is properly connected to your computer and recognized by OBS. Make sure you have the latest drivers installed for your camcorder and that it is set to the correct video output mode.
2. Adjust OBS settings: Configure OBS to match the resolution and frame rate of your camcorder. Go to the "Settings" menu in OBS and select the "Video" tab. Set the base and output resolution to match your camcorder's capabilities. Also, make sure the frame rate is set correctly.
3. Manage bandwidth and internet connection: Streaming HD video requires a stable and fast internet connection. Check your internet speed and ensure that you have sufficient bandwidth to handle the streaming. If you experience buffering or dropped frames, consider lowering the video bitrate in OBS to reduce the strain on your internet connection.
4. Optimize your computer's performance: Streaming HD video can be resource-intensive, so make sure your computer meets the minimum system requirements for OBS. Close any unnecessary applications and processes running in the background to free up system resources.
5. Test your stream before going live: Before starting your actual live stream, perform a test stream to ensure everything is working correctly. Check the video quality, audio levels, and overall stream stability. This will help you identify and fix any issues before going live.
In conclusion, troubleshooting common issues when live streaming HD camcorder with OBS involves checking hardware connections, adjusting OBS settings, managing bandwidth, optimizing computer performance, and performing test streams. By following these tips, you can ensure a smooth and high-quality live streaming experience for your audience.
