How To Look Through A Microscope?
To look through a microscope, first, place the microscope on a flat surface and adjust the height of the stage so that it is comfortable for your eyes. Then, turn on the light source and adjust the intensity of the light to a level that is suitable for your specimen. Next, place your specimen on the stage and secure it in place using the clips or stage controls.
Once your specimen is in place, adjust the focus knob to bring the specimen into focus. Start with the lowest magnification and work your way up to higher magnifications as needed. Use the fine focus knob to make small adjustments to the focus.
When you are finished observing your specimen, turn off the light source and remove the specimen from the stage. Clean the lenses and stage with a lens cleaning solution and a soft cloth to prevent damage to the microscope.
1、 Adjusting the focus
How to look through a microscope:
1. Start by placing the microscope on a flat surface and adjusting the height so that it is comfortable to use.
2. Turn on the light source and adjust the brightness to a level that is comfortable for your eyes.
3. Place the specimen on the stage and secure it in place using the clips or stage controls.
4. Look through the eyepiece and adjust the interpupillary distance so that the two eyepieces are aligned with your eyes.
5. Adjust the magnification by rotating the objective lenses. Start with the lowest magnification and work your way up to higher magnifications as needed.
6. Adjust the focus by using the coarse and fine focus knobs. Use the coarse focus knob to bring the specimen into view and then use the fine focus knob to sharpen the image.
7. Move the specimen around on the stage to explore different areas and adjust the focus as needed.
8. When you are finished, turn off the light source and remove the specimen from the stage.
Adjusting the focus:
One of the most important steps in using a microscope is adjusting the focus. This is because the focus determines the clarity and detail of the image you see. When adjusting the focus, it is important to use both the coarse and fine focus knobs. The coarse focus knob is used to bring the specimen into view, while the fine focus knob is used to sharpen the image. It is also important to move the specimen around on the stage to explore different areas and adjust the focus as needed. Additionally, it is important to use the appropriate magnification for the specimen you are viewing. Using too high of a magnification can result in a blurry image, while using too low of a magnification can result in a lack of detail. Overall, adjusting the focus is a crucial step in using a microscope and should be done carefully and methodically.
2、 Setting the magnification
How to look through a microscope:
1. Setting up the microscope: Before you start looking through the microscope, you need to set it up properly. This involves adjusting the focus, lighting, and magnification. Make sure the microscope is on a stable surface and the stage is clean.
2. Placing the specimen: Once the microscope is set up, you can place the specimen on the stage. Use the clips to hold the slide in place. Make sure the specimen is centered and in focus.
3. Adjusting the lighting: Adjust the lighting to get the best view of the specimen. Use the diaphragm to adjust the amount of light that enters the microscope. Too much light can wash out the image, while too little light can make it difficult to see.
4. Setting the magnification: Use the objective lenses to adjust the magnification. Start with the lowest magnification and work your way up. Use the fine focus knob to adjust the focus at each magnification.
5. Looking through the eyepiece: Once the microscope is set up and the specimen is in place, you can look through the eyepiece to view the specimen. Adjust the focus and magnification as needed to get a clear view.
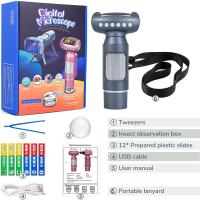
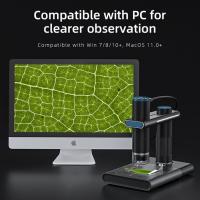
In recent years, digital microscopes have become increasingly popular. These microscopes use a camera to capture images of the specimen, which can be viewed on a computer screen. This allows for easier sharing and analysis of the images. Additionally, some digital microscopes have built-in software that can help with image analysis and measurement.
3、 Placing the specimen on the stage
How to look through a microscope:
Looking through a microscope can be an exciting and rewarding experience, but it can also be challenging if you are not familiar with the process. Here are some steps to help you get started:
1. Set up the microscope: Before you can start looking through the microscope, you need to set it up properly. This involves adjusting the focus, lighting, and magnification settings to suit your needs.
2. Placing the specimen on the stage: Once the microscope is set up, you need to place the specimen on the stage. This is the platform where the specimen is placed for observation. Make sure the specimen is centered and secured in place using clips or other means.
3. Adjust the focus: Use the coarse focus knob to bring the specimen into focus. This knob moves the stage up and down to adjust the distance between the specimen and the objective lens. Once the specimen is roughly in focus, use the fine focus knob to make small adjustments for a clearer image.
4. Adjust the lighting: Adjust the lighting to suit your needs. Most microscopes have a built-in light source that can be adjusted for brightness and angle. You may need to adjust the lighting to reduce glare or improve contrast.
5. Observe the specimen: Once the specimen is in focus and the lighting is adjusted, you can start observing it. Move the stage around to explore different parts of the specimen and adjust the magnification as needed.
In recent years, digital microscopes have become increasingly popular. These microscopes use digital cameras to capture images of the specimen, which can be viewed on a computer screen. This allows for easier sharing and analysis of the images. Additionally, some microscopes now come with built-in software that can help with image analysis and measurement.
4、 Using the light source
Using the light source is one of the most important steps in learning how to look through a microscope. The light source provides the illumination necessary to view the specimen under the microscope. To use the light source, first, ensure that the microscope is properly set up and the light source is turned on. Adjust the brightness of the light source to the desired level.
Next, place the specimen on the stage of the microscope and adjust the focus using the coarse and fine focus knobs. Once the specimen is in focus, adjust the diaphragm to control the amount of light that passes through the specimen. This will help to improve the contrast and clarity of the image.
It is important to note that the type of light source used can affect the quality of the image. Traditional light sources such as halogen bulbs can produce heat, which can damage the specimen. LED light sources are becoming increasingly popular as they produce less heat and have a longer lifespan.
In addition, some microscopes now come with built-in LED illumination, which provides a consistent and reliable light source. This can be particularly useful for those who use microscopes frequently or for extended periods of time.
Overall, using the light source is a crucial step in learning how to look through a microscope. By adjusting the brightness, focus, and diaphragm, you can improve the quality of the image and gain a better understanding of the specimen under observation.















There are no comments for this blog.