How To Make A Camera Stand ?
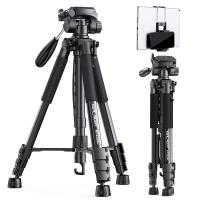
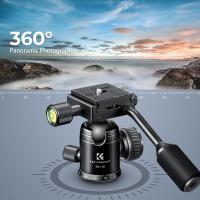
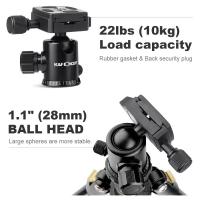
To make a camera stand, you can use a tripod or create a DIY stand using common household items. For a tripod, you can purchase one from a camera store or online. These typically have adjustable legs and a mount to hold the camera securely.
If you prefer a DIY option, you can use a variety of materials such as PVC pipes, wood, or metal. By constructing a stable base and attaching a mount or platform for the camera, you can create a custom camera stand. There are numerous tutorials available online that provide step-by-step instructions for building camera stands using different materials.
Remember to ensure that the stand is sturdy and can support the weight of your camera. It's also important to consider the height and adjustability of the stand to suit your needs.
1、 Tripod: Stable three-legged camera support for steady shots.
A camera stand, also known as a tripod, is an essential tool for photographers and videographers. It provides stability and allows for steady shots, making it easier to capture high-quality images and videos. Here's how to make a camera stand:
1. Gather the materials: You will need three sturdy legs, a central column, a camera mount, and some screws or bolts to secure everything together. The legs can be made of wood, metal, or even PVC pipes, depending on your preference and availability.
2. Prepare the legs: Cut the legs to your desired length, ensuring they are all the same size. Sand down any rough edges and drill holes near the top of each leg to attach the central column.
3. Assemble the central column: Take the central column and attach it to the top of the legs using screws or bolts. Make sure it is securely fastened to provide stability.
4. Attach the camera mount: Depending on the type of camera mount you have, you may need to drill holes or use adhesive to attach it to the top of the central column. Ensure it is firmly fixed to prevent any accidents.
5. Test the stability: Once everything is assembled, test the stability of your camera stand. Adjust the legs if necessary to ensure it stands firmly on the ground without wobbling.
A tripod provides stability and allows for steady shots, which is crucial for capturing sharp images and smooth videos. It is especially useful in low-light situations or when using long exposure times. Additionally, a tripod enables photographers to experiment with different angles and compositions, as it can be adjusted to various heights and positions.
In recent years, there have been advancements in tripod technology, with the introduction of lightweight and compact options. These are particularly popular among travel photographers and vloggers who need a portable solution without compromising stability. Some tripods also come with additional features such as built-in levels, quick-release plates, and flexible legs for unconventional shooting angles.
Overall, a camera stand or tripod is an indispensable tool for any photographer or videographer. It not only provides stability but also opens up a world of creative possibilities. Whether you are a professional or an amateur, investing in a good quality tripod will greatly enhance the quality of your work.
2、 Monopod: Single-legged camera stand for added stability and mobility.
A camera stand, also known as a tripod, is an essential tool for photographers and videographers to capture steady and professional-looking shots. However, there are situations where a traditional tripod may not be the most practical option. In such cases, a monopod can be a great alternative.
A monopod is a single-legged camera stand that offers added stability and mobility. It consists of a single pole with a camera mount on top and a rubber or spiked foot at the bottom. The monopod is designed to be held by the photographer, providing support and reducing camera shake while allowing for quick and easy movement.
To make a camera stand using a monopod, follow these steps:
1. Choose a sturdy monopod: Look for a monopod made of durable materials like aluminum or carbon fiber. Consider the maximum weight capacity and height that will suit your camera and shooting needs.
2. Attach a camera mount: Most monopods come with a standard 1/4-inch screw mount. Ensure that your camera is compatible with this mount or use an adapter if necessary.
3. Adjust the height: Extend the monopod to your desired height and lock it in place using the provided locking mechanism. Make sure it is stable and secure.
4. Add stability: To further stabilize the monopod, you can attach a small weight or use a tripod base that allows it to stand on its own.
5. Use the monopod: Hold the monopod firmly with one hand while operating the camera with the other. The monopod will provide stability and reduce camera shake, resulting in sharper images and smoother videos.
From a latest point of view, monopods have become increasingly popular among photographers and videographers due to their portability and versatility. They are particularly useful in situations where setting up a traditional tripod is impractical or time-consuming, such as in crowded areas or when shooting on the go. Additionally, monopods allow for quick adjustments and smooth panning movements, making them ideal for capturing action shots or following subjects in motion.
In conclusion, a monopod is a great option for creating a camera stand that offers stability and mobility. By following the steps outlined above, you can easily set up a monopod and enjoy the benefits it provides in your photography or videography endeavors.
3、 Gorillapod: Flexible tripod with bendable legs for versatile positioning.
To make a camera stand, one of the most popular and versatile options available is the Gorillapod. This flexible tripod features bendable legs that allow for versatile positioning, making it an ideal choice for photographers and videographers.
The Gorillapod is designed with a unique ball and socket joint system, which enables users to easily adjust the position and angle of their camera. The legs are made of durable, rubberized material that provides a strong grip on various surfaces, ensuring stability and preventing any accidental slips or falls.
To use the Gorillapod, simply attach your camera to the tripod's quick-release plate, which securely holds the camera in place. Then, position the legs in any desired configuration, whether it's wrapping them around a tree branch, bending them on uneven terrain, or simply standing them on a flat surface. The flexible legs can be adjusted individually, allowing for precise positioning and stability even on challenging surfaces.
The Gorillapod is available in different sizes and models to accommodate various camera weights and sizes. Some models even come with additional features like a built-in level or a magnetic base for added convenience.
In conclusion, the Gorillapod is an excellent choice for a camera stand due to its flexibility, versatility, and stability. Whether you're a professional photographer or an amateur enthusiast, this tripod will provide you with the necessary support to capture stunning photos and videos from any angle or position.
4、 DIY Camera Stand: Homemade camera support using household items.
DIY Camera Stand: Homemade camera support using household items.
If you're looking for a camera stand but don't want to spend money on a professional one, you can easily make your own using household items. Not only is it a cost-effective solution, but it also allows you to customize the stand to fit your specific needs. Here's a step-by-step guide on how to make a camera stand using items you probably already have at home.
1. Tripod base: Start by finding a sturdy base for your camera stand. A great option is to use a table or desk. Make sure it's stable and won't wobble during use.
2. Mounting platform: Next, you'll need a platform to mount your camera on. A simple solution is to use a small piece of wood or a sturdy plastic board. Attach it securely to the top of your tripod base using screws or strong adhesive.
3. Adjustable height: To make your camera stand adjustable in height, you can use a stack of books or a sturdy box. Place it under the mounting platform to raise the camera to your desired height. If you want more flexibility, consider using a stack of wooden blocks with different thicknesses that can be easily rearranged.
4. Stability: To ensure stability, you can add weights to the base of your camera stand. This can be achieved by placing heavy objects, such as books or sandbags, on the tripod base. This will help prevent any accidental tipping or movement during use.
5. Camera attachment: Finally, you'll need a way to attach your camera securely to the mounting platform. Most cameras have a standard tripod screw hole on the bottom. If your camera doesn't have one, you can purchase a tripod adapter that fits your camera model.
Remember to always test the stability of your homemade camera stand before using it with expensive equipment. Additionally, be cautious when adjusting the height or moving the stand to avoid any accidents or damage to your camera.
In conclusion, making a camera stand at home is a practical and budget-friendly solution. By using household items, you can create a customized camera support that suits your needs. So, grab those items lying around and start building your own camera stand today!
