How To Make A Homemade Tripod ?
To make a homemade tripod, you can use various materials depending on your needs and resources. One simple method is to use three sturdy sticks or dowels of equal length. Tie them together at one end using strong string or rope, ensuring that the sticks form a stable tripod shape. You can also attach a small platform or mount at the top of the tripod to hold your camera or device securely. Another option is to repurpose household items such as a broomstick or a sturdy coat hanger to create a makeshift tripod. By bending or adjusting the materials, you can achieve a stable base for your camera or other equipment. Remember to test the stability of your homemade tripod before using it to ensure it can support the weight of your device.
1、 DIY Tripod: Using Everyday Objects for Camera Stability
DIY Tripod: Using Everyday Objects for Camera Stability
In today's digital age, capturing high-quality photos and videos has become more accessible than ever. However, achieving stability while shooting can still be a challenge. A tripod is an essential tool for any photographer or videographer, providing a steady base for their camera. But what if you don't have a tripod on hand? Fear not, as there are several ways to create a homemade tripod using everyday objects.
One simple method is to use a stack of books or a sturdy box. Place your camera on top, ensuring it is balanced and secure. This makeshift tripod provides a stable base and can be adjusted by adding or removing books to achieve the desired height.
Another option is to utilize a table or a chair. Position your camera on the edge of the table or the backrest of the chair, making sure it is stable and won't fall. This method works well for shooting from a higher angle or capturing overhead shots.
If you're outdoors, nature can provide you with a DIY tripod solution. Look for a sturdy tree branch or a fence post to rest your camera on. You can also use rocks or boulders to prop up your camera, ensuring it remains steady.
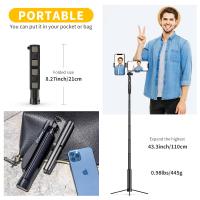
In recent years, the rise of smartphone photography has opened up even more possibilities for homemade tripods. Many smartphone tripods are available in the market, but you can also create your own using objects like a selfie stick, a clamp, or even a rubber band. These can be easily attached to various surfaces, providing stability for your smartphone.
While these homemade tripods may not offer the same level of versatility and adjustability as professional tripods, they can still be effective in providing stability for your camera. Remember to always prioritize safety and ensure that your camera is secure before shooting.
In conclusion, when you find yourself without a tripod, don't let it hinder your creativity. With a little ingenuity and resourcefulness, you can create a homemade tripod using everyday objects. So go ahead, experiment, and capture those stunning shots with stability and confidence.
2、 Homemade Tripod: Step-by-Step Guide for Building Your Own
Homemade Tripod: Step-by-Step Guide for Building Your Own
In today's world of photography and videography, tripods are essential tools for capturing steady and professional-looking shots. While there are many tripods available on the market, building your own homemade tripod can be a fun and cost-effective alternative. Not only does it allow you to customize the tripod to your specific needs, but it also gives you a sense of accomplishment.
Here is a step-by-step guide to help you build your own homemade tripod:
1. Gather the materials: You will need three sturdy and equal-length rods, such as wooden dowels or metal pipes, a drill, screws, a tripod head, and a base plate.
2. Measure and cut the rods: Determine the desired height of your tripod and cut the rods accordingly. Make sure they are all the same length for stability.
3. Drill holes: On one end of each rod, drill a hole large enough to fit the screws. These holes will be used to attach the tripod head.
4. Attach the tripod head: Place the base plate on top of the rods and align the holes. Secure the tripod head to the rods using screws, ensuring it is tightly fastened.
5. Test stability: Stand the tripod upright and check for any wobbling or instability. If needed, adjust the screws or reinforce the connections to improve stability.
6. Optional additions: Depending on your needs, you can add rubber feet to the bottom of the rods for better grip on different surfaces. You can also attach a level bubble to ensure your shots are perfectly straight.
It is important to note that while building a homemade tripod can be a fun and rewarding project, it may not provide the same level of stability and durability as professional tripods. Therefore, it is recommended to use homemade tripods for lighter cameras and in situations where absolute stability is not crucial.
In conclusion, building your own homemade tripod can be a great way to save money and customize your equipment. By following this step-by-step guide, you can create a functional tripod that suits your needs. However, it is important to keep in mind the limitations of homemade tripods and use them accordingly.

3、 Tripod Alternatives: Creative Ways to Stabilize Your Camera
Tripod Alternatives: Creative Ways to Stabilize Your Camera
While tripods are undoubtedly a great tool for stabilizing your camera, there are times when you may not have one readily available or simply prefer a more creative approach. In such cases, there are several alternatives you can consider to achieve stability and capture those perfect shots.
One option is to make a homemade tripod using everyday objects. One popular method involves using a bean bag or a small sandbag. Simply place your camera on top of the bean bag and mold it to the desired angle or position. This provides a stable base and allows you to adjust the camera easily. Another option is to use a string or a strap attached to a fixed object, such as a tree branch or a pole. By pulling the string taut and using it as a makeshift stabilizer, you can minimize camera shake and capture sharper images.
Additionally, you can explore using your surroundings to stabilize your camera. Look for stable surfaces like walls, rocks, or tables to rest your camera on. You can also utilize objects like books or bags to prop up your camera at the desired height and angle. Be creative and experiment with different objects to find what works best for your specific situation.
It's worth noting that while these alternatives can provide stability, they may not offer the same level of versatility and adjustability as a traditional tripod. They are best suited for situations where you need a quick stabilization solution or when carrying a tripod is not feasible.
In conclusion, when a tripod is not available, there are various creative alternatives to stabilize your camera. From homemade tripods using bean bags or strings to utilizing your surroundings, these options can help you capture steady shots. However, it's important to remember that these alternatives may not offer the same level of stability and versatility as a traditional tripod.
4、 Improvised Tripod: Making a Temporary Camera Support System
Improvised Tripod: Making a Temporary Camera Support System
In today's world of advanced technology, capturing high-quality photographs and videos has become an integral part of our lives. However, not everyone has access to professional camera equipment, including tripods. But fear not, as there are ways to create a makeshift tripod using everyday items found around the house.
One simple method is to use a stack of books or a sturdy box as a base. Place your camera on top of the stack, ensuring it is stable and secure. Adjust the height by adding or removing books until you achieve the desired level. This method works well for stationary shots but may not be suitable for capturing moving subjects.
Another option is to utilize a table or any flat surface with a ledge. Position your camera on the edge of the surface, making sure it is balanced and won't fall off. This technique is particularly useful for capturing overhead shots or time-lapse videos.
If you're outdoors, nature can provide you with a natural tripod. Look for sturdy branches or rocks that can act as legs for your camera. Secure your camera to the branches or rocks using rubber bands or string, ensuring it is stable and won't move.
In recent years, the rise of smartphone photography has opened up new possibilities for homemade tripods. Many smartphone tripods are available in the market, but you can also create your own using a selfie stick or a flexible tripod mount. These accessories allow you to attach your smartphone securely and adjust the angle as needed.
While these improvised tripods may not offer the same stability and versatility as professional ones, they can still be effective in certain situations. However, it's important to exercise caution and ensure the safety of your camera or smartphone while using these makeshift supports.
In conclusion, making a homemade tripod is possible using everyday items found around the house. Whether it's using books, tables, natural elements, or smartphone accessories, these improvised tripods can provide temporary camera support for capturing memorable moments.










There are no comments for this blog.