How To Make A Wooden Camera Tripod ?
To make a wooden camera tripod, you will need to gather materials such as wooden dowels, screws, nuts, washers, and a tripod head. Cut the wooden dowels to the desired length and shape them to fit together as tripod legs. Drill holes in the dowels to insert screws and nuts to hold the legs together. Attach the tripod head to the top of the legs using screws and washers. Sand the wooden tripod to smooth out any rough edges and apply a finish if desired. Your wooden camera tripod is now ready to use.
1、 Selecting the right wood and tools
How to make a wooden camera tripod:
Selecting the right wood and tools is the first step in making a wooden camera tripod. The wood should be strong and durable, such as oak or maple, and free of knots or cracks. The tools needed include a saw, drill, sandpaper, and wood glue.
Once the wood and tools are gathered, the next step is to cut the wood into the desired lengths for the tripod legs and center column. The legs should be tapered at one end to fit into the tripod head, and the center column should have a hole drilled through the center for the tripod screw.
After cutting the wood, sand the pieces to smooth out any rough edges or surfaces. Then, assemble the tripod by gluing the legs and center column together, making sure they are aligned properly. Allow the glue to dry completely before using the tripod.
It is important to note that there are many different designs and styles of wooden camera tripods, and the process may vary depending on the specific design chosen. Additionally, some woodworkers may choose to add decorative elements or finishes to their tripod for added visual appeal.
In recent years, there has been a growing trend towards using sustainable and eco-friendly materials in woodworking projects. As such, some woodworkers may choose to use reclaimed or salvaged wood for their camera tripod, or opt for non-toxic finishes and adhesives. This approach not only reduces waste and environmental impact, but also adds a unique and rustic character to the finished product.
2、 Cutting and shaping the legs and center column
How to make a wooden camera tripod? The process of making a wooden camera tripod involves several steps, but the most crucial one is cutting and shaping the legs and center column. This step requires precision and accuracy to ensure that the tripod is stable and can support the weight of the camera.
To begin, select a suitable wood material that is strong and durable. Maple, oak, and cherry are popular choices for wooden tripods. Next, measure and cut the wood into the desired length for the legs and center column. The legs should be of equal length and have a tapered shape to provide stability. The center column should be slightly longer than the legs and have a cylindrical shape.
Once the wood is cut, use a lathe or a router to shape the legs and center column. The legs should have a smooth and even surface to prevent any wobbling. The center column should have a threaded hole at the top to attach the camera mount.
After shaping the legs and center column, sand them down to remove any rough edges or splinters. Apply a coat of wood stain or varnish to protect the wood from moisture and give it a polished look.
Finally, attach the legs to the center column using metal brackets or screws. Test the stability of the tripod by placing a camera on it and adjusting the height and angle. Make any necessary adjustments to ensure that the tripod is level and secure.
In conclusion, cutting and shaping the legs and center column is a crucial step in making a wooden camera tripod. With the right tools and techniques, anyone can create a sturdy and reliable tripod for their photography needs.

3、 Joining the pieces together with screws or dowels
How to make a wooden camera tripod? Making a wooden camera tripod is a fun and rewarding project for any DIY enthusiast. The process involves selecting the right wood, cutting it to size, and joining the pieces together. The first step is to choose the right type of wood. Hardwoods like oak, maple, and cherry are ideal for this project as they are strong and durable. Once you have selected the wood, you need to cut it to size. You will need three legs, a center column, and a head plate.
The next step is to join the pieces together. There are two main methods for joining the pieces together: screws and dowels. If you choose to use screws, you will need to drill pilot holes and then screw the pieces together. This method is quick and easy, but it can weaken the wood over time. If you choose to use dowels, you will need to drill holes in the wood and then insert the dowels. This method is more time-consuming, but it creates a stronger joint that will last longer.
In addition to joining the pieces together, you will also need to sand and finish the wood. Sanding will smooth out any rough edges and prepare the wood for finishing. Finishing will protect the wood from moisture and give it a polished look. You can use a variety of finishes, including oil, wax, and varnish.
Overall, making a wooden camera tripod is a fun and rewarding project that requires some basic woodworking skills. With the right tools and materials, you can create a beautiful and functional tripod that will last for years to come.
4、 Adding a mounting plate and head assembly
How to make a wooden camera tripod? Well, there are several steps involved in making a wooden camera tripod, but one of the most important steps is adding a mounting plate and head assembly.
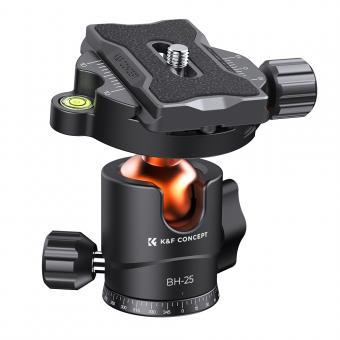
To add a mounting plate, you will need to drill a hole in the center of the top of the tripod. This hole should be slightly smaller than the screw that will hold the mounting plate in place. Once the hole is drilled, you can attach the mounting plate to the tripod using screws or bolts.
The head assembly is the part of the tripod that holds the camera. To make a head assembly, you will need to cut a piece of wood to the desired size and shape. This piece of wood should be attached to the mounting plate using screws or bolts.
Once the head assembly is attached to the mounting plate, you can attach the camera to the head assembly using a screw or bolt. The camera should be securely attached to the head assembly to prevent it from falling off.
In addition to adding a mounting plate and head assembly, you may also want to add adjustable legs to your wooden camera tripod. Adjustable legs will allow you to adjust the height of the tripod to suit your needs.
Overall, making a wooden camera tripod can be a fun and rewarding project. With a little bit of time and effort, you can create a beautiful and functional tripod that will last for years to come.
