How To Make Dvd From Jvc Everio Camcorder ?
To make a DVD from a JVC Everio camcorder, you will need to follow these steps:
1. Connect your JVC Everio camcorder to your computer using a USB cable.
2. Open the software that came with your camcorder or any video editing software on your computer.
3. Import the video footage from your camcorder to the software.
4. Edit the video if desired, such as trimming or adding titles.
5. Once you are satisfied with the editing, select the option to burn the video to a DVD.
6. Follow the on-screen instructions to choose the DVD format and settings.
7. Insert a blank DVD into your computer's DVD burner.
8. Start the burning process and wait for it to complete.
9. Once the DVD is burned, eject it from your computer and it is ready to be played on any DVD player.
Please note that the specific steps may vary depending on the software you are using and the model of your JVC Everio camcorder. It is recommended to consult the user manual or online resources for detailed instructions.
1、 Connecting JVC Everio Camcorder to Computer
To make a DVD from a JVC Everio Camcorder, you will need to transfer the video footage from the camcorder to your computer and then burn it onto a DVD. Here is a step-by-step guide on how to do it:
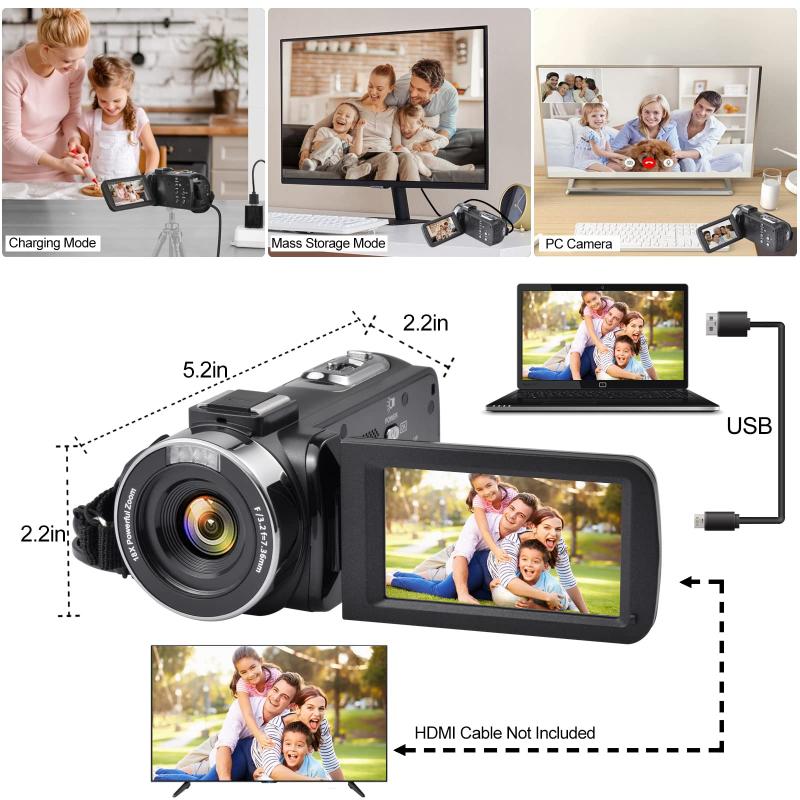
1. Connect the JVC Everio Camcorder to your computer using a USB cable. Make sure the camcorder is turned on and set to "PC" mode.
2. Once connected, your computer should recognize the camcorder as a removable storage device. Open the file explorer on your computer and navigate to the camcorder's storage.
3. Locate the video files you want to transfer to your computer. These files are usually stored in the "Videos" or "DCIM" folder on the camcorder.
4. Copy the video files from the camcorder and paste them into a folder on your computer's hard drive. You can create a new folder specifically for these videos if you prefer.
5. Once the video files are transferred to your computer, you will need DVD burning software to create a DVD. There are many options available, both free and paid. Some popular choices include Nero Burning ROM, Ashampoo Burning Studio, and ImgBurn.
6. Install the DVD burning software of your choice and open it. Select the option to create a new DVD project.
7. Import the video files you transferred from the camcorder into the DVD burning software. Arrange them in the desired order if necessary.
8. Customize the DVD menu if desired. Most DVD burning software allows you to add background images, text, and chapter markers.
9. Insert a blank DVD into your computer's DVD burner. Make sure it is compatible with the DVD burning software you are using.
10. Follow the prompts in the DVD burning software to burn the video files onto the DVD. This process may take some time, depending on the length and size of the video files.
11. Once the DVD is burned, you can test it on a DVD player to ensure it plays correctly.
It's worth noting that technology is constantly evolving, and newer JVC Everio Camcorder models may have different connectivity options or features. Therefore, it's always a good idea to consult the user manual or JVC's official website for the most up-to-date instructions specific to your camcorder model.
2、 Transferring Video Files from Camcorder to Computer
To make a DVD from a JVC Everio camcorder, you will need to transfer the video files from the camcorder to your computer first. Here is a step-by-step guide on how to do it:
1. Connect your JVC Everio camcorder to your computer using a USB cable. Make sure the camcorder is turned on and set to the appropriate mode for transferring files.
2. Once connected, your computer should recognize the camcorder as a removable storage device. Open the file explorer on your computer and navigate to the camcorder's storage.
3. Locate the video files you want to transfer to your computer. These files are usually stored in the "Videos" or "DCIM" folder on the camcorder's storage.
4. Select the video files you want to transfer and copy them to a folder on your computer. You can create a new folder specifically for these video files if you prefer.
5. Once the video files are successfully transferred to your computer, you can use DVD burning software to create a DVD. There are many DVD burning software options available, both free and paid. Some popular choices include Nero Burning ROM, Ashampoo Burning Studio, and ImgBurn.
6. Install the DVD burning software of your choice and follow the instructions provided to create a DVD. Typically, you will need to select the video files you want to burn, choose a DVD menu template, and then start the burning process.
7. Insert a blank DVD into your computer's DVD drive and wait for the burning process to complete. Once finished, you will have a DVD containing your JVC Everio camcorder videos.
It's worth noting that DVD burning has become less popular in recent years due to the rise of digital media and streaming services. However, if you still prefer to have physical copies of your videos, this method can be a viable option.
3、 Converting Video Files to DVD Format
To make a DVD from a JVC Everio camcorder, you will need to convert the video files to DVD format. Here is a step-by-step guide on how to do it:
1. Connect your JVC Everio camcorder to your computer using a USB cable. Make sure the camcorder is turned on and set to the appropriate mode for transferring files.
2. Once connected, your computer should recognize the camcorder as a removable storage device. Open the file explorer and navigate to the folder where your video files are stored on the camcorder.
3. Copy the video files from the camcorder to your computer's hard drive. Create a new folder on your computer to store these files.
4. Next, you will need DVD authoring software to convert the video files to DVD format. There are several options available, both free and paid. Some popular choices include Nero, Roxio, and DVD Flick.
5. Install the DVD authoring software on your computer and open it. Select the option to create a new DVD project.
6. Import the video files you copied from the camcorder into the DVD authoring software. Arrange them in the desired order for playback on the DVD.
7. Customize the DVD menu if desired. Most DVD authoring software allows you to add background images, text, and chapter markers to the menu.
8. Once you are satisfied with the DVD project, insert a blank DVD into your computer's DVD burner. Follow the prompts in the DVD authoring software to burn the project to the DVD.
9. Wait for the burning process to complete. Once finished, your DVD is ready to be played in any standard DVD player.
It's worth noting that as technology advances, DVD usage is declining, and digital formats are becoming more popular. Therefore, consider whether converting your videos to a digital format (such as MP4) might be a more convenient and future-proof option.
4、 Burning DVD from Converted Video Files
To make a DVD from a JVC Everio camcorder, you will need to follow a few steps. Here is a guide on how to burn a DVD from converted video files:
1. Transfer the video files: Connect your JVC Everio camcorder to your computer using a USB cable. Open the file explorer on your computer and locate the camcorder's storage. Copy the video files you want to burn onto your computer's hard drive.
2. Convert the video files: If the video files are not already in a compatible format for DVD burning, you may need to convert them. There are various video conversion software available online that can help you convert the files to a DVD-compatible format like MPEG-2 or AVI.
3. Choose DVD burning software: Install a DVD burning software on your computer. There are many options available, both free and paid. Some popular choices include Nero Burning ROM, ImgBurn, and Ashampoo Burning Studio.
4. Create a DVD project: Open the DVD burning software and create a new DVD project. Add the converted video files to the project in the order you want them to appear on the DVD.
5. Customize DVD menu (optional): Most DVD burning software allows you to customize the DVD menu. You can add a background image, choose a menu template, and even add text or music.
6. Burn the DVD: Once you are satisfied with the DVD project, insert a blank DVD into your computer's DVD burner. Select the appropriate burning settings, such as burning speed and disc format, and start the burning process.
7. Test the DVD: After the burning process is complete, eject the DVD and insert it into a DVD player to ensure that it plays correctly. Check for any playback issues or errors.
It's important to note that technology is constantly evolving, and new methods or software may become available. It's always a good idea to check for the latest information and updates on DVD burning techniques to ensure the best results.
