How To Make Infrared Filter For Camera ?
To make an infrared filter for a camera, you can use a piece of developed color film or a piece of black photographic negative film. Cut the film to the size of your camera lens and attach it securely using tape or a filter holder. This filter will block visible light and allow only infrared light to pass through, resulting in infrared photography. Keep in mind that this DIY filter may not provide the same quality and effectiveness as a professional infrared filter, but it can still produce interesting results. Experiment with different exposures and settings to achieve the desired infrared effect.
1、 Introduction to Infrared Photography and Filters
Introduction to Infrared Photography and Filters
Infrared photography is a fascinating genre that allows photographers to capture a unique perspective of the world. By using infrared filters, photographers can block visible light and only allow infrared light to pass through, resulting in surreal and ethereal images.
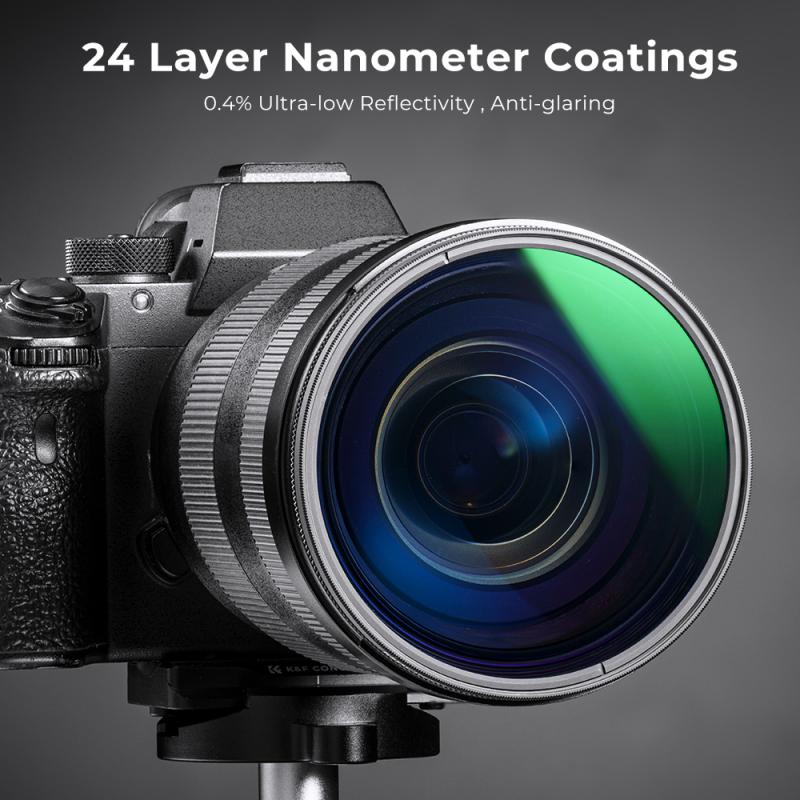
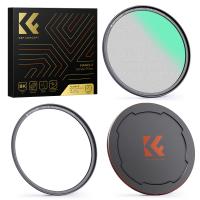
To make an infrared filter for your camera, you will need a few materials. The most important component is the infrared filter itself. There are various options available in the market, ranging from screw-on filters to custom-cut filters that can be attached to your lens. It is crucial to choose a filter that is compatible with your camera's lens diameter.
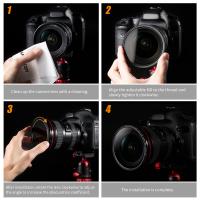
Once you have the filter, attach it to your camera lens and set your camera to manual mode. Infrared light behaves differently from visible light, so you will need to adjust your camera settings accordingly. Start by setting a longer exposure time, typically around 10-30 seconds, to allow enough infrared light to reach the sensor. You may also need to adjust the white balance settings to compensate for the different color temperature of infrared light.
It is important to note that different cameras and filters may require slightly different settings, so experimentation is key. Additionally, post-processing plays a significant role in enhancing the final infrared images. Adjusting the contrast, saturation, and channel swapping can help bring out the unique characteristics of infrared photography.
In recent years, there have been advancements in infrared technology, with some cameras now offering built-in infrared capabilities. These cameras have modified sensors that can capture both visible and infrared light simultaneously, eliminating the need for external filters. This technology allows for real-time infrared photography without the hassle of attaching and adjusting filters.
In conclusion, infrared photography offers a captivating and otherworldly perspective. Making an infrared filter for your camera is a relatively simple process, and with the advancements in technology, some cameras now offer built-in infrared capabilities. Whether you choose to use external filters or opt for a camera with built-in infrared capabilities, experimenting with infrared photography can open up a whole new world of creative possibilities.
2、 Types of Infrared Filters for Cameras
Infrared photography has gained popularity in recent years due to its unique and captivating results. To achieve these stunning infrared images, photographers often use infrared filters on their cameras. These filters block visible light and allow only infrared light to pass through, resulting in surreal and ethereal images.
There are several types of infrared filters available for cameras, each with its own characteristics and effects. One common type is the infrared pass filter, which blocks visible light and allows only infrared light to pass through. This filter is often used for black and white infrared photography, as it produces high contrast images with dark skies and white foliage.
Another type is the infrared cut-off filter, which blocks infrared light and allows only visible light to pass through. This filter is commonly used in digital cameras to prevent infrared light from interfering with the image sensor's color reproduction. It helps to maintain accurate colors in the final image.
Additionally, there are also full spectrum filters that allow both visible and infrared light to pass through. These filters are popular among photographers who want to experiment with different types of infrared photography, as they provide the flexibility to capture both visible and infrared light in a single image. However, using full spectrum filters requires additional post-processing to achieve the desired infrared effect.
It is worth noting that the specific effects and results of infrared filters can vary depending on the camera model and sensor sensitivity. Therefore, it is recommended to experiment with different filters and camera settings to achieve the desired infrared effect.
In conclusion, there are various types of infrared filters available for cameras, each with its own unique characteristics and effects. Whether you choose an infrared pass filter, an infrared cut-off filter, or a full spectrum filter, experimenting with these filters can open up a whole new world of creative possibilities in infrared photography.
3、 DIY Infrared Filter: Step-by-Step Guide
DIY Infrared Filter: Step-by-Step Guide
Infrared photography has gained popularity in recent years due to its unique and captivating results. If you're interested in experimenting with infrared photography, you can create your own infrared filter for your camera. Here's a step-by-step guide to help you get started.
1. Gather the necessary materials: You'll need a piece of developed color film, a pair of scissors, clear tape, and a filter holder or a lens cap that fits your camera.
2. Prepare the film: Cut a small piece of the developed color film to fit the size of your filter holder or lens cap. Make sure the film is clean and free from any scratches or dust.
3. Attach the film to the filter holder or lens cap: Use clear tape to secure the film onto the filter holder or lens cap. Make sure it is tightly attached to prevent any light leaks.
4. Test your DIY infrared filter: Attach the filter to your camera and start experimenting with infrared photography. Keep in mind that the results may vary depending on the camera model and the film used.
5. Adjust your camera settings: Infrared photography requires longer exposure times, so set your camera to manual mode and adjust the shutter speed accordingly. You may also need to adjust the white balance to achieve the desired effect.
It's important to note that creating a DIY infrared filter may not produce the same results as a professional infrared filter. However, it can be a fun and cost-effective way to explore the world of infrared photography.
Latest Point of View: While creating a DIY infrared filter can be a great starting point, it's worth considering investing in a professional infrared filter for better results. Professional filters are specifically designed to block visible light and allow only infrared light to pass through, resulting in more accurate and consistent infrared images. Additionally, professional filters often come with different levels of infrared transmission, allowing you to have more control over the final image. So, if you find yourself enjoying infrared photography and want to take it to the next level, it might be worth investing in a high-quality infrared filter.
4、 Choosing the Right Materials for an Infrared Filter
Choosing the Right Materials for an Infrared Filter
Infrared photography has gained popularity in recent years due to its unique and captivating results. To capture stunning infrared images, one must use an infrared filter on their camera lens. These filters block visible light and allow only infrared light to pass through, resulting in ethereal and otherworldly images.
When it comes to making an infrared filter for a camera, the choice of materials is crucial. The most commonly used material for infrared filters is a type of glass called Schott RG830. This glass has excellent infrared transmission properties, allowing a wide range of infrared light to pass through while blocking most visible light. It is important to note that not all glass types are suitable for infrared photography, as some may block too much infrared light or allow too much visible light to pass through.
Another material option for an infrared filter is acrylic. Acrylic filters are lightweight and less prone to breakage compared to glass filters. However, they may not provide the same level of infrared transmission as glass filters, resulting in slightly different image results.
In recent years, advancements in technology have led to the development of specialized infrared filters made from materials such as sapphire and quartz. These filters offer even higher infrared transmission and can produce stunning infrared images with enhanced clarity and detail.
When choosing the right material for an infrared filter, it is essential to consider factors such as the desired level of infrared transmission, durability, and budget. Additionally, it is advisable to consult with experienced photographers or experts in the field to stay updated on the latest advancements and recommendations.
In conclusion, selecting the appropriate material for an infrared filter is crucial for achieving captivating infrared images. Whether using glass, acrylic, or specialized materials like sapphire or quartz, understanding the properties and capabilities of each material is essential for capturing the desired results in infrared photography.
