How To Make Your Own Tripod Stand ?
To make your own tripod stand, you will need three long, sturdy poles or metal rods of equal length. Start by gathering the three poles and tying them together at one end using a strong rope or cable tie. Make sure the poles are evenly spaced apart, forming a triangle shape. Next, spread the other ends of the poles out to create a stable base. You can either dig holes in the ground to secure the poles or use additional ropes or stakes to anchor them. Finally, check that the tripod stand is stable and adjust the positioning of the poles if needed. Your homemade tripod stand is now ready to be used for various purposes such as photography, camping, or even as a support for hanging objects.
1、 Choosing the right materials for your DIY tripod stand
Choosing the right materials for your DIY tripod stand is crucial to ensure stability and durability. There are several options available, each with its own advantages and considerations. Here are some materials commonly used for making tripod stands:
1. Wood: Wood is a popular choice due to its availability and ease of working with. Hardwoods like oak or maple are recommended for their strength. However, wood may not be as stable as other materials, especially in windy conditions. To enhance stability, consider adding metal brackets or reinforcements.
2. Aluminum: Aluminum is lightweight, sturdy, and resistant to rust, making it a popular choice for tripod stands. It is also relatively affordable and easy to work with. However, aluminum may not be as strong as other materials, so consider using thicker or reinforced aluminum tubing for added stability.
3. Carbon Fiber: Carbon fiber is a lightweight and extremely strong material used in professional-grade tripod stands. It offers excellent stability and vibration resistance, making it ideal for photography or videography. However, carbon fiber can be expensive and more challenging to work with compared to other materials.
4. PVC: PVC (polyvinyl chloride) is a budget-friendly option that is readily available at hardware stores. It is lightweight, easy to work with, and resistant to corrosion. However, PVC may not be as durable or stable as other materials, especially for heavier equipment.
When choosing materials for your DIY tripod stand, consider the weight and size of the equipment you plan to use. Additionally, take into account the intended use and environmental conditions. It's always a good idea to research and gather different perspectives on the latest materials and techniques to ensure you make an informed decision.

2、 Step-by-step guide to building a sturdy tripod stand
Step-by-step guide to building a sturdy tripod stand:
1. Gather the necessary materials: You will need three sturdy wooden or metal poles of equal length, a drill, screws, a saw, and a measuring tape.
2. Measure and cut the poles: Determine the desired height of your tripod stand and cut the poles accordingly. Make sure all three poles are the same length.
3. Drill holes: On one end of each pole, drill a hole large enough to fit the screws. This will be the top of your tripod stand.
4. Attach the poles: Place the three poles together at the top, aligning the holes. Insert screws through the holes and tighten them to secure the poles together. This will create the tripod shape.
5. Adjust the legs: Spread out the legs of the tripod to your desired width, ensuring stability. You can use a measuring tape to ensure equal distance between each leg.
6. Secure the legs: Once you have determined the desired width, mark the spot on each leg where they will be attached to the ground. Drill holes at these spots and insert screws to secure the legs in place.
7. Test the stability: Before using your tripod stand, make sure it is sturdy and can support the weight it will be holding. Adjust the legs if necessary to ensure stability.
8. Optional: If you want to add extra stability, you can attach braces or crossbars between the legs of the tripod stand.
Building your own tripod stand can be a cost-effective and customizable solution for various purposes such as photography, camping, or even as a display stand. However, it is important to note that the materials and design may vary depending on the intended use and personal preferences. Always prioritize safety and stability when constructing your tripod stand.

3、 Tips for adjusting the height and stability of your tripod
Tips for adjusting the height and stability of your tripod:
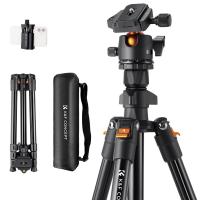
1. Extend the legs: Most tripods have adjustable legs that can be extended to different lengths. To increase the height of your tripod, simply extend the legs to the desired length. Make sure to lock the leg sections securely in place to ensure stability.
2. Use the center column: Many tripods also have a center column that can be extended to further increase the height. This is especially useful when shooting from a higher perspective or when you need extra height. However, keep in mind that extending the center column too much can compromise stability, so use it sparingly.
3. Adjust the leg angles: Tripods often have adjustable leg angles that allow you to position the tripod on uneven surfaces. By adjusting the leg angles, you can ensure that your tripod is stable and level, even on challenging terrain.
4. Add weight for stability: If you're shooting in windy conditions or on unstable ground, adding weight to your tripod can help improve stability. You can use a bag or hook to hang a weight, such as your camera bag, from the center column or tripod legs. This will help prevent your tripod from toppling over.
5. Consider a tripod stabilizer: If you frequently shoot in windy or unstable conditions, you may want to invest in a tripod stabilizer. These accessories attach to the tripod legs and provide additional stability by anchoring the tripod to the ground.
In conclusion, adjusting the height and stability of your tripod is essential for capturing steady and well-composed shots. By following these tips, you can ensure that your tripod is set up correctly and ready to support your camera in any shooting situation.

4、 Enhancing the durability and longevity of your homemade tripod
How to Make Your Own Tripod Stand:
Making your own tripod stand can be a rewarding and cost-effective solution for photographers and videographers. Here's a step-by-step guide to help you create your own tripod stand:
1. Gather the materials: You will need three sturdy and equal-length wooden or metal rods, a drill, screws, a saw, a measuring tape, and a level.
2. Measure and cut the rods: Determine the desired height of your tripod stand and cut the rods accordingly. Ensure that all three rods are of equal length.
3. Drill holes: On one end of each rod, drill a hole large enough to fit the screw. This will be used to attach the legs to the tripod head.
4. Attach the legs: Place the three rods together, forming a triangle shape, and align the holes. Insert screws through the holes to secure the legs together.
5. Add stability: To enhance stability, you can attach a small metal plate or a wooden block to the bottom of each leg. This will provide a wider base and prevent the tripod from tipping over.
6. Attach the tripod head: Purchase a tripod head separately and attach it to the top of the legs. Ensure that it is securely fastened.
Enhancing the Durability and Longevity of Your Homemade Tripod:
To ensure that your homemade tripod stand lasts for a long time and withstands regular use, consider the following tips:
1. Choose high-quality materials: Opt for sturdy and durable materials such as aluminum or hardwood for the legs. This will provide better stability and longevity.
2. Reinforce the joints: Apply wood glue or metal brackets at the joints where the legs meet to strengthen the connection. This will prevent the legs from loosening over time.
3. Regular maintenance: Clean your tripod stand regularly to remove dirt and debris that can cause wear and tear. Lubricate any moving parts to ensure smooth operation.
4. Store properly: When not in use, store your tripod stand in a dry and safe place to prevent damage from moisture or accidental knocks.
5. Avoid overloading: Be mindful of the weight capacity of your homemade tripod stand and avoid exceeding it. Overloading can lead to instability and potential damage.
By following these steps and taking proper care of your homemade tripod stand, you can enhance its durability and longevity, ensuring that it serves you well in your photography or videography endeavors.


