How To Measure For Nd Grad Filters?
To measure for ND grad filters, you need to follow these steps:
1. Determine the strength of the filter you need: ND grad filters come in different strengths, usually measured in stops. You need to determine the strength of the filter you need based on the amount of light reduction required.
2. Determine the angle of the horizon: You need to determine the angle of the horizon in your scene to know the type of ND grad filter to use. If the horizon is straight, you can use a rectangular filter. If the horizon is uneven, you need to use a graduated filter.
3. Determine the size of the filter: You need to determine the size of the filter that fits your lens. You can do this by checking the diameter of your lens or by using a step-up or step-down ring.
4. Position the filter: Once you have the right filter, you need to position it correctly. For rectangular filters, you need to slide it into a filter holder and adjust it to cover the area you want to darken. For graduated filters, you need to position the dark part of the filter over the bright area of the scene.
5. Adjust the exposure: After positioning the filter, you need to adjust the exposure to get the right balance between the bright and dark areas of the scene.
1、 Understanding ND Grad Filters

How to measure for ND Grad Filters:
To measure for ND Grad Filters, you need to first determine the strength of the filter you need. This is usually measured in stops, which refers to the amount of light the filter blocks. For example, a 2-stop filter will block two stops of light, while a 4-stop filter will block four stops of light.
To determine the strength of the filter you need, you can use a light meter or simply take test shots and adjust the exposure until you achieve the desired effect. Once you know the strength of the filter you need, you can choose the appropriate ND Grad Filter.
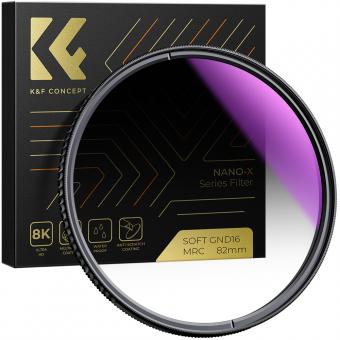
It's important to note that ND Grad Filters come in different types, including hard-edge, soft-edge, and reverse. Hard-edge filters have a sharp transition between the dark and clear areas, while soft-edge filters have a gradual transition. Reverse filters are designed for sunrise and sunset shots, where the brightest part of the scene is at the horizon.
Understanding ND Grad Filters:
ND Grad Filters are essential tools for landscape photographers, allowing them to balance the exposure between the sky and the foreground. They work by blocking light from the brightest part of the scene, usually the sky, while allowing light from the darker areas, such as the foreground, to pass through.
ND Grad Filters come in different strengths and types, allowing photographers to choose the appropriate filter for their specific needs. They can be used in combination with other filters, such as polarizers and neutral density filters, to achieve even more creative effects.
In recent years, there has been a trend towards using digital post-processing techniques to achieve similar effects to ND Grad Filters. However, many photographers still prefer the use of physical filters, as they allow for more precise control over the exposure and can often produce more natural-looking results.
2、 Choosing the Right ND Grad Filter Strength
Choosing the Right ND Grad Filter Strength:
ND grad filters are essential tools for landscape photographers who want to balance the exposure between the sky and the foreground. However, choosing the right ND grad filter strength can be a daunting task, especially for beginners. Here are some tips to help you choose the right ND grad filter strength:
1. Determine the Exposure Difference: The first step is to determine the exposure difference between the sky and the foreground. You can use a light meter or the histogram on your camera to measure the difference.
2. Choose the Right ND Grad Filter Strength: Once you know the exposure difference, you can choose the right ND grad filter strength. ND grad filters come in different strengths, such as 1-stop, 2-stop, and 3-stop. Choose the strength that matches the exposure difference.
3. Consider the Scene: The strength of the ND grad filter also depends on the scene you are photographing. For example, if you are photographing a sunset, you may need a stronger ND grad filter to balance the exposure between the bright sky and the darker foreground.
4. Experiment: Don't be afraid to experiment with different ND grad filter strengths. Take test shots with different strengths and see which one works best for your scene.
5. Latest Point of View: With the advancement of technology, some photographers are now using digital blending techniques instead of ND grad filters. This technique involves taking multiple exposures of the same scene and blending them together in post-processing to achieve a balanced exposure. However, ND grad filters are still a popular and effective tool for landscape photographers who prefer to get the shot right in-camera.
3、 Determining the Gradation Area
Determining the Gradation Area is the key to measuring for ND Grad filters. The Gradation Area is the part of the image that needs to be darkened or lightened to balance the exposure. To determine the Gradation Area, you need to identify the brightest and darkest parts of the scene. This can be done by using a histogram or by simply looking at the scene and identifying the areas that are too bright or too dark.
Once you have identified the Gradation Area, you can measure the size of the filter you need. This can be done by using a filter holder and measuring the width of the filter slot. Alternatively, you can use a ruler to measure the width of the Gradation Area and then choose a filter that is slightly wider than this measurement.
It is important to note that the Gradation Area may vary depending on the scene and the effect you are trying to achieve. For example, if you are shooting a landscape with a bright sky and dark foreground, you may need a filter that has a soft transition between the dark and light areas. On the other hand, if you are shooting a cityscape with a bright skyline and dark buildings, you may need a filter with a hard transition.
In conclusion, measuring for ND Grad filters requires determining the Gradation Area and choosing a filter that is slightly wider than this area. It is important to consider the scene and the effect you are trying to achieve when choosing the type of filter and the transition type.
4、 Measuring the Exposure Values

Measuring for ND grad filters involves determining the difference in exposure values between the bright and dark areas of a scene. This can be done using a handheld light meter or by using the histogram feature on a digital camera.
To measure with a handheld light meter, take a reading of the brightest part of the scene and then take a reading of the darkest part of the scene. The difference in exposure values between the two readings will determine the strength of the ND grad filter needed.
Alternatively, using the histogram feature on a digital camera can also help determine the exposure values. Take a photo of the scene and review the histogram. If the histogram shows a large difference between the bright and dark areas, then an ND grad filter may be necessary to balance the exposure.
It is important to note that the strength of the ND grad filter needed may vary depending on the specific scene and lighting conditions. It is recommended to start with a lower strength filter and adjust as necessary. Additionally, some photographers prefer to use a range of ND grad filters to have more flexibility in balancing exposure values.
In recent years, some photographers have also started using digital blending techniques to achieve similar results as ND grad filters. This involves taking multiple exposures of the same scene with different exposure values and blending them together in post-processing. However, the use of ND grad filters remains a popular and effective method for balancing exposure values in landscape photography.


