How To Mount Canon Dslr On Tripod ?
To mount a Canon DSLR on a tripod, you will need to follow these steps:
1. Locate the tripod mount socket on the bottom of your Canon DSLR camera.
2. Align the tripod plate with the socket and ensure that the plate's screw is compatible with the camera's socket.
3. Insert the screw into the socket and tighten it securely using a coin or a screwdriver, depending on the type of tripod plate.
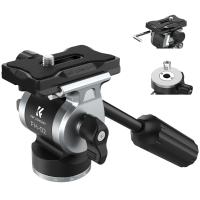
4. Once the camera is securely attached to the tripod plate, place the plate onto the tripod head.
5. Align the plate with the tripod head and ensure that it is securely fastened.
6. Test the stability of the camera by gently moving it and checking if it remains firmly attached to the tripod.
It is important to note that the specific steps may vary slightly depending on the model of your Canon DSLR camera and the type of tripod you are using. Always refer to the camera and tripod manuals for detailed instructions.
1、 Choosing the Right Tripod Mount for Canon DSLR Cameras
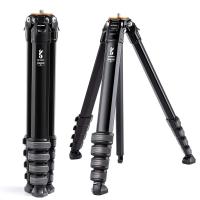
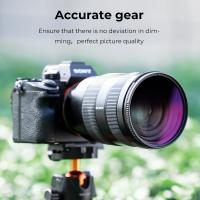
Choosing the right tripod mount for Canon DSLR cameras is essential for achieving stability and capturing high-quality images. Mounting your Canon DSLR on a tripod provides stability, reduces camera shake, and allows for precise composition. Here's a step-by-step guide on how to mount your Canon DSLR on a tripod:
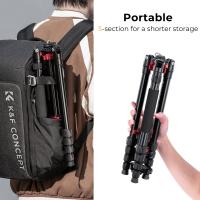
1. Ensure that your tripod is set up correctly and securely. Extend the legs to your desired height and lock them in place.
2. Locate the tripod mount on your Canon DSLR camera. It is usually located on the bottom of the camera body.
3. Align the tripod mount on your camera with the tripod head. The tripod head is the part of the tripod that holds the camera.
4. Attach the camera to the tripod head by screwing the tripod mount into the tripod head. Make sure it is securely tightened to prevent any accidental falls.
5. Once the camera is securely mounted, adjust the tripod head to the desired angle and lock it in place. This will allow you to position your camera for the perfect shot.
It is important to note that there are various types of tripod mounts available for Canon DSLR cameras. The most common type is the standard 1/4"-20 tripod mount, which is compatible with most tripods. However, some Canon DSLR cameras may require a specific type of tripod mount, such as the Arca-Swiss mount.
When choosing a tripod mount, consider factors such as the weight and size of your camera, the type of photography you will be doing, and your budget. Additionally, it is always a good idea to read reviews and seek recommendations from other photographers to ensure you are choosing a reliable and durable tripod mount.
In conclusion, mounting your Canon DSLR on a tripod is a simple process that can greatly enhance your photography. By choosing the right tripod mount and following the steps outlined above, you can achieve stability, reduce camera shake, and capture stunning images with your Canon DSLR camera.
2、 Attaching a Canon DSLR to a Tripod: Step-by-Step Guide
Attaching a Canon DSLR to a tripod is a simple process that ensures stability and eliminates camera shake, allowing you to capture sharp and steady images. Here is a step-by-step guide on how to mount a Canon DSLR on a tripod:
1. Choose a compatible tripod: Ensure that the tripod you have is compatible with your Canon DSLR. Most tripods come with a standard 1/4-inch screw mount, which is compatible with Canon DSLRs.
2. Locate the tripod mount on your camera: The tripod mount is usually located on the bottom of the camera body. It is a threaded hole with a metal ring around it.
3. Align the camera with the tripod head: Place the camera on the tripod head, aligning the threaded hole on the camera with the screw mount on the tripod head.
4. Screw the camera onto the tripod head: Rotate the camera clockwise onto the tripod head until it is securely attached. Ensure that the camera is tightly screwed onto the tripod head to prevent any accidental falls.
5. Adjust the camera position: Once the camera is securely attached, adjust the position of the camera on the tripod head. Most tripod heads allow for 360-degree rotation and tilt adjustments, allowing you to position the camera as desired.
6. Lock the camera in place: Once you have positioned the camera, tighten the tripod head's locking mechanism to secure the camera in place. This will prevent any movement or rotation of the camera while shooting.
It is important to note that different tripod models may have slight variations in their mounting mechanisms. Therefore, it is always recommended to refer to the specific instructions provided by the tripod manufacturer.
In conclusion, mounting a Canon DSLR on a tripod is a straightforward process. By following these steps, you can ensure that your camera is securely attached to the tripod, providing stability and allowing you to capture high-quality images.
3、 Understanding Tripod Mounting Options for Canon DSLR Cameras
Understanding Tripod Mounting Options for Canon DSLR Cameras
Mounting a Canon DSLR camera on a tripod is a crucial step in achieving stable and shake-free shots. It not only provides stability but also allows for precise framing and composition. To mount your Canon DSLR on a tripod, follow these steps:
1. Identify the tripod mount: Every Canon DSLR camera has a tripod mount located on the bottom. It is a threaded hole that allows you to attach the camera to the tripod.
2. Choose the right tripod plate: Tripods typically come with a quick-release plate that attaches to the camera's tripod mount. Ensure that the plate is compatible with your Canon DSLR model. Some tripods offer interchangeable plates, while others have specific plates designed for certain camera models.
3. Attach the plate to the camera: Align the plate's screw hole with the camera's tripod mount and securely tighten it using a coin or screwdriver. Make sure it is firmly attached to prevent any accidental detachment.
4. Mount the camera on the tripod: Slide the plate into the tripod's quick-release mechanism and lock it in place. Ensure that it is securely fastened to avoid any wobbling or movement.
5. Adjust the tripod: Once the camera is mounted, adjust the tripod's height, angle, and position according to your shooting requirements. Ensure that the tripod legs are stable and locked in place.
It is important to note that Canon DSLR cameras come in various sizes and weights, so it is crucial to choose a tripod that can support the weight of your camera and lens combination. Additionally, consider using a remote shutter release or the camera's self-timer function to minimize any potential camera shake when capturing images.
In recent years, advancements in tripod mounting options have introduced features like Arca-Swiss compatible plates, which offer a more universal mounting solution. These plates allow for quick and easy attachment to a wide range of tripod heads and accessories. Additionally, some tripods now offer built-in leveling bases or ball heads, providing more flexibility and convenience for photographers.
Overall, understanding the tripod mounting options for Canon DSLR cameras is essential for achieving stable and professional-looking shots. By following the steps mentioned above and considering the latest advancements in tripod technology, you can enhance your photography experience and capture stunning images with ease.
4、 Tips for Securely Mounting a Canon DSLR on a Tripod
Tips for Securely Mounting a Canon DSLR on a Tripod
Mounting your Canon DSLR on a tripod is essential for capturing steady and sharp images. Here are some tips to ensure a secure and stable setup:
1. Choose a compatible tripod: Ensure that your tripod is compatible with your Canon DSLR. Look for a tripod with a sturdy build and a weight capacity that can support the weight of your camera and lens.
2. Use a quick-release plate: Most tripods come with a quick-release plate that attaches to the bottom of your camera. This plate allows you to quickly attach and detach your camera from the tripod. Make sure the plate is securely fastened to your camera's tripod mount.
3. Align the camera properly: When mounting your Canon DSLR on the tripod, ensure that it is aligned correctly. The camera should be parallel to the ground, and the lens should be facing forward. This will help maintain balance and stability.
4. Tighten all screws and knobs: Before using your tripod, make sure to tighten all screws and knobs securely. This includes the tripod head, quick-release plate, and any adjustable legs or extensions. Regularly check these connections during your shoot to ensure they remain tight.
5. Use a remote shutter release or self-timer: To minimize camera shake, use a remote shutter release or the self-timer function on your Canon DSLR. This will allow you to trigger the shutter without physically touching the camera, reducing the risk of introducing vibrations.
6. Consider additional stability options: If you're shooting in windy conditions or on uneven terrain, consider using additional stability options. This could include using a sandbag or a tripod weight hook to add extra weight to the tripod, or using a tripod with spiked feet for better grip on slippery surfaces.
By following these tips, you can securely mount your Canon DSLR on a tripod and capture sharp, blur-free images. Always remember to handle your equipment with care and regularly check for any signs of wear or damage to ensure a safe and stable setup.
