How To Open Tripod Legs ?
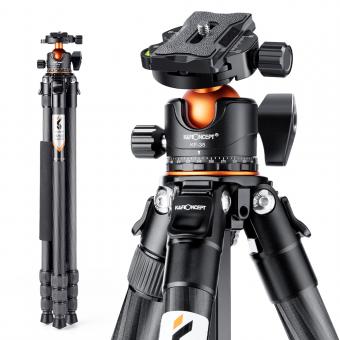
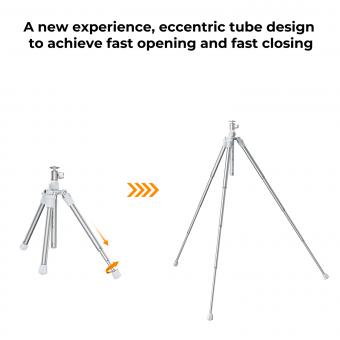
To open tripod legs, start by loosening the leg locks or clasps located near the top of each leg. Once the locks are loosened, extend the legs by pulling them outward. Some tripods may have multiple sections, so you may need to extend each section individually. Once the legs are fully extended, tighten the leg locks to secure them in place. Make sure all the legs are extended to the same height for stability.
1、 Unlocking mechanism for extending tripod legs
To open tripod legs, follow these steps:
1. Start by holding the tripod firmly with one hand and locating the locking mechanism. This mechanism is usually located near the top of each leg, close to where it connects to the center column.
2. Depending on the type of tripod you have, the locking mechanism may vary. The most common types include twist locks, flip locks, and lever locks. Twist locks require you to rotate the leg sections to unlock them, flip locks require you to flip a lever to release the leg sections, and lever locks require you to press a lever to unlock the legs.
3. Once you have identified the locking mechanism, unlock it by twisting, flipping, or pressing the appropriate part. This will release the leg sections, allowing you to extend them.
4. Gently pull the leg sections apart to extend the tripod legs to your desired height. Most tripods have multiple leg sections, so you may need to repeat this step for each section.
5. Once the legs are extended, make sure to lock the mechanism again to secure the legs in place. This will prevent the tripod from collapsing or wobbling during use.
It's important to note that tripod designs can vary, so it's always a good idea to consult the manufacturer's instructions for your specific tripod model. Additionally, some tripods may have additional features or adjustments that can affect the opening and closing process.
2、 Adjusting tripod leg height for optimal stability
To open tripod legs, follow these steps:
1. Start by loosening the leg locks: Most tripods have leg locks located near the top of each leg. Rotate these locks counterclockwise to loosen them. This will allow the legs to move freely.
2. Extend the legs: Hold the tripod firmly and pull each leg outward to extend it. Some tripods have multiple sections, so you may need to extend each section individually. Make sure to extend the legs evenly to maintain stability.
3. Adjust the leg height: Once the legs are extended, you can adjust their height according to your needs. Most tripods have adjustable leg sections that can be locked into place at different heights. To adjust the height, loosen the leg lock at each section, slide the leg to the desired height, and then tighten the lock to secure it.
4. Ensure stability: After adjusting the leg height, make sure the tripod is stable. Check that all legs are extended to the same height and that the tripod is level. If needed, use a bubble level or the built-in level on the tripod to ensure it is balanced.
5. Lock the leg locks: Once you have set the tripod to the desired height and ensured stability, tighten the leg locks by rotating them clockwise. This will secure the legs in place and prevent any accidental movement.
Adjusting tripod leg height for optimal stability is crucial to ensure steady shots. It is recommended to extend the legs fully and evenly to maximize stability. Additionally, using a tripod on a flat and level surface will further enhance stability.
3、 Securing tripod legs in desired position
To open tripod legs, follow these steps:
1. Start by unlocking the leg locks: Most tripods have leg locks located near the top of each leg. These locks are usually twist locks or flip locks. Twist locks require you to rotate the lock counterclockwise to unlock, while flip locks need to be flipped open.
2. Extend the legs: Once the leg locks are unlocked, gently pull each leg downward to extend it. Be careful not to force the legs open too quickly or forcefully, as this can damage the tripod.
3. Adjust the leg height: Tripods usually have multiple leg sections, allowing you to adjust the height according to your needs. To adjust the height, locate the leg angle adjustment locks, which are usually located near the top of each leg. Unlock these locks and slide the leg sections up or down to achieve the desired height. Make sure to lock the leg angle adjustment locks once you have set the desired height.
4. Secure the tripod legs in the desired position: Once you have extended and adjusted the legs to the desired height, lock the leg locks by twisting them clockwise or flipping them closed. This will secure the tripod legs in place.
It's important to note that different tripod models may have slight variations in their leg opening mechanisms. Therefore, it's always a good idea to refer to the manufacturer's instructions for your specific tripod model.
From a latest point of view, some tripods now come with quick-release leg locks that allow for faster and easier leg opening. These locks often feature a lever or button that can be pressed to release the leg sections, making setup even more convenient. Additionally, some tripods also offer adjustable leg angles, allowing for greater flexibility in positioning the tripod on uneven surfaces.
4、 Properly collapsing tripod legs for storage and transportation
Properly collapsing tripod legs for storage and transportation is essential to ensure the longevity and functionality of your tripod. Here's a step-by-step guide on how to open tripod legs:
1. Start by unlocking the leg locks: Most tripods have twist locks or flip locks to secure the legs in place. Rotate or flip the locks counterclockwise to release them.
2. Extend the legs: Gently pull the legs downward to extend them to the desired height. Make sure to extend all the legs evenly to maintain stability.
3. Adjust the leg angles: Many tripods offer adjustable leg angles to accommodate different shooting situations. To adjust the angles, locate the leg angle locks near the tripod head and release them. Then, position the legs at the desired angle and lock them back in place.
4. Secure the leg locks: Once you have extended the legs and adjusted the angles, tighten the leg locks by rotating or flipping them clockwise. Ensure that each lock is securely tightened to prevent any accidental collapses.
5. Test stability: Give your tripod a gentle shake to ensure that the legs are securely locked in place and the tripod is stable. If you notice any wobbling or instability, double-check the leg locks and adjust them if necessary.
Remember, always consult your tripod's user manual for specific instructions as different tripod models may have slight variations in their leg opening mechanisms.
In terms of the latest point of view, some tripods now come with innovative leg opening mechanisms such as quick-release buttons or levers. These mechanisms allow for faster and more convenient leg opening, making setup time even quicker. Additionally, some tripods offer leg angle adjustments with preset options, allowing for easier and more precise positioning. These advancements in tripod design aim to enhance the user experience and provide greater flexibility in various shooting scenarios.
