How To Operate Wifi Camera ?
To operate a WiFi camera, you need to follow these steps:
1. Power on the camera: Ensure that the camera is properly charged or connected to a power source.
2. Connect to WiFi: Use the camera's settings menu to connect it to your WiFi network. Enter the network name and password when prompted.
3. Install the camera's app: Download and install the camera's dedicated app on your smartphone or tablet from the respective app store.
4. Launch the app: Open the app and create an account if required. Log in using your credentials.
5. Add the camera: Follow the app's instructions to add the camera to your account. This usually involves scanning a QR code or entering a unique camera ID.
6. Adjust camera settings: Use the app to customize camera settings such as motion detection, recording schedules, and video quality.
7. View and control the camera: Once the camera is successfully added, you can use the app to view the camera's live feed, control pan/tilt/zoom functions (if available), and access recorded footage.
Remember to consult the camera's user manual for specific instructions as the steps may vary slightly depending on the camera model.
1、 Setting up the camera's Wi-Fi connection
Setting up a Wi-Fi camera is a relatively simple process that can be done by following a few steps. Here's a guide on how to operate a Wi-Fi camera:
1. Choose the right camera: Before setting up the camera, make sure you have a Wi-Fi-enabled camera. Most modern cameras come with built-in Wi-Fi capabilities, allowing you to connect them to your home network.
2. Install the camera: Follow the manufacturer's instructions to physically install the camera in the desired location. Ensure it is placed within range of your Wi-Fi network for a stable connection.
3. Power on the camera: Connect the camera to a power source and turn it on. Wait for the camera to boot up and initialize.
4. Connect to Wi-Fi: Access the camera's settings menu either through a mobile app or a web browser. Look for the Wi-Fi settings and select the option to connect to a network. Choose your home Wi-Fi network from the list and enter the password if prompted.
5. Test the connection: Once connected, the camera should display a confirmation message or indicator light to signify a successful connection. You can also check the camera's app or web interface to ensure it is connected to the network.
6. Adjust camera settings: After the Wi-Fi connection is established, you can customize the camera settings according to your preferences. This may include adjusting motion detection sensitivity, setting up recording schedules, or enabling remote access.
7. Monitor and control: With the camera connected to Wi-Fi, you can now access the live feed and control the camera remotely using a mobile app or web interface. This allows you to view the camera's feed, receive notifications, and even control pan, tilt, and zoom functions if available.
It's worth noting that the specific steps may vary slightly depending on the camera model and manufacturer. Always refer to the camera's user manual or online documentation for detailed instructions.

2、 Configuring camera settings through the Wi-Fi connection
Configuring camera settings through the Wi-Fi connection is a convenient and efficient way to operate a Wi-Fi camera. With advancements in technology, many modern cameras come equipped with built-in Wi-Fi capabilities, allowing users to control and adjust settings remotely using a smartphone or computer.
To begin, ensure that your camera is connected to a stable Wi-Fi network. Most cameras have a dedicated app that can be downloaded onto your smartphone or tablet. Install the app and follow the instructions to connect your camera to the app via Wi-Fi. Once connected, you can access a range of settings and features.
Through the app, you can adjust basic settings such as exposure, white balance, and ISO. You can also change shooting modes, switch between photo and video modes, and even control the zoom function if your camera has one. Some apps even offer advanced features like manual focus control and the ability to shoot in RAW format.
Additionally, you can use the app to remotely trigger the camera's shutter, making it ideal for self-portraits or group photos. This feature is particularly useful when the camera is mounted on a tripod or placed in a hard-to-reach location.
Furthermore, many Wi-Fi cameras allow for wireless file transfer. This means you can transfer photos and videos directly from the camera to your smartphone or computer without the need for cables or memory cards. This feature is especially handy for quickly sharing images on social media or backing up files.
In conclusion, operating a Wi-Fi camera through a Wi-Fi connection offers a range of benefits and convenience. By configuring camera settings through the app, users can easily control various aspects of their camera remotely, making it a valuable tool for photographers of all levels.
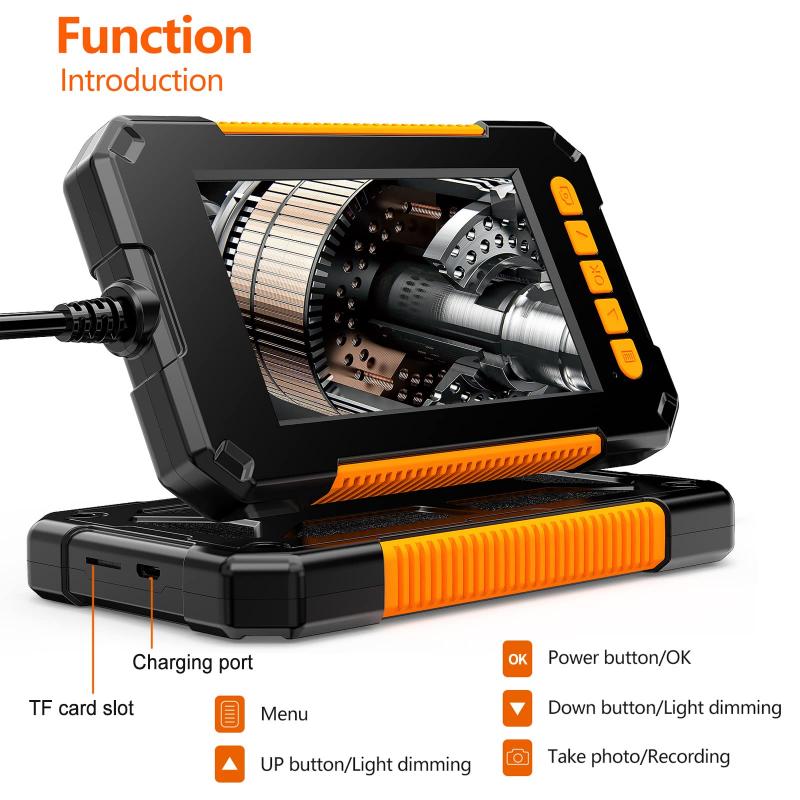
3、 Accessing the camera's live feed remotely via Wi-Fi
To operate a Wi-Fi camera, you need to follow a few simple steps. First, ensure that the camera is connected to a power source and that it is properly set up on your Wi-Fi network. Most Wi-Fi cameras come with a mobile app that you can download on your smartphone or tablet. Install the app and create an account if necessary.
Once the camera is connected to your Wi-Fi network and the app is installed, you can access the camera's live feed remotely. Open the app and log in to your account. The app will display a list of cameras associated with your account. Select the camera you want to view.
The app will then connect to the camera and display the live feed on your device's screen. You can usually control the camera's movement, zoom in or out, and even take snapshots or record videos directly from the app. Some cameras also offer additional features like two-way audio, motion detection, and night vision.
It's important to note that accessing the camera's live feed remotely via Wi-Fi requires a stable internet connection. Make sure that your smartphone or tablet is connected to a reliable Wi-Fi network or has a strong cellular data connection.
In recent years, advancements in technology have made Wi-Fi cameras more user-friendly and accessible. Many cameras now offer cloud storage options, allowing you to store and access recorded footage remotely. Additionally, some cameras are compatible with voice assistants like Amazon Alexa or Google Assistant, enabling you to control them using voice commands.
Overall, operating a Wi-Fi camera and accessing its live feed remotely has become easier and more convenient, thanks to the advancements in mobile apps and connectivity options.

4、 Managing and organizing recorded footage on a Wi-Fi camera
Managing and organizing recorded footage on a Wi-Fi camera is an essential aspect of utilizing this technology to its fullest potential. With the increasing popularity of Wi-Fi cameras, it is crucial to understand how to efficiently operate and manage the recorded footage.
To begin, it is important to familiarize yourself with the specific features and functions of your Wi-Fi camera. Each camera may have a different user interface and settings, so referring to the user manual or online resources provided by the manufacturer is highly recommended.
Once you have set up your Wi-Fi camera and connected it to your network, you can access the recorded footage remotely through a smartphone app or a web browser. Most Wi-Fi cameras offer cloud storage options, allowing you to store and access your footage securely from anywhere. Additionally, some cameras may have built-in SD card slots for local storage.
To effectively manage and organize your recorded footage, consider the following tips:
1. Create a folder structure: Organize your footage into folders based on date, location, or specific events. This will make it easier to locate and review specific recordings later on.
2. Use timestamps and tags: Many Wi-Fi cameras automatically add timestamps to the recorded footage. Take advantage of this feature to easily identify and sort recordings. Additionally, consider adding tags or labels to categorize footage based on specific criteria.
3. Regularly review and delete unnecessary footage: To avoid clutter and conserve storage space, periodically review your recorded footage and delete any unnecessary or redundant recordings.
4. Utilize motion detection and alerts: Wi-Fi cameras often offer motion detection capabilities. Enable this feature to receive alerts and notifications when motion is detected, allowing you to quickly review and manage relevant footage.
5. Consider video management software: If you have multiple Wi-Fi cameras or require advanced features, consider using video management software. These applications provide centralized control and organization of recorded footage from multiple cameras.
As technology continues to evolve, new features and advancements in Wi-Fi cameras are constantly emerging. Staying up to date with the latest developments and firmware updates will ensure you are utilizing your Wi-Fi camera to its fullest potential.
