How To Photograph Planets With Your Digital Camera ?
To photograph planets with your digital camera, you will need a few key things. First, you will need a camera with manual settings and the ability to attach it to a telescope. Next, you will need a telescope with a sturdy mount and the ability to attach your camera. Additionally, you will need a T-ring adapter specific to your camera model, which will allow you to connect your camera to the telescope.
Once you have all the necessary equipment, set up your telescope and attach your camera using the T-ring adapter. Use manual focus to adjust the focus on the planet you want to photograph. Set your camera to manual mode and adjust the settings to capture the planet's details. Start with a low ISO setting to reduce noise, and experiment with different shutter speeds and aperture settings to find the right balance.
It's important to use a remote shutter release or a timer to minimize camera shake. Additionally, consider using a tracking mount to compensate for the Earth's rotation and keep the planet in focus for longer exposures.
Remember, photographing planets can be challenging, and it may take some practice to achieve the desired results.
1、 Equipment needed for planetary photography with a digital camera
Equipment needed for planetary photography with a digital camera:
1. Digital Camera: Choose a camera with manual settings and a high-resolution sensor. Ideally, a DSLR or mirrorless camera will provide the best results. However, even some advanced point-and-shoot cameras can capture decent planetary images.
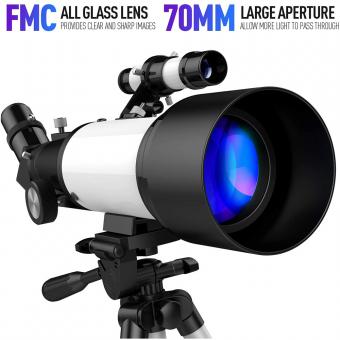
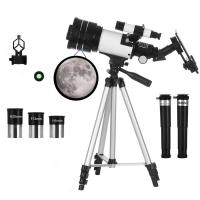
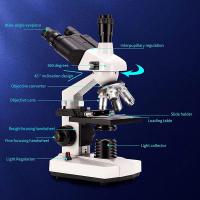
2. Telescope: To photograph planets, you will need a telescope with a good focal length. A telescope with a focal length of at least 1000mm is recommended for capturing detailed images of planets.
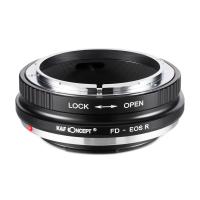
3. T-Ring and Adapter: A T-ring is required to connect your camera to the telescope. This adapter allows you to attach the camera to the telescope's eyepiece holder.
4. Barlow Lens: A Barlow lens is an optional accessory that can increase the effective focal length of your telescope, allowing for even closer views of the planets.
5. Remote Shutter Release: To minimize camera shake, use a remote shutter release or a self-timer function to trigger the camera without touching it.
6. Stable Mount: A sturdy mount is crucial for planetary photography. A motorized equatorial mount is recommended to track the planets accurately and compensate for the Earth's rotation.
7. Image Processing Software: After capturing the images, you will need software like Adobe Photoshop or specialized planetary imaging software to process and enhance the images.
It's worth noting that planetary photography with a digital camera can be challenging, as planets appear as small, bright objects in the sky. Achieving sharp focus and capturing fine details requires patience, practice, and experimentation with camera settings. Additionally, atmospheric conditions and light pollution can affect the quality of your images.
To stay up to date with the latest techniques and advancements in planetary photography, consider joining online communities or forums dedicated to astrophotography. These platforms provide valuable insights, tips, and discussions on capturing stunning planetary images.

2、 Camera settings for capturing clear and detailed planet images
Camera settings for capturing clear and detailed planet images:
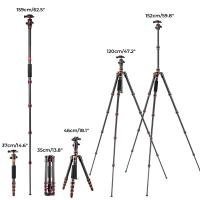
1. Use a tripod: To avoid any camera shake, it is essential to stabilize your camera on a tripod. This will ensure sharp and clear images.
2. Manual mode: Switch your camera to manual mode to have full control over the settings. This allows you to adjust the exposure, focus, and other parameters according to the specific conditions.
3. ISO: Set your ISO to the lowest possible value (usually around 100 or 200) to minimize noise and capture more details.
4. Aperture: Choose a wide aperture (low f-number) to allow more light into the camera. This will help in capturing brighter and more detailed planet images.
5. Shutter speed: Use a fast shutter speed to prevent any motion blur. Planets appear as tiny points of light in the sky, so a faster shutter speed will freeze their motion and result in sharper images.
6. Manual focus: Switch to manual focus mode and adjust the focus manually. Planets are at a considerable distance, so set your focus to infinity or use the hyperfocal distance technique to ensure sharpness.
7. Image stabilization: If your camera has image stabilization, enable it to further reduce any camera shake.
8. Remote shutter release: Use a remote shutter release or the camera's self-timer to avoid any camera movement caused by pressing the shutter button.
9. Post-processing: After capturing the images, use photo editing software to enhance the details and adjust the brightness, contrast, and sharpness as needed.
It's important to note that photographing planets with a digital camera can be challenging, as they are relatively small and distant objects. However, with the right equipment, patience, and practice, it is possible to capture stunning planet images. Additionally, staying updated with the latest techniques and advancements in astrophotography can help improve your results.
3、 Techniques for focusing and tracking planets during photography
Techniques for focusing and tracking planets during photography have evolved with the advancements in digital camera technology. Here's a guide on how to photograph planets with your digital camera:
1. Equipment: You'll need a digital camera with manual settings, a telephoto lens (preferably 200mm or longer), a sturdy tripod, and a remote shutter release.
2. Location and Timing: Choose a location with minimal light pollution and a clear view of the sky. Planets are best photographed when they are at their highest point in the sky, usually during the late evening or early morning.
3. Camera Settings: Set your camera to manual mode and adjust the ISO to a low value (around 100-400) to reduce noise. Use a wide aperture (low f-stop number) to capture more light. Experiment with different shutter speeds to find the right exposure.
4. Focusing: Switch your lens to manual focus and use live view mode to zoom in on the planet. Adjust the focus until the planet appears sharp and clear. Alternatively, you can use the camera's autofocus by focusing on a bright star or distant object before pointing it towards the planet.
5. Tracking: Planets move across the sky, so it's important to track their movement to avoid blurring. Use a motorized equatorial mount or a star tracker to keep the camera aligned with the planet's motion. If you don't have a tracking device, take multiple short exposures and stack them later using software to reduce motion blur.
6. Post-processing: Once you have captured your images, use photo editing software to enhance the details and colors of the planet. Adjust the contrast, sharpness, and saturation to bring out the best in your photograph.
It's worth noting that the latest point of view in planetary photography involves using specialized planetary cameras or even smartphones with telescope adapters. These devices offer higher magnification and better image quality, allowing for more detailed and impressive planetary photographs. However, with the right techniques and equipment, you can still achieve great results using a digital camera.
4、 Tips for selecting the right time and location for planetary photography
Tips for selecting the right time and location for planetary photography:
1. Research the planets: Before heading out to photograph planets, it's important to know which planets are visible in the night sky and their current positions. Websites and apps like Stellarium can provide you with this information.
2. Choose a clear night: Planetary photography requires clear skies with minimal atmospheric interference. Check the weather forecast to ensure you have a cloudless night.
3. Find a dark location: Light pollution can greatly affect the quality of your planetary photographs. Look for a location away from city lights, preferably in a rural area or a designated dark sky site.
4. Use a telescope or telephoto lens: To capture detailed images of planets, you'll need a telescope or a telephoto lens with a long focal length. Attach your digital camera to the telescope or lens using a T-ring adapter.
5. Use a sturdy tripod: Stability is crucial for planetary photography. Mount your camera on a sturdy tripod to minimize camera shake and ensure sharp images.
6. Use a remote shutter release: To further reduce camera shake, use a remote shutter release or the camera's self-timer function to trigger the shutter without touching the camera.
7. Experiment with exposure settings: Planets are relatively bright objects, so start with a low ISO setting (e.g., ISO 100) and a fast shutter speed (e.g., 1/1000th of a second). Adjust these settings as needed to achieve the desired exposure.
8. Shoot in RAW format: RAW files contain more data and allow for greater flexibility in post-processing. Shooting in RAW will give you more control over the final image.
9. Post-processing: Once you've captured your planetary images, use photo editing software to enhance the details and colors. Adjust the levels, sharpness, and contrast to bring out the best in your photographs.
Remember, planetary photography requires patience and practice. Keep experimenting with different settings and techniques to improve your skills and capture stunning images of the planets.













There are no comments for this blog.