How To Program A Trail Camera ?
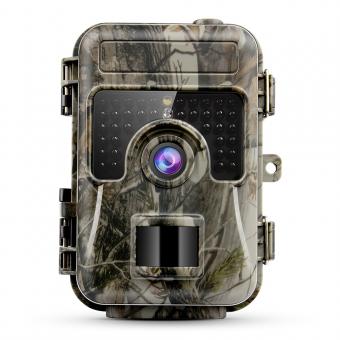
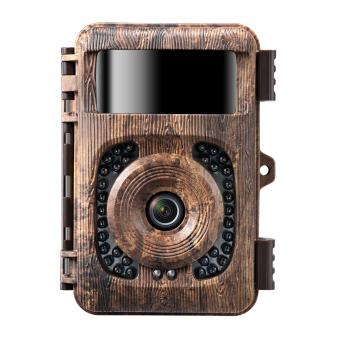
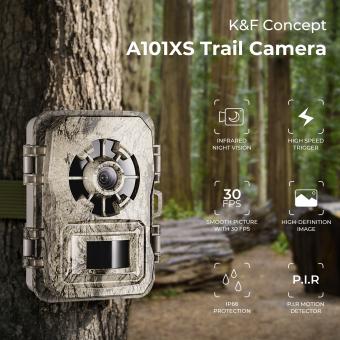
Programming a trail camera typically involves setting up the date and time, selecting the desired mode (such as photo or video), adjusting the resolution and other settings, and choosing the trigger sensitivity and delay. The exact steps may vary depending on the specific model of camera, so it is important to consult the user manual for detailed instructions. In general, the process involves accessing the camera's menu system and using the buttons or touchscreen to navigate through the various options and make selections. Once the camera is programmed, it can be mounted in a suitable location and left to capture images or videos of wildlife or other subjects. Some trail cameras also offer wireless connectivity options, allowing users to remotely view and control the camera using a smartphone app or other device.
1、 Camera Settings
Programming a trail camera can be a bit daunting, especially for beginners. However, with the right knowledge and guidance, it can be a breeze. The first step is to familiarize yourself with the camera's settings. Most trail cameras come with a variety of settings that can be customized to suit your needs.
The first setting to consider is the resolution. This determines the quality of the images and videos captured by the camera. Higher resolutions will produce clearer images, but they will also take up more storage space. It's important to find a balance between image quality and storage space.
Another important setting is the trigger speed. This determines how quickly the camera will take a photo or video once it detects motion. A faster trigger speed is ideal for capturing fast-moving animals, while a slower speed may be better for capturing animals that move more slowly.
The detection range is also an important setting to consider. This determines how far away the camera can detect motion. A longer detection range is ideal for larger areas, while a shorter range may be better for smaller areas.
Finally, consider the battery life of the camera. This will determine how long the camera can stay in the field before needing to be replaced or recharged. It's important to choose a camera with a battery life that suits your needs.
In conclusion, programming a trail camera requires a good understanding of the camera's settings. By customizing the resolution, trigger speed, detection range, and battery life, you can ensure that your camera captures the images and videos you need. With the latest advancements in technology, trail cameras are becoming more user-friendly and efficient, making it easier than ever to capture wildlife in their natural habitat.

2、 Time-Lapse Mode
To program a trail camera in Time-Lapse Mode, follow these steps:
1. Turn on the camera and navigate to the settings menu.
2. Select Time-Lapse Mode and choose the interval at which you want the camera to take photos. This can range from seconds to hours, depending on your preference.
3. Set the duration of the Time-Lapse Mode. This determines how long the camera will take photos for before stopping.
4. Choose the resolution and quality of the photos you want the camera to take.
5. Select the location where you want the camera to save the photos.
6. Set the date and time on the camera to ensure accurate time-stamping of the photos.
Once you have programmed the camera, place it in the desired location and let it run for the duration of the Time-Lapse Mode. After the camera has finished taking photos, you can retrieve the images and review them to see what activity occurred during the time period.
It is important to note that some trail cameras may have additional features or settings that can enhance the Time-Lapse Mode, such as motion detection or infrared technology. It is recommended to read the camera's manual or do research online to fully understand the capabilities of your specific camera.
In recent years, trail cameras have become increasingly popular among wildlife enthusiasts, hunters, and researchers. Time-Lapse Mode can be a useful tool for monitoring changes in the environment, tracking animal behavior, or capturing unique moments in nature. As technology continues to advance, trail cameras are becoming more sophisticated and user-friendly, making them accessible to a wider range of individuals and purposes.

3、 Motion Detection Mode
How to program a trail camera in Motion Detection Mode is a crucial aspect of using a trail camera. Motion Detection Mode is a feature that allows the camera to detect any movement within its range and capture images or videos. To program a trail camera in Motion Detection Mode, you need to follow a few simple steps.
First, you need to turn on the camera and access the settings menu. From there, you can select the Motion Detection Mode option and adjust the sensitivity level. The sensitivity level determines how sensitive the camera is to motion, and you can adjust it based on the environment you are monitoring.
Next, you can set the trigger speed, which is the time it takes for the camera to capture an image or video once it detects motion. You can also set the delay time, which is the time between each capture. This feature is useful if you want to conserve battery life or avoid capturing too many images or videos.
Finally, you can set the resolution and quality of the images or videos captured by the camera. Higher resolution and quality will result in better images or videos, but they will also take up more storage space.
It is important to note that different trail cameras may have different settings and options for Motion Detection Mode. Therefore, it is essential to read the user manual and follow the manufacturer's instructions.
In conclusion, programming a trail camera in Motion Detection Mode is a simple process that requires adjusting the sensitivity level, trigger speed, delay time, and image or video quality. With the latest advancements in trail camera technology, some cameras now come with advanced features such as facial recognition and animal detection, making them even more effective for monitoring wildlife and security purposes.

4、 Trigger Speed
How to program a trail camera is a common question among outdoor enthusiasts and wildlife photographers. The process of programming a trail camera can vary depending on the brand and model, but the basic steps are similar. First, you need to insert batteries and a memory card into the camera. Then, turn on the camera and navigate to the settings menu. From there, you can adjust the date and time, image resolution, and other settings.
One important setting to consider when programming a trail camera is the trigger speed. Trigger speed refers to the amount of time it takes for the camera to capture an image after detecting motion. A faster trigger speed means that the camera will capture images more quickly, which is important for capturing fast-moving wildlife. The latest trail cameras on the market have trigger speeds as fast as 0.2 seconds, which is incredibly fast.
Another important consideration when programming a trail camera is the detection range. This refers to the distance at which the camera can detect motion and trigger an image capture. The latest trail cameras have detection ranges of up to 100 feet, which is ideal for capturing wildlife in large open areas.
In summary, programming a trail camera involves inserting batteries and a memory card, navigating to the settings menu, and adjusting various settings such as trigger speed and detection range. The latest trail cameras on the market have incredibly fast trigger speeds and long detection ranges, making them ideal for capturing high-quality images of wildlife.


