How To Put On A Polarizing Filter ?
To put on a polarizing filter, follow these steps:
1. Identify the front of your lens. This is the side that faces the subject you are photographing.
2. Screw the polarizing filter onto the front of your lens. Make sure it is securely attached.
3. Look through your viewfinder or LCD screen and rotate the filter until you achieve the desired effect. A polarizing filter can reduce glare and reflections, deepen the color of the sky, and make water appear more transparent.
4. Take your photo. If you are using a circular polarizing filter, you may need to adjust the filter as you change the orientation of your camera (e.g. from landscape to portrait).
5. When you are finished using the polarizing filter, unscrew it from your lens and store it in a protective case.
1、 Understanding Polarizing Filters
To put on a polarizing filter, follow these steps:
1. Identify the front of your lens: The front of your lens is the side that faces the subject you are photographing. The polarizing filter should be attached to this side.
2. Screw on the filter: Hold the filter with the polarizing element facing the subject and screw it onto the front of your lens. Make sure it is securely attached.
3. Adjust the filter: Rotate the filter until you achieve the desired effect. Polarizing filters work by blocking certain light waves, so rotating the filter will change the amount of light that is blocked. This can help reduce glare and reflections, enhance colors, and improve contrast.
It is important to note that polarizing filters can have different effects depending on the angle of the light source and the position of the camera. Therefore, it may take some experimentation to achieve the desired effect.
Understanding Polarizing Filters:
Polarizing filters are a popular accessory for photographers and videographers. They work by blocking certain light waves, which can help reduce glare and reflections, enhance colors, and improve contrast. Polarizing filters are particularly useful for outdoor photography, where they can help reduce the glare from water, snow, and other reflective surfaces.
However, it is important to use polarizing filters carefully, as they can also have some drawbacks. For example, they can reduce the amount of light that reaches the camera, which can result in longer exposure times and the need for a tripod. Additionally, polarizing filters can sometimes produce uneven effects, particularly when shooting wide-angle shots.
Overall, polarizing filters can be a useful tool for photographers and videographers, but it is important to understand their limitations and use them appropriately.
2、 Choosing the Right Polarizing Filter
How to put on a polarizing filter:
1. First, make sure you have the correct size filter for your lens. Check the diameter of your lens and purchase a filter that matches.
2. Screw the filter onto the front of your lens. Make sure it is securely attached and tightened.
3. Adjust the filter to the desired polarization by rotating it. Look through your viewfinder or LCD screen and rotate the filter until you achieve the desired effect.
4. Take your photo! The polarizing filter will help reduce glare and reflections, deepen colors, and improve contrast.
Choosing the right polarizing filter:
When choosing a polarizing filter, there are a few things to consider. First, make sure you get the correct size for your lens. Second, consider the quality of the filter. Cheaper filters may not be as effective and can even degrade the quality of your photos. Look for filters made with high-quality materials and coatings.
Another consideration is the type of polarizing filter. Linear polarizers are less expensive but can interfere with autofocus and metering systems. Circular polarizers are more expensive but do not have these issues and are recommended for most modern cameras.
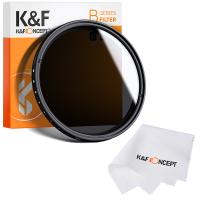
Finally, consider the strength of the filter. Stronger filters will have a more noticeable effect on your photos but can also reduce the amount of light entering your lens. This can be a problem in low-light situations. Consider a variable ND filter if you need to adjust the strength of the filter on the fly.
Overall, a polarizing filter can be a valuable tool for any photographer. Just make sure you choose the right one for your needs and use it correctly to get the best results.
3、 Attaching the Filter to Your Lens
Attaching the Filter to Your Lens:
To put on a polarizing filter, you first need to select the correct size for your lens. Polarizing filters come in different sizes, so make sure to choose the one that fits your lens. Once you have the right size, follow these steps:
1. Remove the lens cap from your camera lens.
2. Hold the polarizing filter up to your lens and screw it on in a clockwise direction. Make sure to align the filter correctly so that the polarizing element is facing the right way.
3. Once the filter is securely attached, you can adjust the polarization by rotating the outer ring of the filter. This will change the angle of the polarizing element and allow you to control the amount of light that enters your lens.
It's important to note that polarizing filters are not just for reducing glare and reflections. They can also enhance colors and improve contrast in your photos. However, it's important to use them correctly and not overdo it, as too much polarization can result in unnatural-looking images.
In addition, some newer cameras and lenses have built-in polarizing filters or anti-reflective coatings, so it's worth checking your equipment before purchasing an external filter. Overall, a polarizing filter can be a useful tool for any photographer looking to improve their outdoor photography.
4、 Adjusting the Filter Orientation
How to put on a polarizing filter:
1. First, identify the front of your lens. This is the side that faces the subject you are photographing.
2. Screw the polarizing filter onto the front of your lens. Make sure it is securely attached.
3. Adjust the filter orientation. This is the most important step in using a polarizing filter. Rotate the filter until you achieve the desired effect. You can see the effect through the viewfinder or on the LCD screen of your camera.
4. Experiment with different angles. The effect of a polarizing filter changes depending on the angle of the light source. Try rotating the filter to see how it affects the image.
5. Be aware of the limitations of polarizing filters. They work best when the light source is at a 90-degree angle to the subject. They also work best on clear days with blue skies.
Adjusting the filter orientation is crucial to getting the most out of your polarizing filter. By rotating the filter, you can control the amount of polarization and achieve the desired effect. It's important to experiment with different angles to see how the filter affects the image. Keep in mind that polarizing filters have limitations and work best under certain conditions. With practice, you can master the use of a polarizing filter and take your photography to the next level.











There are no comments for this blog.