How To Record Sound For Youtube ?
To record sound for YouTube, you will need a few essential tools. First, you will need a good quality microphone that can capture clear audio. USB microphones are a popular choice for beginners as they are easy to set up and use. Next, you will need audio recording software or a digital audio workstation (DAW) to capture and edit your sound. There are many free and paid options available, such as Audacity or Adobe Audition. Once you have your microphone and recording software set up, make sure to find a quiet environment to minimize background noise. Position the microphone close to your mouth for clear and consistent sound. Test your audio levels before recording to ensure they are not too loud or too soft. Finally, hit the record button and start capturing your sound. After recording, you can edit and enhance your audio using the editing features in your chosen software.
1、 Microphone types and their suitability for YouTube recording.
Microphone types and their suitability for YouTube recording.
When it comes to recording sound for YouTube videos, choosing the right microphone is crucial to ensure high-quality audio. There are several microphone types available, each with its own strengths and suitability for different recording situations.
1. USB Microphones: USB microphones are a popular choice for YouTubers due to their ease of use and affordability. They can be directly connected to your computer or camera, making them convenient for beginners. USB microphones are suitable for recording voiceovers, podcasts, and vlogs.
2. Condenser Microphones: Condenser microphones are known for their sensitivity and ability to capture detailed sound. They are ideal for recording vocals, musical instruments, and studio-quality audio. However, they require an external power source, such as phantom power, and are more sensitive to background noise.
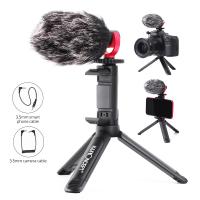
3. Shotgun Microphones: Shotgun microphones are highly directional and are designed to capture sound from a specific direction while minimizing background noise. They are commonly used for outdoor recording, interviews, and capturing audio from a distance. Shotgun microphones can be mounted on cameras or used with boom poles.
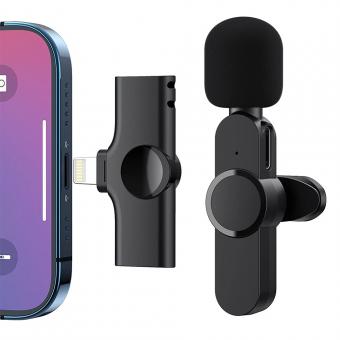
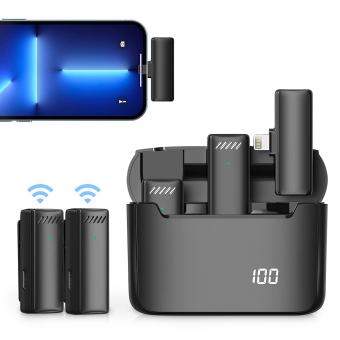
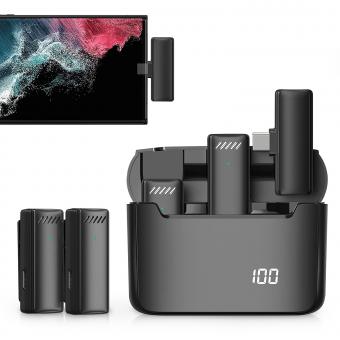
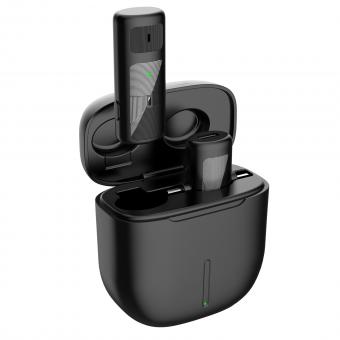
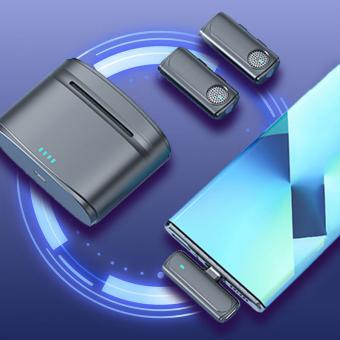
4. Lavalier Microphones: Lavalier microphones, also known as lapel microphones, are small and discreet. They are commonly used in interviews, presentations, and vlogs where the speaker needs to move around freely. Lavalier microphones can be clipped onto clothing and provide hands-free recording.
5. Dynamic Microphones: Dynamic microphones are durable and can handle high sound pressure levels, making them suitable for live performances and recording loud sources. They are commonly used in music videos, concerts, and outdoor recordings.
It is important to consider your specific recording needs, budget, and the environment in which you will be recording when choosing a microphone for YouTube. Additionally, staying updated with the latest advancements in microphone technology can help you make informed decisions and improve the audio quality of your YouTube videos.
2、 Setting up audio recording equipment for optimal sound quality.
Setting up audio recording equipment for optimal sound quality is crucial when recording sound for YouTube. The quality of your audio can greatly impact the overall viewing experience for your audience. Here are some steps to help you achieve the best sound possible:
1. Choose the right microphone: Invest in a high-quality microphone that suits your needs. There are various options available, such as condenser microphones for studio-like recordings or lavalier microphones for on-the-go vlogging.
2. Position the microphone correctly: Proper microphone placement is essential. Position it close to the sound source to capture clear and focused audio. Experiment with different angles and distances to find the best position for your specific recording environment.
3. Reduce background noise: Minimize any unwanted background noise by recording in a quiet space. Consider using soundproofing materials or a pop filter to eliminate plosive sounds and improve overall sound quality.
4. Use a microphone preamp or audio interface: These devices help amplify and enhance the audio signal from your microphone, resulting in cleaner and more professional sound.
5. Monitor your audio: Use headphones to monitor your audio while recording. This allows you to catch any issues or distortions in real-time and make necessary adjustments.
6. Edit and enhance your audio: After recording, use audio editing software to fine-tune your sound. This includes adjusting levels, removing background noise, and adding effects if desired.
7. Stay up to date with the latest technology: As technology advances, new audio recording equipment and techniques emerge. Stay informed about the latest developments to ensure you are utilizing the best tools available for optimal sound quality.
Remember, high-quality audio is just as important as video quality when it comes to creating engaging content on YouTube. By following these steps and staying informed about the latest advancements, you can ensure that your viewers have an enjoyable and immersive audio experience.
3、 Techniques for capturing clear and balanced audio for YouTube videos.
Techniques for capturing clear and balanced audio for YouTube videos have evolved over time, and it's important to stay up to date with the latest practices. Here are some tips on how to record sound for YouTube:
1. Invest in a quality microphone: A good microphone is essential for capturing clear audio. Consider using a condenser microphone for studio-like sound quality or a lavalier microphone for hands-free recording.
2. Reduce background noise: Find a quiet location to record your videos. Use soundproofing techniques like acoustic panels or foam to minimize echo and external noise interference.
3. Use a pop filter: A pop filter helps reduce plosive sounds (such as "p" and "b" sounds) that can distort the audio. It also helps prevent saliva from reaching the microphone.
4. Adjust microphone placement: Experiment with microphone placement to find the best position for capturing your voice. Generally, placing the microphone slightly off-center and a few inches away from your mouth can help achieve a balanced sound.
5. Monitor audio levels: Keep an eye on your audio levels to ensure they are not too low or too high. Use headphones to monitor the sound while recording and adjust the microphone gain accordingly.
6. Edit and enhance audio in post-production: After recording, use audio editing software to remove any background noise, adjust volume levels, and enhance the overall sound quality. There are various software options available, such as Adobe Audition or Audacity, that offer tools for audio enhancement.
7. Stay updated with the latest technology: As technology advances, new tools and techniques for recording audio for YouTube videos emerge. Stay informed about the latest advancements, such as USB microphones or portable audio recorders, to improve your recording setup.
Remember, clear and balanced audio is crucial for engaging YouTube content. By following these techniques and staying updated with the latest practices, you can ensure that your viewers have an enjoyable listening experience.
4、 Tips for reducing background noise and improving audio clarity.
Tips for reducing background noise and improving audio clarity:
1. Choose a quiet location: Find a quiet room or space to record your audio. Avoid areas with high levels of background noise, such as busy streets or rooms with loud appliances.
2. Use a quality microphone: Invest in a good quality microphone that suits your needs. USB microphones are a popular choice for beginners, while XLR microphones offer higher audio quality. Consider using a microphone with a cardioid polar pattern, as it helps to pick up sound from the front and reduce background noise.
3. Use a pop filter: A pop filter is a screen that is placed in front of the microphone to reduce plosive sounds (such as "p" and "b" sounds) that can distort the audio. It also helps to reduce background noise caused by breathing or wind.
4. Adjust microphone settings: Experiment with the microphone's gain and volume settings to find the optimal level. Avoid setting the gain too high, as it can introduce unwanted noise or distortion.
5. Soundproof your recording space: If you're unable to find a completely quiet location, consider soundproofing your recording space. This can be done by using acoustic panels, foam, or even blankets to absorb and reduce background noise.
6. Edit and enhance audio: After recording, use audio editing software to further improve the sound quality. This can include removing background noise, adjusting levels, and enhancing clarity. There are various software options available, such as Audacity (free) or Adobe Audition (paid).
7. Consider using a noise gate: A noise gate is a tool that helps to eliminate background noise during silent parts of your recording. It automatically mutes the audio when the volume falls below a certain threshold, reducing unwanted noise.
In conclusion, recording high-quality audio for YouTube requires careful consideration of the recording environment, microphone choice, and post-production editing. By following these tips and staying up to date with the latest advancements in audio technology, you can ensure that your YouTube videos have clear and professional sound.
