How To Remove Lens Filter Canon ?
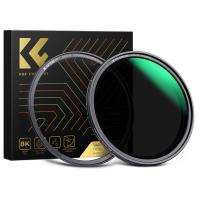
To remove a lens filter from a Canon camera, follow these steps:
1. Turn off the camera and remove the lens cap if it is attached.
2. Hold the camera firmly with one hand and locate the filter on the front of the lens.
3. Grip the filter firmly but gently with your other hand.
4. Rotate the filter counterclockwise to loosen it. Be careful not to apply excessive force.
5. Once the filter is loose, continue rotating it until it comes off completely.
6. Inspect the lens and filter threads for any dirt or debris. Clean them if necessary.
7. If you plan to attach a different filter, ensure the threads are clean and aligned properly before screwing it on.
Note: It is important to handle the lens and filter with care to avoid any damage. If you encounter any difficulties or if the filter is stuck, it is recommended to seek assistance from a professional camera technician.
1、 Unscrewing the Lens Filter
To remove a lens filter from a Canon camera, you can follow these steps:
1. Ensure the camera is turned off: Before attempting to remove the lens filter, make sure the camera is powered off. This will prevent any accidental damage to the lens or camera.
2. Grip the filter firmly: Hold the lens filter securely with your fingers. It's important to have a good grip to avoid dropping or damaging the filter.
3. Rotate counterclockwise: Most lens filters have threads that allow them to be screwed onto the lens. To remove the filter, rotate it counterclockwise. Be gentle but firm, as some filters may be tightly screwed on.
4. Use a filter wrench if necessary: If the filter is stuck or difficult to remove by hand, you can use a filter wrench. These tools provide extra grip and leverage to help loosen stubborn filters. Place the wrench around the filter and turn it counterclockwise to remove.
5. Clean the lens: Once the filter is removed, take the opportunity to clean both the lens and the filter. Use a microfiber cloth or lens cleaning solution to remove any smudges or dirt.
It's worth noting that lens filters are useful accessories for protecting your lens and enhancing your photography. However, they can sometimes cause image quality issues or unwanted reflections. Therefore, it's recommended to only use filters when necessary and to invest in high-quality filters to minimize any potential negative impact on image quality.

2、 Using a Lens Filter Removal Tool
To remove a lens filter on a Canon camera, one effective method is to use a Lens Filter Removal Tool. This tool is specifically designed to safely and easily remove filters without causing any damage to the lens or filter threads.
Using a Lens Filter Removal Tool is a straightforward process. First, ensure that the camera is turned off to prevent any accidental damage. Then, attach the tool to the front of the lens filter by aligning the notches on the tool with the filter's threads. Gently twist the tool counterclockwise to loosen the filter. It is important to apply even pressure and avoid using excessive force to prevent any potential damage.
The Lens Filter Removal Tool provides a secure grip, allowing photographers to have better control and leverage when removing stubborn filters. It is particularly useful when filters are stuck due to over-tightening or environmental factors such as humidity or temperature changes.
It is worth noting that the latest point of view emphasizes the importance of using a Lens Filter Removal Tool specifically designed for the camera brand and model. This ensures compatibility and reduces the risk of any potential damage. Additionally, it is recommended to handle the tool and filter with clean hands to avoid any smudges or fingerprints on the lens or filter surface.
In conclusion, using a Lens Filter Removal Tool is a safe and effective method to remove lens filters on Canon cameras. It provides photographers with better control and minimizes the risk of damage to the lens or filter threads.
3、 Applying Gentle Heat to Loosen the Filter
To remove a lens filter from a Canon camera, one effective method is to apply gentle heat to loosen the filter. This technique can help loosen any adhesive or tightness that may be causing the filter to stick.
Here's how to remove a lens filter using gentle heat:
1. Turn off the camera and remove the lens cap.
2. Use a hairdryer on a low heat setting or a heat gun on the lowest setting. Hold it a few inches away from the filter.
3. Move the heat source around the edges of the filter in a circular motion. Be careful not to overheat the filter or the lens.
4. After a few minutes, try to twist the filter counterclockwise using a filter wrench or a rubber jar opener for better grip.
5. If the filter doesn't budge, repeat the process of applying gentle heat and try again.
It's important to exercise caution when using heat to remove a lens filter. Avoid overheating the lens or using excessive force, as this can damage the lens or filter threads. If the filter still won't come off, it's advisable to seek professional assistance from a camera technician.
Please note that the latest point of view may vary depending on the specific model of the Canon camera and the type of lens filter being used. It's always recommended to consult the camera's manual or contact Canon customer support for specific instructions tailored to your equipment.

4、 Freezing the Lens Filter to Loosen it
To remove a lens filter from a Canon camera, one method you can try is freezing the filter to loosen it. This technique can be effective in cases where the filter is stuck due to over-tightening or other factors. However, it is important to note that freezing the filter should be done with caution and only as a last resort, as it may potentially damage the filter or camera if not done properly.
To begin, wrap the camera and attached lens in a plastic bag to protect it from condensation. Place the camera in a sealable plastic bag and ensure it is airtight. Then, place the camera in the freezer for about 15-20 minutes. The cold temperature will cause the metal components of the filter to contract, potentially loosening its grip.
After the allotted time, remove the camera from the freezer and quickly attempt to unscrew the filter using a filter wrench or a rubber jar opener for added grip. Be careful not to apply excessive force, as this could damage the lens or filter threads.
If the filter still does not budge, it is advisable to seek professional assistance from a camera technician or a reputable camera repair service. They will have the necessary tools and expertise to safely remove the stuck filter without causing any damage.
It is worth mentioning that freezing the lens filter is not a guaranteed method and should only be used as a last resort. It is always recommended to exercise caution and seek professional help if unsure.
