How To Remove Scratches From Nd Filter ?
To remove scratches from an ND filter, you can try using a microfiber cloth and a lens cleaning solution to gently rub the scratches in a circular motion. If the scratches are deep, you may need to use a more abrasive solution such as toothpaste or a specialized polishing compound. However, be careful not to apply too much pressure or use a solution that is too abrasive as this can damage the filter further. It is also important to note that removing scratches may affect the quality of the filter and it may be better to replace it if the scratches are severe.
1、 Cleaning materials for ND filters
How to remove scratches from ND filter:
Unfortunately, scratches on ND filters cannot be completely removed. However, there are some methods that can help minimize the appearance of scratches. One method is to use a microfiber cloth and gently rub the scratch in a circular motion. Another method is to use a toothpaste that contains baking soda and apply it to the scratch with a cotton swab. Gently rub the toothpaste into the scratch and then rinse it off with water. This method may help to reduce the appearance of the scratch, but it will not completely remove it.
Cleaning materials for ND filters:
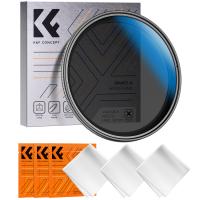
When it comes to cleaning ND filters, it is important to use the right materials to avoid damaging the filter. A microfiber cloth is a great tool for cleaning ND filters as it is gentle and does not scratch the surface. It is also important to use a cleaning solution that is specifically designed for camera lenses and filters. Avoid using harsh chemicals or abrasive materials as they can damage the filter.
In recent years, there has been a growing trend towards using ultrasonic cleaners for cleaning camera lenses and filters. While these cleaners can be effective, there is some debate over whether they are safe for use on ND filters. Some experts argue that ultrasonic cleaners can damage the coating on the filter, while others believe that they are safe as long as they are used properly. As with any cleaning method, it is important to do your research and use caution when using an ultrasonic cleaner on your ND filter.
2、 Identifying the depth of the scratches
How to remove scratches from ND filter is a common question among photographers. However, before attempting to remove scratches, it is important to identify the depth of the scratches. If the scratches are only on the surface of the filter, they can be easily removed with a microfiber cloth and some lens cleaning solution. However, if the scratches are deeper, it may require more advanced techniques.
One method to remove deeper scratches is to use a polishing compound. This involves applying a small amount of the compound to the scratched area and using a soft cloth to gently rub the surface in a circular motion. This process should be repeated until the scratches are no longer visible. It is important to note that this method should only be used on filters with a hard coating, as using it on filters without a hard coating can cause further damage.
Another method is to use a scratch removal kit. These kits typically include a polishing compound, a buffing wheel, and instructions on how to use them. This method is more effective than using a polishing compound alone, as the buffing wheel helps to evenly distribute the compound and remove the scratches more efficiently.
In recent years, some photographers have also turned to using toothpaste as a DIY solution for removing scratches from ND filters. While toothpaste can be effective in removing surface scratches, it is not recommended for deeper scratches as it can cause further damage to the filter.
In conclusion, identifying the depth of the scratches on an ND filter is crucial before attempting to remove them. Depending on the severity of the scratches, different methods can be used, such as using a polishing compound, a scratch removal kit, or toothpaste (for surface scratches only). It is important to handle the filter with care and to avoid using abrasive materials that can cause further damage.
3、 Polishing techniques for minor scratches
Polishing techniques for minor scratches are the best way to remove scratches from an ND filter. The first step is to clean the filter with a microfiber cloth to remove any dirt or debris. Then, apply a small amount of polishing compound to the scratched area and use a soft cloth to gently rub the compound into the scratch. Be sure to use a circular motion and apply light pressure to avoid causing further damage to the filter.
After polishing the scratched area, clean the filter again with a microfiber cloth to remove any remaining polishing compound. Inspect the filter to see if the scratch has been removed or if it requires further polishing. If the scratch is still visible, repeat the polishing process until the scratch is no longer visible.
It is important to note that polishing techniques should only be used for minor scratches. If the scratch is deep or severe, it may be necessary to replace the filter. Additionally, polishing can remove the coating on the filter, which can affect the filter's performance. Therefore, it is recommended to use polishing techniques sparingly and only when necessary.
In the latest point of view, some photographers suggest using toothpaste as a polishing compound for minor scratches. Toothpaste contains mild abrasives that can help remove scratches from the filter. However, it is important to use a non-gel toothpaste and avoid toothpaste with added whitening agents or other chemicals that can damage the filter.
4、 Sanding techniques for deep scratches
How to remove scratches from ND filter:
1. Cleaning Solution: Begin by cleaning the surface of your filter with a cleaning solution that is safe for camera lenses. Use a microfiber cloth to gently wipe away any dirt, dust or smudges from the filter.
2. Toothpaste: Apply a small amount of regular toothpaste to the scratch on the ND filter. Gently rub the toothpaste into the scratch using a circular motion with a cotton swab. Rinse the filter with water and dry it with a microfiber cloth.
3. Baking Soda: Mix equal parts of baking soda and water to make a paste. Apply the paste to the scratched area of the filter and use a cotton swab to work it into the scratch. Rinse the filter with water and dry it with a microfiber cloth.
4. Metal Polish: Apply a small amount of metal polish to a soft cloth. Gently rub the scratched area of the ND filter in a circular motion until the scratch disappears.
5. Sandpaper: For deeper scratches, you can use sandpaper to remove the scratch. Begin with a fine-grit sandpaper, like 400-grit, and gently sand the scratch in circular motions. Gradually move to a finer grit sandpaper until the scratch is no longer visible. Finish by polishing the surface with metal polish.
Sanding techniques for deep scratches:
When dealing with deep scratches on an ND filter, the sanding technique can be effective. However, it is essential to be cautious and not over-sand the filter. Start with a coarse sandpaper with a grit of 220 and gently move it in a circular motion on the scratch. Gradually switch to finer grit sandpapers, like 400 or 600, and repeat the process until the scratch is no longer visible. It is vital to go slowly and exercise patience, so as to avoid damaging the filter further. Once the scratch is removed, use a polishing compound to bring back the filter's original shine. Finally, give the filter a thorough cleaning to remove any sandpaper residue. While this approach can be useful, it is best left to professionals or individuals who are confident in their technical skills.

















There are no comments for this blog.