How To Set Up A Microscope ?
To set up a microscope, first, place the microscope on a stable surface. Then, plug in the power cord and turn on the microscope. Adjust the eyepiece to your eye level and focus the eyepiece by looking through it and rotating it until the image appears clear. Next, place the specimen on the stage and secure it using the stage clips or slide holder. Use the coarse adjustment knob to bring the specimen into rough focus, and then use the fine adjustment knob to bring it into sharp focus. Adjust the magnification by rotating the objective lenses. Finally, adjust the lighting by using the condenser and diaphragm controls to achieve the desired brightness and contrast.
1、 Microscope Components and Assembly
Microscope Components and Assembly
Setting up a microscope involves assembling its various components in the correct order to ensure optimal performance and accurate observations. Here is a step-by-step guide on how to set up a microscope:
1. Unpack the microscope: Carefully remove all the components from the packaging, ensuring that nothing is damaged or missing.
2. Base and arm assembly: Start by attaching the microscope's arm to the base. Align the holes on the arm with the corresponding holes on the base and secure them together using the provided screws. Make sure the arm is firmly attached to provide stability.
3. Eyepiece installation: Locate the eyepiece tube and insert it into the top of the microscope arm. Secure it in place by tightening the set screw.
4. Objective lenses: Choose the appropriate objective lens for your observation needs. Insert it into the revolving nosepiece, ensuring it clicks into place. Rotate the nosepiece to switch between different objective lenses.
5. Stage preparation: Adjust the stage height and position to accommodate your specimen. Some microscopes have a mechanical stage that allows precise movement of the specimen, while others may require manual adjustment.
6. Illumination setup: Depending on the microscope type, you may need to install a light source. For compound microscopes, attach the light source beneath the stage and adjust the intensity as needed. In the case of stereo microscopes, the illumination is usually built-in.
7. Condenser adjustment: If your microscope has a condenser, adjust its height and position to optimize the illumination of the specimen. The condenser helps focus the light onto the specimen, enhancing image quality.
8. Fine and coarse focus adjustment: Use the coarse focus knob to bring the specimen into rough focus. Then, use the fine focus knob to achieve a clear and sharp image. Adjust the focus as needed during observation.
9. Calibration and alignment: Before starting your observations, it is essential to calibrate and align the microscope. Follow the manufacturer's instructions to ensure accurate measurements and proper alignment of the optical components.
It is important to consult the microscope's user manual for specific instructions as different microscope models may have slight variations in their setup procedures. Additionally, advancements in technology may introduce new features or improvements to microscope assembly, so staying updated with the latest information is recommended.
2、 Adjusting the Microscope Focus and Magnification
Adjusting the Microscope Focus and Magnification
Setting up a microscope properly is crucial to ensure accurate observations and clear images. Here is a step-by-step guide on how to set up a microscope:
1. Start by placing the microscope on a stable and level surface. Ensure that the microscope is clean and free from any dust or debris.
2. Plug in the microscope and turn on the light source. Adjust the intensity of the light to a comfortable level for viewing.
3. Place a slide on the stage of the microscope. Use the mechanical stage controls to center the slide under the objective lens.
4. Begin with the lowest magnification objective lens (usually 4x or 10x). Lower the objective lens close to the slide using the coarse focus knob. Look through the eyepiece and slowly turn the coarse focus knob until the image comes into focus. Fine-tune the focus using the fine focus knob for a clear image.
5. Once the image is in focus, increase the magnification by rotating the nosepiece to switch to a higher power objective lens (e.g., 40x or 100x). Use the fine focus knob to adjust the focus again.
6. If your microscope has a condenser, adjust its height using the condenser focus knob to optimize the illumination.
7. To enhance the contrast and clarity of the image, adjust the diaphragm or iris diaphragm. Opening the diaphragm will increase the amount of light, while closing it will decrease the light.
8. Finally, adjust the interpupillary distance by moving the eyepieces closer or further apart to match the distance between your eyes.
It is important to note that different microscopes may have slight variations in their setup procedures. Always refer to the manufacturer's instructions for specific details on your microscope model.
In recent years, advancements in microscope technology have led to the development of digital microscopes. These microscopes often come with built-in cameras and software that allow for easy image capture and analysis. Additionally, some microscopes now offer motorized focus and magnification adjustments, making it even more convenient to obtain clear and precise images.
Remember to handle the microscope with care, clean the lenses regularly, and follow proper maintenance procedures to ensure its longevity and optimal performance.

3、 Proper Lighting and Illumination Techniques
Proper lighting and illumination techniques are crucial when setting up a microscope to ensure optimal visibility and accurate observations. Here is a step-by-step guide on how to set up a microscope with a focus on lighting and illumination:
1. Start by placing the microscope on a stable and level surface. Ensure that it is positioned in a well-lit area to avoid any additional strain on your eyes.
2. Adjust the height of the microscope so that you can comfortably view the specimen without straining your neck or eyes. Most microscopes have an adjustable stage and eyepiece to accommodate different users.
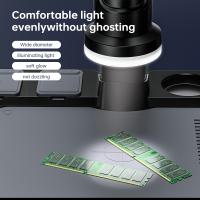
3. Begin by adjusting the light source. If your microscope has a built-in light, make sure it is turned on and set to an appropriate intensity. If not, position an external light source, such as a lamp, at an angle that provides even illumination across the specimen.
4. Adjust the diaphragm or iris aperture to control the amount of light entering the microscope. Start with a smaller aperture and gradually increase it until you achieve the desired brightness. This will help enhance contrast and improve visibility.
5. If your microscope has a condenser, adjust its height to focus the light onto the specimen. The condenser should be positioned as close to the stage as possible without touching it. This will help concentrate the light and improve resolution.
6. Consider using different lighting techniques, such as brightfield, darkfield, phase contrast, or fluorescence, depending on the type of specimen and the specific details you want to observe. Each technique has its advantages and can provide different insights into the specimen.
7. Finally, ensure that the microscope is properly calibrated and aligned. This includes adjusting the focus knobs, centering the stage, and aligning the eyepieces for a clear and sharp image.
In recent years, advancements in microscope technology have led to the development of new lighting techniques, such as super-resolution microscopy and confocal microscopy. These techniques allow for even higher resolution and more detailed observations. Additionally, the integration of LED lights in microscopes has improved energy efficiency and reduced heat generation, making them more environmentally friendly and comfortable to use.
Remember, proper lighting and illumination techniques are essential for obtaining accurate and reliable observations with a microscope. By following these steps and staying updated with the latest advancements, you can ensure optimal visibility and enhance your microscopy experience.

4、 Sample Preparation and Mounting
Sample Preparation and Mounting for Microscopy
Setting up a microscope involves several steps, including sample preparation and mounting. Proper sample preparation is crucial to obtain clear and accurate microscopic images. Here is a step-by-step guide on how to prepare and mount samples for microscopy.
1. Choose the appropriate sample: Select a sample that is suitable for microscopic analysis. This could be a biological specimen, a thin section of a material, or a prepared slide.
2. Fixation: If working with biological samples, fixation is often necessary to preserve the structure and prevent degradation. Common fixatives include formaldehyde, glutaraldehyde, and paraformaldehyde. Follow the recommended fixation protocol for your specific sample.
3. Dehydration: Dehydration is required to remove water from the sample and replace it with a medium that is compatible with the mounting medium. Gradually immerse the sample in a series of increasing concentrations of alcohol or other suitable dehydrating agents.
4. Clearing: Some samples may require clearing agents to make them transparent. This step is particularly important for thick or opaque samples. Common clearing agents include xylene, benzene, and cedarwood oil.
5. Infiltration: Infiltration involves impregnating the sample with a medium that provides support and stability during sectioning. This is typically done using a resin, such as epoxy or acrylic, which is mixed with a hardener and poured over the sample. Allow the resin to cure according to the manufacturer's instructions.
6. Sectioning: Once the sample is properly infiltrated and hardened, it can be sectioned using a microtome or other cutting tools. Thin sections are cut and collected on glass slides or other suitable substrates.
7. Mounting: Place the sections on a clean glass slide and apply a mounting medium, such as a resin or a mounting fluid, to cover the sample. Ensure that the mounting medium is compatible with the sample and does not introduce artifacts or distortions.
8. Coverslipping: Gently place a coverslip over the mounted sample, taking care to avoid air bubbles. Press down gently to ensure proper adhesion.
9. Labeling: Finally, label the slide with relevant information, such as the sample name, date, and any additional details that may be important for future reference.
It is important to note that sample preparation and mounting techniques may vary depending on the specific requirements of the sample and the microscopy technique being used. Always refer to the manufacturer's instructions and consult relevant scientific literature for the most up-to-date protocols and recommendations.
