How To Set Up A Monopod Selfie Stick ?
To set up a monopod selfie stick, first extend the telescopic pole of the selfie stick to your desired length. Then, locate the phone holder or mount on top of the stick and adjust it to the desired angle. Next, open the clamp on the phone holder and place your smartphone securely inside, making sure it is centered and stable. Once your phone is in place, tighten the clamp to hold it securely. Finally, connect the selfie stick to your phone using either a wired or wireless connection, depending on the model. Now you are ready to use your monopod selfie stick to capture photos or videos from a distance.
1、 Choosing the right monopod selfie stick for your needs
Choosing the right monopod selfie stick for your needs is essential to ensure that you capture the perfect selfies and videos. With the wide variety of options available in the market, it can be overwhelming to make a decision. However, by considering a few key factors, you can find the perfect monopod selfie stick that suits your requirements.
Firstly, consider the length and weight of the monopod. If you are looking for a compact and lightweight option, go for a stick that can be easily folded and carried around. On the other hand, if you want to capture wider angles or group shots, opt for a longer monopod that can extend to your desired length.
Next, check the compatibility of the monopod with your smartphone or camera. Most selfie sticks come with adjustable mounts that can accommodate various devices. Ensure that the mount is secure and can hold your device firmly in place.
Once you have chosen the right monopod selfie stick, setting it up is a breeze. Start by extending the stick to your desired length and tightening the lock mechanism. Attach your smartphone or camera to the mount and adjust it to the desired angle. Some monopods also come with Bluetooth remote controls, allowing you to capture photos and videos wirelessly.
In conclusion, selecting the right monopod selfie stick is crucial for capturing the perfect shots. Consider factors such as length, weight, and compatibility with your device. Once you have chosen the ideal monopod, setting it up is a simple process that allows you to capture stunning selfies and videos effortlessly.
2、 Attaching your smartphone or camera securely to the monopod
To set up a monopod selfie stick, follow these steps:
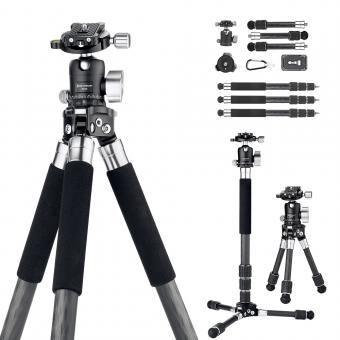
1. Extend the monopod: Start by extending the monopod to your desired length. Most monopods have telescopic sections that can be adjusted by twisting or pulling them apart. Make sure it is fully extended and locked in place.
2. Attach your smartphone or camera: Look for the smartphone or camera mount on the top of the monopod. It is usually a spring-loaded clamp or a screw mount. If it's a clamp, gently open it and place your smartphone or camera inside, making sure it is secure. If it's a screw mount, align the screw hole on your device with the mount and twist it clockwise until it is tightly secured.
3. Adjust the angle: Many monopods have a swivel head or a ball joint that allows you to adjust the angle of your device. Use this feature to position your smartphone or camera at the desired angle for your selfie or video.
4. Connect your device: If you are using a smartphone, you can connect it to the monopod using a Bluetooth or wired connection. This will allow you to control the shutter remotely or use features like zoom. Follow the instructions provided with your monopod or refer to your device's user manual for specific instructions on how to connect.
5. Test stability: Once your device is attached, give it a gentle shake to ensure it is securely fastened to the monopod. You don't want it to accidentally detach while you're using it.
Remember to always be mindful of your surroundings and use the monopod responsibly. Some places may have restrictions on the use of selfie sticks, so be sure to check local regulations before using one.
3、 Adjusting the height and angle of the monopod
To set up a monopod selfie stick, follow these steps:
1. Extend the monopod: Start by extending the monopod to its full length. Most selfie sticks have multiple sections that can be adjusted by twisting or pulling them apart. Make sure each section is securely locked in place.
2. Attach your phone: Most monopods come with a phone holder that can be adjusted to fit different phone sizes. Open the phone holder and place your phone inside, making sure it is secure. Some holders have a spring-loaded mechanism, while others require manual adjustment.
3. Connect your phone: If your monopod has a built-in Bluetooth remote, turn it on and pair it with your phone. This will allow you to control the camera shutter remotely. If your monopod does not have a remote, you can use the self-timer function on your phone's camera app instead.
4. Adjust the height and angle: Once your phone is attached, you can adjust the height and angle of the monopod to get the desired shot. Most monopods have a ball head or a swivel mount that allows you to tilt and rotate your phone. Experiment with different angles to find the best composition.
5. Secure the monopod: Once you have set the height and angle, make sure to tighten any locking mechanisms to secure the monopod in place. This will prevent it from accidentally collapsing or moving while you are taking photos or videos.
Remember to always be mindful of your surroundings and considerate of others when using a monopod selfie stick. Some places may have restrictions on their use, so be sure to check local regulations before using one in public spaces.
4、 Using the remote control or Bluetooth feature for capturing photos
To set up a monopod selfie stick, follow these simple steps:
1. Extend the monopod: Start by extending the monopod to your desired length. Most selfie sticks have adjustable sections that can be locked in place. Make sure to tighten the sections securely to avoid any wobbling.
2. Attach your smartphone: Most selfie sticks come with an adjustable phone holder at the top. Open the holder and place your smartphone inside, making sure it is secure. Adjust the holder to fit your phone's size and tighten it.
3. Connect via Bluetooth: If your monopod has a Bluetooth feature, turn it on and enable Bluetooth on your smartphone. Search for the monopod's Bluetooth signal and pair the devices. Once connected, you can use the remote control or the shutter button on the handle to capture photos.
4. Using the remote control: Some monopods come with a small remote control that can be detached from the handle. Pair the remote with your smartphone via Bluetooth and use it to capture photos. The remote usually has a shutter button that allows you to take pictures from a distance.
5. Adjust the angle: Most monopods have a rotating head that allows you to adjust the angle of your smartphone. Find the perfect angle for your selfie or group photo by rotating the head until you are satisfied.
6. Capture your photos: Once everything is set up, you can start capturing photos. Use the remote control or the Bluetooth feature to take pictures without having to touch your phone.
The latest point of view on monopod selfie sticks is that they provide a convenient and versatile way to capture selfies and group photos. With the advancement of technology, many monopods now come with Bluetooth capabilities, making it easier than ever to take photos remotely. This feature allows for more creative shots and eliminates the need for a timer or reaching for the phone's shutter button. Additionally, monopods are designed to be lightweight and portable, making them ideal for travel and outdoor activities. They provide a stable and extended reach, allowing you to capture wider angles and include more people in your photos. Overall, monopod selfie sticks are a popular accessory for smartphone photography, offering convenience, flexibility, and improved photo-taking capabilities.
