How To Set Up A Time Lapse Camera ?
To set up a time-lapse camera, first, ensure you have a camera capable of capturing time-lapse sequences. Next, choose a suitable location and mount the camera securely on a tripod or other stable surface. Set the camera to manual mode and adjust the settings such as exposure, focus, and white balance according to your preferences and the lighting conditions. Determine the interval at which you want the camera to capture photos, typically ranging from a few seconds to several minutes. Use an intervalometer or built-in camera feature to automate the photo capture process. Finally, ensure the camera has sufficient power and memory capacity to capture the desired duration of the time-lapse sequence. Start the camera and let it capture the series of photos over the desired time period. Afterward, you can compile the individual photos into a time-lapse video using software or online tools.
1、 Camera Selection: Choosing the right camera for time lapse photography.
Camera Selection: Choosing the right camera for time lapse photography.
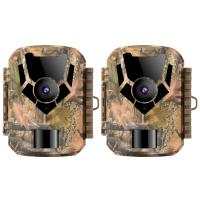
When it comes to setting up a time lapse camera, the first and most crucial step is selecting the right camera for the job. With the advancements in technology, there are now numerous options available that cater specifically to time lapse photography. Here are some key factors to consider when choosing a camera for your time lapse project.
1. Image Quality: Look for a camera that offers high-resolution images and good low-light performance. This will ensure that your time lapse footage is sharp and clear, even in challenging lighting conditions.
2. Interval Shooting: The camera should have the capability to shoot at regular intervals, allowing you to capture a series of images over an extended period. Look for a camera that offers customizable interval settings to suit your specific project requirements.
3. Battery Life: Time lapse photography requires the camera to be operational for an extended period. Therefore, it is essential to choose a camera with a long battery life or the option to connect it to an external power source.
4. Durability: Depending on your time lapse project, you may need a camera that can withstand harsh weather conditions or be mounted in challenging locations. Look for a camera that is weather-sealed and built to withstand the elements.
5. Remote Control: Having the ability to control your camera remotely is a significant advantage in time lapse photography. Look for a camera that offers wireless connectivity or compatibility with remote control devices.
6. Storage: Time lapse photography generates a large number of images, so it is crucial to have sufficient storage capacity. Choose a camera that supports high-capacity memory cards or has the option to connect to an external storage device.
7. Latest Point of View: With the latest advancements in technology, some cameras now offer additional features specifically designed for time lapse photography. For example, some cameras have built-in time lapse modes that automatically process the images into a video file, saving you time and effort in post-production.
In conclusion, selecting the right camera for time lapse photography is essential to ensure high-quality footage and a smooth shooting experience. Consider factors such as image quality, interval shooting capabilities, battery life, durability, remote control options, storage capacity, and any latest features that may enhance your time lapse project.
2、 Interval Settings: Determining the time intervals between each photo.
To set up a time lapse camera, you will need to consider a few key factors such as camera placement, power source, interval settings, and framing. Here's a step-by-step guide on how to set up a time lapse camera:
1. Camera Placement: Choose a sturdy and stable location for your camera. It could be a tripod, a window sill, or any other secure surface that provides a good vantage point for capturing the desired scene.
2. Power Source: Ensure that your camera has a reliable power source. This could be a fully charged battery or a continuous power supply using an AC adapter or external battery pack. Make sure the power source can last for the duration of your time lapse.
3. Interval Settings: Determining the time intervals between each photo is crucial for creating a smooth and visually appealing time lapse. The interval will depend on the subject and the desired effect. For example, if you want to capture fast-moving clouds, a shorter interval like 2-5 seconds may be suitable. For slower-moving subjects like a sunset, a longer interval of 10-30 seconds may be more appropriate. Experiment with different intervals to achieve the desired effect.
4. Framing: Consider the composition and framing of your time lapse. Ensure that the camera is capturing the desired scene and that there are no obstructions in the frame. You may want to use a wide-angle lens to capture a larger field of view.
5. Camera Settings: Set your camera to manual mode to have full control over exposure settings. Adjust the aperture, shutter speed, and ISO according to the lighting conditions and desired effect. It's recommended to use a low ISO to minimize noise and a narrow aperture for a larger depth of field.
6. Start Shooting: Once you have set up your camera and adjusted the settings, start the time lapse recording. Let the camera capture the scene for the desired duration, ensuring that it remains stable and undisturbed.
Remember to have patience and experiment with different settings to achieve the best results. Additionally, consider using a remote shutter release or intervalometer to minimize camera shake when triggering each shot.
3、 Camera Setup: Configuring the camera settings for time lapse.
Camera Setup: Configuring the camera settings for time lapse.
Setting up a time lapse camera requires careful consideration of various factors such as interval, exposure, and power source. Here is a step-by-step guide to help you set up your camera for capturing stunning time lapse footage.
1. Choose the right camera: Ensure that your camera has a time lapse feature or the ability to be controlled remotely. DSLRs and mirrorless cameras are popular choices due to their versatility and image quality.
2. Select a sturdy tripod: Stability is crucial for time lapse photography. Invest in a sturdy tripod that can withstand wind and other external factors.
3. Set the interval: Determine the interval at which you want your camera to capture images. This depends on the subject and the desired speed of the final video. For example, if you want to capture a sunset over an hour, you might set the interval to 5 seconds.
4. Adjust exposure settings: Depending on the lighting conditions, you may need to adjust the exposure settings manually. Use aperture priority or manual mode to ensure consistent exposure throughout the time lapse.
5. Focus: Set your camera to manual focus to avoid any changes in focus during the time lapse. Choose a focal point and adjust the focus accordingly.
6. Power source: Time lapse photography can drain your camera's battery quickly. Consider using an external power source, such as a battery grip or AC adapter, to ensure uninterrupted shooting.
7. Frame your shot: Compose your shot carefully, considering the subject, foreground, and background. Use the rule of thirds or other composition techniques to create visually appealing footage.
8. Start shooting: Once all the settings are configured, start the time lapse sequence and let the camera capture the images automatically.
Remember to be patient and allow the camera to capture enough frames to create a smooth and captivating time lapse video. Experiment with different settings and intervals to achieve the desired effect.
4、 Mounting Options: Different ways to mount the camera for stability.
How to set up a time lapse camera: Mounting Options: Different ways to mount the camera for stability.
Setting up a time lapse camera requires careful consideration of the mounting options available to ensure stability and capture the desired footage. Here are some popular mounting options to consider:
1. Tripod: A tripod is a versatile and stable option for mounting a time lapse camera. It provides a solid base and allows for easy adjustments in height and angle. Ensure that the tripod is placed on a stable surface to prevent any unwanted movement during the time lapse.
2. Clamp Mount: A clamp mount is a convenient option for mounting the camera on various objects such as poles, branches, or fences. It provides flexibility in positioning the camera at different angles and heights. Make sure the clamp is securely fastened to avoid any accidental falls.
3. Suction Cup Mount: This mounting option is ideal for attaching the camera to smooth surfaces like windows or car windshields. Suction cup mounts offer stability and can be easily repositioned. However, ensure that the surface is clean and dry for a secure attachment.
4. Wall Mount: If you want to capture a time lapse from a fixed location, a wall mount can be a suitable option. It provides a stable platform and can be easily attached to walls or other vertical surfaces. Ensure that the mount is securely fixed to prevent any movement.
5. Pole Mount: A pole mount is a great option for capturing time lapses from an elevated perspective. It allows for a wider field of view and can be attached to poles or other vertical structures. Ensure that the pole is sturdy and securely fastened to avoid any wobbling.
It is important to consider the environment and weather conditions when choosing a mounting option. Additionally, always double-check the stability of the mount before starting the time lapse to avoid any mishaps.
In recent years, advancements in technology have introduced innovative mounting options such as magnetic mounts and flexible tripods. These options provide even more flexibility and stability for setting up time lapse cameras. Always stay updated with the latest mounting options available in the market to enhance your time lapse photography experience.
