How To Set Up A Tripod For Phone ?
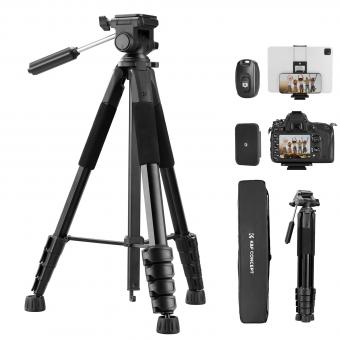
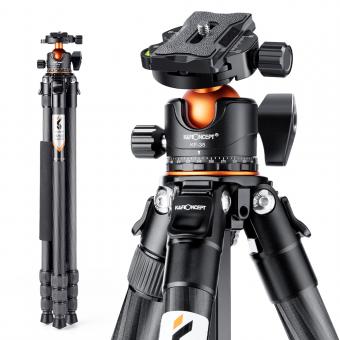
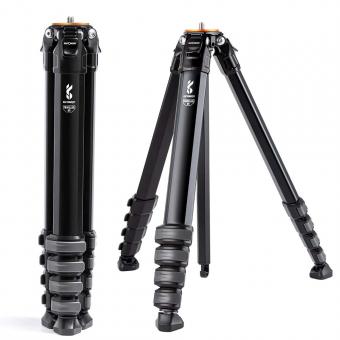
To set up a tripod for a phone, start by extending the tripod legs fully and ensuring they are locked in place. Attach the phone holder or mount to the tripod head, making sure it is secure. Adjust the angle and position of the phone holder to your desired orientation. Place your phone into the holder, ensuring it is stable and secure. Finally, adjust the tripod height and position as needed to achieve the desired framing for your shot.
1、 Adjusting the tripod legs for stability
To set up a tripod for your phone, follow these steps:
1. Choose a stable surface: Find a flat and level surface to place your tripod. This will ensure stability and prevent any wobbling or shaking during use.
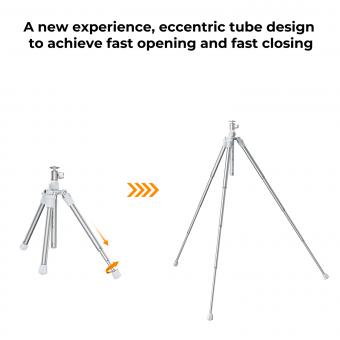
2. Extend the tripod legs: Start by loosening the leg locks on each tripod leg. Extend the legs to your desired height, making sure they are all at the same level. Tighten the leg locks to secure the legs in place.
3. Adjust the tripod head: Most tripods come with a head that allows you to tilt and pan your phone. Loosen the head lock and position it in a way that suits your needs. Tighten the lock to secure the head in place.
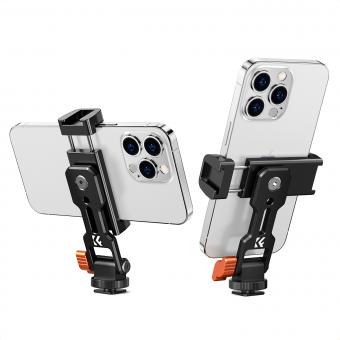
4. Attach your phone: Depending on the tripod, you may need to use a phone mount or holder. These can be easily attached to the tripod head. Make sure your phone is securely fastened to the mount to prevent any accidents.
5. Fine-tune the position: Once your phone is attached, adjust the tripod head to position your phone at the desired angle and height. Use the tilt and pan functions to achieve the perfect shot.
Adjusting the tripod legs for stability is crucial to ensure a steady and secure setup. If you're shooting outdoors or on uneven terrain, it's important to adjust the legs accordingly. Some tripods come with adjustable leg angles, allowing you to set up on uneven surfaces. This feature can greatly enhance stability and prevent any accidental tipping. Additionally, consider using a tripod with rubber feet or spikes for added grip on different surfaces.
Remember to always double-check the stability of your tripod before leaving your phone unattended. A well-set tripod will provide a steady base for capturing high-quality photos and videos with your phone.
2、 Mounting the phone securely on the tripod head
To set up a tripod for your phone, follow these steps:
1. Extend the tripod legs: Start by extending the legs of the tripod to your desired height. Make sure the legs are stable and locked in place.
2. Attach the phone mount: Most tripods come with a phone mount that can be easily attached to the tripod head. Simply screw the mount onto the tripod head until it is secure.
3. Adjust the phone mount: Once the mount is attached, adjust it to the desired angle. Most phone mounts have a ball head that allows for easy adjustment. Ensure that the mount is tightened to hold your phone securely.
4. Mount the phone: Gently place your phone into the mount, making sure it is centered and secure. Some phone mounts have adjustable clamps or grips to hold the phone in place. Adjust these as needed to ensure a snug fit.
5. Check stability: Once your phone is mounted, give it a gentle shake to ensure it is secure. If it wobbles or feels unstable, readjust the mount or tighten any loose parts.
Mounting the phone securely on the tripod head is crucial to prevent any accidental falls or damage. It is recommended to use a phone mount that has a secure grip and adjustable features to accommodate different phone sizes. Additionally, consider using a tripod with a sturdy build and a wide base for added stability. Always double-check the tightness of the mount and tripod legs before using your phone on the tripod to ensure a safe and steady setup.

3、 Adjusting the tripod height for desired framing
To set up a tripod for your phone, follow these steps:
1. Extend the tripod legs: Start by unlocking the leg locks and extending each leg to your desired height. Make sure the legs are stable and secure by tightening the locks.
2. Attach the phone mount: Most tripods come with a phone mount that can be easily attached to the top of the tripod. Simply screw or clip the mount onto the tripod head.
3. Adjust the tripod height for desired framing: Once the phone mount is attached, you can adjust the tripod height to achieve the desired framing. If you want a lower angle, lower the tripod legs. For a higher angle, extend the legs further. Ensure that the tripod is level and stable before moving on.
4. Secure your phone: Place your phone into the mount and adjust the grip to hold it securely. Make sure the phone is centered and level within the mount.
5. Fine-tune the framing: Use the tripod's pan and tilt controls to adjust the phone's position and angle. This will help you achieve the perfect framing for your shot.
6. Lock the tripod: Once you have achieved the desired framing, lock the tripod in place to prevent any accidental movement or shaking.
From a latest point of view, it's worth mentioning that some tripods now come with additional features such as Bluetooth remote controls or smartphone apps that allow you to control the phone's camera settings remotely. These features can be particularly useful for capturing self-portraits or group shots without having to physically touch the phone. Additionally, some tripods are designed to be lightweight and portable, making them ideal for travel or outdoor photography.
4、 Ensuring level positioning of the tripod and phone
How to set up a tripod for a phone:
Ensuring level positioning of the tripod and phone is crucial for capturing stable and professional-looking photos or videos. Here's a step-by-step guide to help you set up your tripod for your phone:
1. Choose a stable surface: Find a flat and sturdy surface to place your tripod. This will ensure stability and prevent any wobbling or shaking during use.
2. Extend the tripod legs: Extend the legs of the tripod to your desired height. Make sure all the legs are extended evenly to maintain balance.
3. Adjust the tripod head: Most tripods come with a head that allows you to tilt and pan. Adjust the head to a level position by loosening the knobs or levers and aligning it with a bubble level if available. This will help you achieve a straight and balanced shot.
4. Attach the phone mount: Attach the phone mount to the tripod head. Ensure it is securely fastened to prevent any accidental slips or falls.
5. Place your phone in the mount: Gently place your phone into the mount, making sure it is centered and secure. Double-check that the phone is properly aligned with the tripod head to maintain level positioning.
6. Adjust the phone angle: Use the tripod head's tilt and pan functions to adjust the angle of your phone. This will allow you to capture the desired shot or frame.
7. Lock the tripod: Once you have positioned your phone, tighten all the knobs and levers on the tripod to lock it in place. This will prevent any movement or shifting during use.
Remember, technology is constantly evolving, and new tripod designs and phone mounts are being introduced regularly. It's always a good idea to consult the user manual or manufacturer's instructions for specific guidance on setting up your tripod for your phone.
