How To Set Up A Wildlife Camera ?
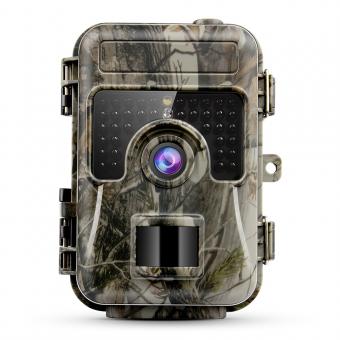
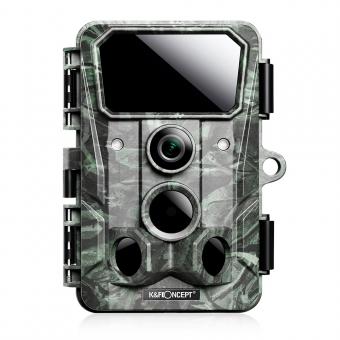
To set up a wildlife camera, first choose a suitable location where wildlife activity is likely to occur, such as near a watering hole, animal trails, or feeding areas. Ensure that the camera is placed securely and inconspicuously, preferably at eye level or slightly higher. Make sure the camera is facing the desired area and adjust the angle accordingly. Set up the camera according to the manufacturer's instructions, including inserting batteries or connecting it to a power source, and inserting a memory card for storage. Adjust the camera settings, such as resolution, sensitivity, and trigger speed, based on your preferences and the wildlife you are hoping to capture. Finally, test the camera to ensure it is functioning properly and regularly check the memory card to review the captured wildlife footage.
1、 Camera selection and specifications for wildlife photography
Camera selection and specifications for wildlife photography have evolved significantly in recent years, thanks to advancements in technology. When setting up a wildlife camera, it is crucial to choose the right equipment to capture high-quality images and videos of animals in their natural habitat.
Firstly, consider the camera type. DSLR cameras are popular among wildlife photographers due to their versatility and ability to interchange lenses. Mirrorless cameras are also gaining popularity for their compact size and excellent image quality. Both options offer a wide range of lens choices, allowing photographers to capture animals from a distance without disturbing them.
When it comes to specifications, a high-resolution sensor is essential for capturing fine details. Look for a camera with at least 20 megapixels or more. This will ensure that your images are sharp and can be enlarged or cropped without losing quality.
Another crucial factor is the camera's autofocus system. Wildlife photography often involves fast-moving subjects, so a camera with a fast and accurate autofocus system is necessary. Look for cameras with advanced autofocus tracking capabilities, such as multiple focus points and subject tracking.
In terms of ISO performance, choose a camera that can handle high ISO settings without excessive noise. This is particularly important when shooting in low-light conditions or when using long telephoto lenses.
Consider the camera's burst rate or frames per second (fps) as well. Wildlife photography often requires capturing fast action, so a camera with a high burst rate will allow you to capture multiple frames in quick succession, increasing your chances of getting the perfect shot.
Lastly, ensure that the camera is weather-sealed and durable. Wildlife photography often takes place in challenging environments, so having a camera that can withstand dust, moisture, and extreme temperatures is crucial.
In conclusion, when setting up a wildlife camera, choose a camera type that suits your needs, with a high-resolution sensor, advanced autofocus system, good ISO performance, high burst rate, and weather-sealing. Keeping up with the latest advancements in camera technology will help you make informed decisions and capture stunning wildlife photographs.
2、 Choosing the right location for setting up a wildlife camera
Choosing the right location for setting up a wildlife camera is crucial to ensure successful monitoring and capturing of wildlife activity. Here are some steps to help you set up a wildlife camera effectively:
1. Research and identify the target species: Before setting up the camera, research the specific wildlife species you want to monitor. This will help you understand their habitat preferences, behavior, and activity patterns, allowing you to choose an appropriate location.
2. Consider habitat features: Look for areas with abundant food sources, water, and shelter. Wildlife tends to frequent these areas, increasing the chances of capturing their activity on camera. For example, setting up near a water source or along animal trails can be effective.
3. Assess camera placement: Choose a location that provides a clear view of the target area. Avoid obstructions such as branches or tall grass that may block the camera's field of view. Ensure the camera is securely mounted to prevent movement or theft.
4. Consider lighting conditions: Wildlife cameras often have infrared or motion-activated sensors for night-time monitoring. However, it is still important to consider lighting conditions. Avoid placing the camera directly facing the sun, as it may cause glare or overexposure.
5. Test and adjust: Before leaving the camera unattended, test it to ensure it is capturing the desired area effectively. Adjust the camera's angle and sensitivity settings as needed to optimize its performance.
6. Regular maintenance: Check the camera regularly to ensure it is functioning properly and has sufficient battery life and memory capacity. Also, consider weather conditions and adjust camera settings accordingly.
From a latest point of view, advancements in technology have made wildlife cameras more sophisticated. Some cameras now offer wireless connectivity, allowing you to remotely monitor and control the camera from your smartphone or computer. Additionally, some cameras have improved image quality and longer battery life, enabling longer monitoring periods.
Remember, when setting up a wildlife camera, it is important to respect the animals and their habitats. Follow local regulations and ethical guidelines to ensure minimal disturbance to the wildlife.

3、 Proper positioning and mounting techniques for wildlife cameras
Proper positioning and mounting techniques for wildlife cameras are essential to ensure optimal performance and capture the best possible footage. Here is a step-by-step guide on how to set up a wildlife camera:
1. Choose the right location: Select an area where wildlife activity is frequent, such as game trails, watering holes, or feeding areas. Researching local wildlife habits and consulting with experts can help you identify the best spots.
2. Mounting the camera: Use a sturdy mounting system that can withstand various weather conditions and prevent theft or damage. Tree mounts or tripod stands are commonly used options. Ensure the camera is securely attached and positioned at the desired height and angle.
3. Adjust camera settings: Configure the camera settings according to your requirements. This may include adjusting the resolution, video length, motion sensitivity, and time-lapse intervals. Some cameras also offer features like infrared night vision or burst mode for capturing fast-moving subjects.
4. Test the camera: Before leaving the camera unattended, conduct a test to ensure it is functioning correctly. Check the field of view, motion detection, and image quality. Make any necessary adjustments to the camera's position or settings.
5. Power source: Depending on the camera model, you may need to consider the power source. Some cameras use batteries, while others can be connected to a solar panel or external power supply. Ensure the power source is reliable and will last for the desired duration.
6. Regular maintenance: Check the camera periodically to ensure it is still functioning properly. Replace batteries or recharge them as needed. Clear any vegetation that may obstruct the camera's view.
From a latest point of view, advancements in technology have led to the development of wireless and cellular wildlife cameras. These cameras can transmit images and videos directly to your smartphone or computer, allowing you to monitor wildlife activity in real-time. Additionally, some cameras now offer advanced features like artificial intelligence for species identification and cloud storage for easy access to footage.
Remember to always follow local regulations and ethical guidelines when setting up wildlife cameras. Respect wildlife habitats and ensure your presence does not disturb or harm the animals.

4、 Adjusting camera settings for optimal wildlife photography results
Adjusting camera settings for optimal wildlife photography results is crucial to capturing stunning images of animals in their natural habitat. Whether you are a beginner or an experienced photographer, here are some tips to help you set up your wildlife camera for the best possible results.
1. Choose the right camera: Invest in a camera with a high-resolution sensor and fast autofocus capabilities. This will ensure that you can capture sharp and detailed images of fast-moving wildlife.
2. Select the appropriate lens: Wildlife photography often requires a telephoto lens to capture animals from a distance. A lens with a focal length of 200mm or more is recommended to get close-up shots without disturbing the animals.
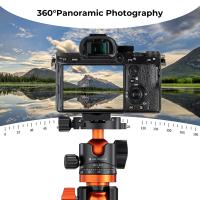
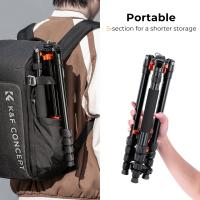
3. Use a tripod or monopod: Stability is crucial for wildlife photography, especially when using longer lenses. A tripod or monopod will help eliminate camera shake and ensure sharp images.
4. Adjust the ISO: In low-light conditions, increase the ISO to allow for faster shutter speeds. However, be cautious not to set it too high as it can introduce noise into your images.
5. Set the shutter speed: Wildlife is often in motion, so a fast shutter speed is essential to freeze the action. Start with a minimum of 1/500th of a second and adjust accordingly based on the speed of the subject.
6. Choose the appropriate aperture: A wider aperture (lower f-stop number) will create a shallow depth of field, isolating the subject from the background. This can help create more visually appealing images.
7. Enable continuous autofocus: Wildlife can move quickly, so using continuous autofocus mode will help keep your subject in focus as it moves.
8. Shoot in burst mode: Animals can exhibit unpredictable behavior, so shooting in burst mode will increase your chances of capturing the perfect moment.
9. Be patient and observant: Wildlife photography requires patience and a keen eye. Take the time to study your subject's behavior and anticipate their movements to capture unique and captivating shots.
Remember, wildlife photography is about respecting and preserving nature. Always prioritize the well-being of the animals and their environment when setting up your camera.
