How To Set Up Bushnell Rangefinder ?
To set up a Bushnell rangefinder, start by installing the battery according to the manufacturer's instructions. Next, turn on the device by pressing the power button. Adjust the eyepiece to achieve a clear view through the rangefinder. Aim the rangefinder at the target you want to measure and press the button to activate the laser. The rangefinder will emit a laser beam that will bounce back from the target and provide you with the distance measurement on the display. Some Bushnell rangefinders may have additional features or settings that you can adjust according to your preferences. It is recommended to refer to the user manual for specific instructions on how to use and set up your particular model of Bushnell rangefinder.
1、 Unboxing and Initial Setup
Setting up a Bushnell rangefinder is a relatively straightforward process that can be completed in just a few simple steps. Here's a guide on how to set up your Bushnell rangefinder:
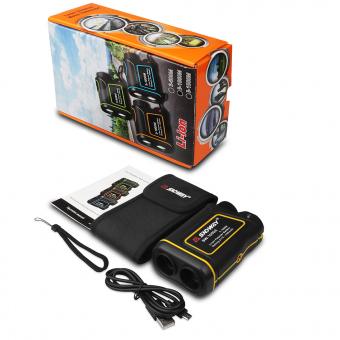
1. Unboxing: Start by carefully unboxing your Bushnell rangefinder. Ensure that all the components are present, including the rangefinder itself, batteries (if required), carrying case, and any additional accessories.
2. Battery Installation: If your Bushnell rangefinder requires batteries, locate the battery compartment and insert the batteries according to the manufacturer's instructions. Make sure to use the correct type and polarity of batteries.
3. Power On: Once the batteries are installed, power on the rangefinder by pressing the power button. Some models may have a separate power button, while others may activate by pressing the main button.
4. Adjust Settings: Depending on the model, you may need to adjust various settings such as measurement units (yards or meters), display brightness, or target priority. Refer to the user manual for specific instructions on how to navigate the settings menu.
5. Target Acquisition: To measure the distance to a target, aim the rangefinder at the desired object and press the main button. The rangefinder will emit a laser beam that will bounce back and provide you with the distance measurement on the display.
6. Additional Features: Some Bushnell rangefinders come with additional features such as slope compensation, angle measurement, or target scanning. Familiarize yourself with these features by referring to the user manual.
It's important to note that the setup process may vary slightly depending on the specific model of your Bushnell rangefinder. Therefore, it's always recommended to consult the user manual for detailed instructions tailored to your device.
In conclusion, setting up a Bushnell rangefinder involves unboxing the device, installing batteries (if required), adjusting settings, and familiarizing yourself with its features. By following these steps, you'll be ready to accurately measure distances on the golf course or during other outdoor activities.

2、 Battery Installation and Powering On
To set up a Bushnell rangefinder, you will need to follow a few simple steps. The first step is to install the battery. Most Bushnell rangefinders use a CR2 lithium battery, which is commonly included with the device. To install the battery, locate the battery compartment on the rangefinder, usually located on the side or bottom of the device. Open the compartment and insert the battery, making sure to align the positive and negative ends correctly. Close the compartment securely.
Once the battery is installed, you can power on the rangefinder. Look for the power button, usually located on the top or side of the device. Press and hold the power button for a few seconds until the rangefinder powers on. Some models may have a separate power button for the display, so make sure to press the correct button.
After powering on the rangefinder, you may need to adjust the settings according to your preferences. This can include selecting the unit of measurement (yards or meters), adjusting the brightness of the display, or enabling additional features such as slope compensation or target priority modes. Refer to the user manual for specific instructions on how to navigate the settings menu and make adjustments.
It is important to note that the steps for setting up a Bushnell rangefinder may vary slightly depending on the model. Therefore, it is always recommended to consult the user manual for your specific device for detailed instructions. Additionally, it is a good practice to periodically check for firmware updates from the manufacturer's website to ensure your rangefinder is running the latest software version, which may offer improved performance and features.

3、 Adjusting Display Settings and Targeting Modes
To set up a Bushnell rangefinder, you need to follow a few steps. Firstly, make sure you have inserted a fresh battery into the device. Then, turn on the rangefinder by pressing the power button. Next, you may need to adjust the display settings to ensure optimal visibility. This can usually be done by pressing the menu button and navigating through the options using the arrow keys. Look for options such as brightness, contrast, and font size, and adjust them according to your preference.
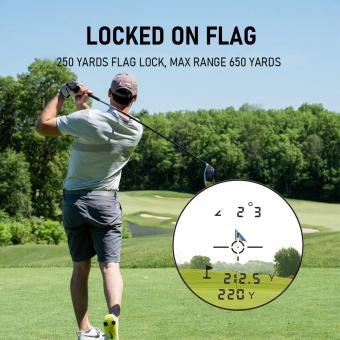
Once you have set up the display settings, you can move on to adjusting the targeting modes. Most Bushnell rangefinders offer different targeting modes, such as standard, scan, and pinseeker. The standard mode provides a single distance reading, while the scan mode continuously updates the distance as you move the rangefinder across different targets. The pinseeker mode is specifically designed for golfers and helps to lock onto the flagstick, ignoring any background objects.
To switch between targeting modes, look for a button or switch specifically labeled for this purpose. Press the button or move the switch to cycle through the available modes. Some newer models may even offer additional features like slope compensation, which adjusts the distance reading based on the incline or decline of the target.
It's important to note that the specific steps for setting up a Bushnell rangefinder may vary slightly depending on the model you have. Therefore, it's always a good idea to consult the user manual that came with your device for detailed instructions.
In conclusion, setting up a Bushnell rangefinder involves adjusting the display settings for optimal visibility and selecting the appropriate targeting mode for your needs. By following the steps outlined above and referring to the user manual, you can ensure that your rangefinder is properly set up and ready to provide accurate distance measurements.
4、 Calibrating and Fine-Tuning Distance Measurements
To set up a Bushnell rangefinder, follow these steps:
1. Install the battery: Open the battery compartment and insert the battery according to the polarity markings. Close the compartment securely.
2. Power on the rangefinder: Press the power button to turn on the device. Some models may have a separate button for this function.
3. Adjust the eyepiece: Look through the eyepiece and rotate it until the reticle appears sharp and clear. This step ensures proper focus for accurate distance measurements.
4. Select the mode: Depending on the model, you may have different modes such as "Scan," "PinSeeker," or "BullsEye." Choose the appropriate mode for your intended use. For example, "Scan" mode allows continuous distance readings while panning across a landscape.
5. Aim at the target: Look through the rangefinder and align the target with the reticle. Ensure that the target is fully visible within the viewfinder.
6. Press the measurement button: Once the target is aligned, press the measurement button to initiate distance calculation. The rangefinder will emit a laser beam that reflects off the target and measures the time it takes for the beam to return.
7. Read the distance: The rangefinder will display the distance measurement on the screen. Some models may also provide additional information such as slope compensation or angle measurements.
Calibrating and fine-tuning distance measurements may not be necessary for most Bushnell rangefinders, as they are designed to provide accurate readings out of the box. However, if you notice any inconsistencies or suspect inaccurate measurements, you can try the following steps:
1. Check for obstructions: Ensure that there are no obstructions, such as dirt or debris, on the lens or laser emitter. Clean them if necessary.
2. Recalibrate the rangefinder: Some models may have a recalibration feature that allows you to reset the device to its factory settings. Refer to the user manual for instructions on how to perform this procedure.
3. Test in different conditions: Distance measurements can be affected by various factors such as lighting conditions, target color, or reflective surfaces. Try measuring distances in different environments to see if there are any variations.
If you continue to experience issues with accuracy, it is recommended to contact Bushnell customer support for further assistance.


