How To Set Up Camera On Tripod ?
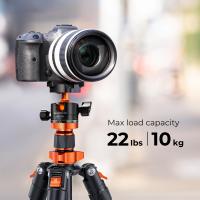
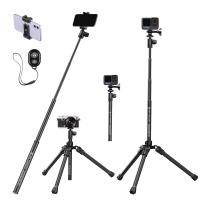
To set up a camera on a tripod, first, extend the tripod legs to the desired height and make sure they are securely locked in place. Then, attach the camera mounting plate to the bottom of the camera by aligning it with the camera's tripod socket and tightening the screw. Next, locate the tripod's quick release plate and attach it to the mounting plate on the tripod head. Ensure it is securely fastened. Place the camera on the tripod head and align the mounting screw with the hole on the quick release plate. Tighten the screw to secure the camera in place. Finally, adjust the tripod head to position the camera at the desired angle and tighten any necessary knobs or levers to lock it in place.
1、 Adjusting the tripod legs for stability
To set up a camera on a tripod, the first step is to adjust the tripod legs for stability. This is crucial to ensure that the camera remains steady and secure during use. Here's a step-by-step guide on how to do it:
1. Start by extending the tripod legs fully. Most tripods have three legs that can be adjusted independently. Make sure the legs are fully extended but not overextended, as this can compromise stability.
2. Once the legs are extended, locate the leg locks. These are usually located near the top of each leg and are used to secure the legs in place. Unlock the leg locks by twisting them counterclockwise.
3. Spread the legs apart to form a stable base. The spread should be wide enough to provide balance but not so wide that it becomes difficult to work with. Adjust the legs until you find a comfortable and stable position.
4. Once you have positioned the legs, lock them in place by twisting the leg locks clockwise. Ensure that each leg lock is tightened securely to prevent any movement or wobbling.
5. Finally, check the stability of the tripod by gently pushing on the camera mount. If the tripod remains steady, it is properly set up. If there is any movement or instability, readjust the legs and tighten the leg locks as necessary.
It's important to note that the latest point of view in tripod setup emphasizes the use of a bubble level. Many tripods now come with built-in bubble levels or have a separate accessory that can be attached. This allows for precise leveling of the tripod, ensuring that the camera is perfectly horizontal or vertical. Using a bubble level can greatly improve the accuracy and stability of your shots.
2、 Mounting the camera onto the tripod head
Mounting the camera onto the tripod head is a crucial step in setting up your camera on a tripod. It ensures stability and allows you to capture steady shots. Here's a step-by-step guide on how to do it:
1. Start by extending the tripod legs to your desired height. Make sure the tripod is stable and secure on the ground.
2. Locate the mounting plate on the tripod head. This plate usually has a screw or quick-release mechanism to attach the camera.
3. Align the mounting plate with the camera's tripod socket. The tripod socket is usually located on the bottom of the camera.
4. Once aligned, attach the mounting plate to the camera by tightening the screw or using the quick-release mechanism. Ensure it is securely fastened.
5. Now, locate the tripod head's mounting platform. This is where you will attach the camera with the mounting plate.
6. Place the camera with the attached mounting plate onto the tripod head's mounting platform. Make sure it sits securely and evenly.
7. Tighten the locking mechanism on the tripod head to secure the camera in place. This will prevent any accidental movement or slippage.
8. Once the camera is securely mounted, adjust the tripod head to the desired angle and lock it in place.
Remember to check the camera's stability by gently nudging it before starting to shoot. If it moves or feels loose, double-check the mounting plate and locking mechanism.
In recent years, some tripods have introduced innovative features like quick-release plates with built-in levels or bubble indicators. These can help you ensure that your camera is level and aligned correctly. Additionally, some tripods now offer compatibility with smartphone mounts, allowing you to use your phone as a camera on the tripod.
Setting up your camera on a tripod is an essential skill for any photographer or videographer. It provides stability, reduces camera shake, and allows for precise composition. By following these steps, you can confidently mount your camera onto a tripod and capture stunning shots.
3、 Adjusting the tripod head for desired framing
To set up a camera on a tripod, follow these steps:
1. Extend the tripod legs: Start by unlocking the leg locks and extending each leg to the desired height. Make sure the tripod is stable and level on the ground.
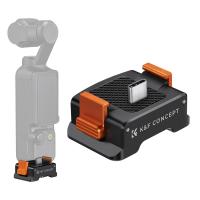
2. Attach the camera plate: Most tripods come with a quick-release plate that attaches to the bottom of the camera. Align the plate with the camera's tripod mount and tighten the screw to secure it in place.
3. Mount the camera: Once the plate is attached, slide it into the tripod head's quick-release mechanism and lock it in place. Ensure that the camera is securely attached to the tripod.
4. Adjust the tripod head: The tripod head allows you to adjust the camera's position and framing. There are typically two main adjustments: the pan and tilt. The pan adjustment allows you to rotate the camera horizontally, while the tilt adjustment allows you to tilt the camera up or down.
5. Level the camera: Use the built-in bubble level on the tripod head or the camera's electronic level to ensure that the camera is perfectly level. This is important for capturing straight and balanced shots.
6. Fine-tune the framing: Adjust the tripod head's pan and tilt controls to frame your shot exactly as desired. Take your time to find the right composition and make any necessary adjustments.
Remember to always double-check the stability of the tripod and ensure that all locks are tightened before leaving your camera unattended. Additionally, consider using a remote shutter release or the camera's self-timer to minimize camera shake when taking photos.

4、 Setting up the camera settings for optimal image quality
Setting up a camera on a tripod is a fundamental skill that every photographer should master. It ensures stability and allows for precise composition, resulting in sharper and more professional-looking images. Here's a step-by-step guide on how to set up your camera on a tripod:
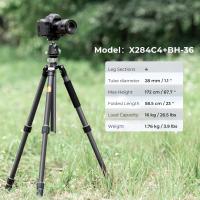
1. Choose a sturdy tripod: Invest in a tripod that is stable and can support the weight of your camera and lens. Look for one with adjustable legs and a secure locking mechanism.
2. Attach the camera plate: Most tripods come with a quick-release plate that attaches to the bottom of your camera. Screw it securely onto the camera's tripod mount.
3. Mount the camera: Align the camera plate with the tripod head and slide it into place. Make sure it locks securely.
4. Adjust the tripod height: Extend or retract the tripod legs to achieve the desired height. Avoid extending the center column fully, as it can compromise stability.
5. Level the camera: Use the built-in bubble level or a hot shoe level to ensure that the camera is perfectly level. This is crucial for straight horizons and accurate compositions.
6. Secure the tripod: Once the camera is level, tighten all the tripod leg locks and ensure that the tripod is stable and doesn't wobble.
Now that your camera is securely mounted on the tripod, you can focus on optimizing the camera settings for optimal image quality. Here are a few key points to consider:
1. Choose the appropriate ISO: Set the ISO to the lowest value possible to minimize noise and maximize image quality. However, in low-light situations, you may need to increase the ISO to maintain a proper exposure.
2. Select the right aperture: Depending on your desired depth of field, adjust the aperture accordingly. A smaller aperture (higher f-number) will result in a larger depth of field, while a larger aperture (lower f-number) will create a shallower depth of field.
3. Set the shutter speed: Ensure that the shutter speed is fast enough to avoid camera shake. As a general rule, the shutter speed should be at least the reciprocal of the focal length. For example, if you're using a 50mm lens, the shutter speed should be 1/50th of a second or faster.
4. Shoot in RAW: If your camera allows it, shoot in RAW format to capture the maximum amount of data and have more flexibility in post-processing.
5. Use the appropriate white balance: Adjust the white balance setting to match the lighting conditions. This will ensure accurate color reproduction.
Remember, these settings may vary depending on the specific shooting situation and your creative intent. Experimentation and practice will help you find the optimal camera settings for different scenarios.
In conclusion, setting up a camera on a tripod is a crucial step in achieving sharp and well-composed images. By following the steps outlined above and optimizing your camera settings, you can capture images with optimal image quality and take your photography to the next level.


