How To Set Up Camera Tripod ?
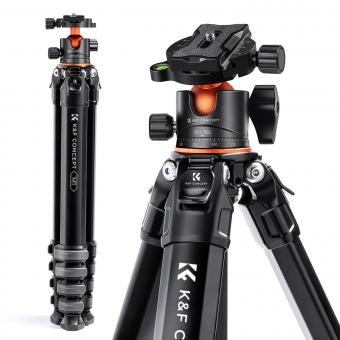
To set up a camera tripod, start by extending the tripod legs to your desired height. Make sure the legs are securely locked in place. Then, attach the camera mounting plate to the bottom of your camera and tighten it securely. Next, locate the mounting screw on the tripod head and align it with the hole on the camera mounting plate. Insert the screw into the hole and tighten it to secure the camera to the tripod head. Adjust the tripod head to position the camera in the desired angle and tighten any locking mechanisms to hold it in place. Finally, check that the tripod is stable and adjust the legs or tripod head as needed for balance.
1、 Choosing the right tripod for your camera setup
Choosing the right tripod for your camera setup is crucial for achieving stable and professional-looking shots. With the wide range of options available in the market, it can be overwhelming to make the right choice. Here are some factors to consider when selecting a tripod:
1. Weight Capacity: Ensure that the tripod can support the weight of your camera and any additional equipment you may use, such as a telephoto lens or external flash. It's always better to choose a tripod with a higher weight capacity than you currently need, as it allows for future upgrades.
2. Height and Stability: Consider the maximum and minimum height of the tripod. If you frequently shoot in low angles or need to capture overhead shots, look for a tripod with a center column that can be inverted. Stability is also crucial, especially in windy conditions. Look for tripods with sturdy legs and a hook at the bottom to hang a weight bag for added stability.
3. Portability: If you often shoot on location or travel frequently, a lightweight and compact tripod is essential. Look for tripods that fold down to a manageable size and come with a carrying case.
4. Quick Release System: A quick release system allows you to attach and detach your camera quickly and securely. Look for a tripod with a reliable and easy-to-use quick release plate.
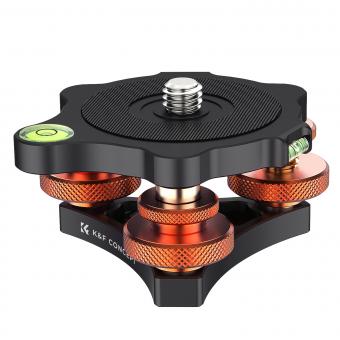
5. Additional Features: Some tripods come with features like a built-in level, adjustable leg angles, or a monopod conversion option. Consider these additional features based on your shooting style and preferences.
Now that you have chosen the right tripod for your camera setup, it's time to set it up properly. Here's a step-by-step guide on how to set up a camera tripod:
1. Unfold the tripod legs and extend them to your desired height. Ensure that the leg locks are securely tightened.
2. Attach the quick release plate to the bottom of your camera and tighten it.
3. Align the quick release plate with the tripod head and slide it into place. Secure it by tightening the locking mechanism.
4. Adjust the tripod head to the desired angle and tighten the knobs to lock it in place.
5. Use the tripod's built-in level or an external bubble level to ensure that the camera is perfectly level.
6. Once everything is set up, test the stability of the tripod by gently nudging it. If it wobbles, adjust the legs or tighten the locks until it is stable.
Remember to always follow the manufacturer's instructions for your specific tripod model, as the setup process may vary slightly. With the right tripod and proper setup, you can capture sharp and professional images in any shooting situation.
2、 Adjusting the tripod legs for stability and height
To set up a camera tripod, follow these steps:
1. Unfold the tripod legs: Start by releasing the leg locks and extending each leg to its full length. Make sure the locks are securely tightened to prevent any accidental collapse.
2. Adjust the tripod legs for stability and height: Most tripods have adjustable legs that allow you to set the desired height and stability. Spread the legs apart to create a stable base, and adjust the length of each leg accordingly. If you're shooting on uneven ground, you may need to adjust the length of each leg individually to ensure stability.
3. Attach the camera: Most tripods have a mounting plate or quick-release system to attach the camera securely. Align the camera's mounting hole with the tripod's mounting plate and tighten the screw or lever to secure it in place. Ensure that the camera is properly balanced and doesn't tilt or wobble.
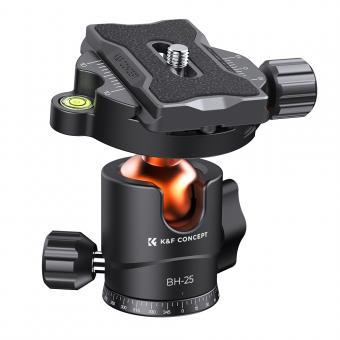
4. Adjust the tripod head: The tripod head allows you to pan, tilt, and rotate the camera for different angles and compositions. Adjust the head according to your desired shot. Some tripods have a ball head, which allows for smooth and easy adjustments in all directions, while others have a three-way head with separate controls for each movement.
5. Fine-tune the composition: Once the camera is attached and the tripod head is adjusted, use the tripod's controls to fine-tune the composition. Make small adjustments to the height, angle, and position of the camera until you achieve the desired framing.
From a latest point of view, some tripods now come with additional features such as built-in levels or bubble indicators to help you ensure that the tripod is perfectly level. This can be particularly useful when shooting landscapes or architectural photography where straight lines are important. Additionally, some tripods now have quick-release leg locks or flip locks, which allow for faster and easier setup compared to traditional twist locks. These advancements in tripod design make it more convenient and efficient for photographers to set up their equipment quickly and accurately.
3、 Attaching the camera securely to the tripod head
To set up a camera tripod, you need to follow a few simple steps. The first step is to extend the tripod legs to your desired height. Most tripods have adjustable legs that can be extended or retracted to achieve the desired height. Make sure to lock the legs in place by tightening the leg locks.
Next, you need to attach the tripod head to the top of the tripod legs. The tripod head is the part that holds the camera and allows you to adjust its position. There are different types of tripod heads available, such as ball heads and pan-tilt heads. Choose the one that suits your needs and attach it securely to the tripod legs.
Once the tripod head is attached, you can now attach the camera to the tripod head. To do this, locate the mounting plate on the tripod head and attach it to the bottom of your camera. Make sure to tighten the mounting plate securely to ensure that the camera is stable and won't come loose.
After attaching the camera, you can adjust the position and angle of the camera by using the controls on the tripod head. This allows you to frame your shot and make any necessary adjustments.
It is important to note that the latest point of view in setting up a camera tripod is to ensure that the camera is securely attached to the tripod head. This is especially important when using heavier cameras or when shooting in challenging conditions. Some tripod heads come with additional safety features, such as quick-release plates or safety locks, which provide added security and stability.
In conclusion, setting up a camera tripod involves extending the legs, attaching the tripod head, and securely attaching the camera to the tripod head. By following these steps and ensuring that the camera is securely attached, you can achieve stable and professional-looking shots.
4、 Adjusting the tripod head for the desired angle and composition
To set up a camera tripod, follow these steps:
1. Extend the tripod legs: Start by unlocking the leg locks and extending each leg to the desired height. Make sure the legs are securely locked in place.
2. Adjust the tripod head: Most tripods have a head that allows you to adjust the angle and composition of your shot. Loosen the head lock and position the camera in the desired direction.
3. Level the tripod: Use the built-in bubble level or a separate leveling tool to ensure that the tripod is perfectly level. Adjust the leg lengths if necessary.
4. Secure the camera: Attach your camera to the tripod head using the quick release plate or mounting screw. Make sure it is securely fastened to prevent any accidental falls.
5. Adjust the tripod head: Once the camera is attached, adjust the tripod head to achieve the desired angle and composition. This can be done by loosening the appropriate knobs or levers and tilting or panning the head.
6. Fine-tune the composition: Look through the camera's viewfinder or LCD screen and make any necessary adjustments to the tripod head to achieve the desired composition. This may involve slight movements or changes in the angle.
7. Lock the tripod head: Once you are satisfied with the composition, tighten the knobs or levers on the tripod head to lock it in place. This will ensure that your camera remains steady during the shoot.
Remember to consider the latest point of view when setting up your tripod. For example, if you are shooting a landscape, you may want to position the camera lower to capture more foreground elements. Alternatively, if you are shooting a portrait, you may want to position the camera higher to capture the subject's entire body. Adjusting the tripod head for the desired angle and composition is crucial in capturing the best shot possible.
