How To Set Up Microscope ?
To set up a microscope, start by placing it on a stable surface. Make sure the microscope is turned off and the stage is lowered. Next, plug in the microscope and turn it on. Adjust the light intensity using the control knob. Place a slide on the stage and secure it with the stage clips. Use the coarse focus knob to lower the objective lens close to the slide. Look through the eyepiece and use the coarse focus knob to bring the image into focus. Once the image is roughly focused, use the fine focus knob to make precise adjustments. Adjust the condenser and diaphragm to optimize the lighting. Finally, adjust the magnification by rotating the objective lens turret.
1、 Microscope Components and Assembly
To set up a microscope, follow these steps:
1. Unpack the microscope: Carefully remove the microscope from its packaging, ensuring that all components are present and undamaged.
2. Assemble the base: Place the base of the microscope on a stable surface. Make sure it is level and secure.
3. Attach the arm: Connect the arm of the microscope to the base, ensuring a tight fit. This will provide support for the microscope head.
4. Install the microscope head: Gently place the microscope head onto the arm, aligning the eyepiece with the viewing position. Secure it in place using the locking mechanism provided.
5. Insert the eyepiece: Take the eyepiece and carefully insert it into the eyepiece tube of the microscope head. Ensure it is securely in place.
6. Install the objective lenses: Depending on the microscope model, there may be multiple objective lenses. Select the desired lens and insert it into the revolving nosepiece, ensuring it clicks into place.
7. Adjust the condenser: Locate the condenser beneath the stage and adjust its height using the condenser adjustment knob. This will help focus the light onto the specimen.
8. Prepare the specimen: Place the specimen onto a glass slide and cover it with a coverslip. Position the slide on the stage and secure it using the stage clips or mechanical stage controls.
9. Focus the microscope: Look through the eyepiece and use the coarse and fine focus knobs to bring the specimen into sharp focus. Adjust the lighting as needed.
10. Start observing: Once the specimen is in focus, you can begin observing it under the microscope. Use the magnification controls to zoom in or out as desired.
It is important to consult the specific instructions provided by the manufacturer for your microscope model, as there may be slight variations in the setup process. Additionally, advancements in microscope technology may introduce new features or components that require specific instructions for assembly.

2、 Adjusting the Microscope Focus and Magnification
How to Set Up a Microscope: Adjusting the Microscope Focus and Magnification
Setting up a microscope properly is essential to ensure accurate observations and clear images. Here is a step-by-step guide on how to set up a microscope and adjust the focus and magnification for optimal viewing:
1. Place the microscope on a stable surface: Start by placing the microscope on a flat and stable surface. This will prevent any unnecessary vibrations or movements that could affect the quality of your observations.
2. Adjust the light source: Position the microscope near a light source, such as a lamp or a window, to ensure proper illumination. Adjust the intensity of the light to a comfortable level, avoiding excessive brightness that may cause glare.
3. Prepare the specimen: Place the specimen on a clean glass slide and cover it with a coverslip. Ensure that the specimen is properly positioned and centered on the slide to facilitate easy viewing.
4. Set the lowest magnification: Begin by setting the lowest magnification objective lens (usually 4x or 10x) into position. This will provide a wider field of view and allow you to locate and focus on the specimen easily.
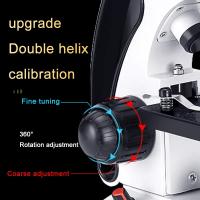
5. Adjust the coarse focus: Use the coarse focus knob to bring the specimen into rough focus. This knob is usually larger and located on the side of the microscope. Rotate it in the appropriate direction until the specimen becomes visible.
6. Fine-tune the focus: Once the specimen is roughly in focus, use the fine focus knob to bring it into sharp focus. This knob is usually smaller and located near the coarse focus knob. Make small adjustments until the image appears clear and crisp.
7. Increase the magnification: If desired, switch to a higher magnification objective lens (e.g., 40x or 100x) by rotating the nosepiece. Repeat the focusing process using the coarse and fine focus knobs to achieve a clear image at the higher magnification.
8. Use the condenser: Adjust the condenser, located beneath the stage, to control the amount of light passing through the specimen. This can enhance the contrast and clarity of the image. Adjust the condenser height and aperture as needed.
9. Fine-tune the lighting: If available, use the iris diaphragm to adjust the amount of light entering the microscope. This can help optimize the image quality by reducing glare or increasing brightness.
10. Take precautions: Remember to handle the microscope with care, avoiding any sudden movements or rough handling. Keep the lenses clean and free from dust or smudges by using lens paper or a soft cloth.
It is important to note that different microscopes may have slight variations in their setup and adjustment procedures. Therefore, it is always recommended to consult the manufacturer's instructions for specific guidelines.
In recent years, advancements in microscope technology have led to the development of digital microscopes. These microscopes often come with built-in cameras or can be connected to external cameras or computers. This allows for real-time viewing, image capture, and analysis, providing researchers and educators with more versatile tools for their work.
In conclusion, setting up a microscope and adjusting the focus and magnification is a crucial step in obtaining clear and accurate observations. By following the steps outlined above and considering the latest advancements in microscope technology, users can optimize their viewing experience and make the most of this valuable scientific tool.
3、 Proper Lighting and Illumination Techniques
To set up a microscope properly, it is important to consider the lighting and illumination techniques. These factors play a crucial role in obtaining clear and accurate images. Here is a step-by-step guide on how to set up the lighting and illumination for a microscope:
1. Start by ensuring that the microscope is placed on a stable surface and properly aligned. Adjust the height and position of the microscope to ensure comfortable viewing.
2. Check the microscope's light source. Most microscopes have built-in illumination systems, such as halogen or LED lights. Make sure the light source is functioning properly and adjust the intensity if necessary.
3. Adjust the condenser. The condenser is located beneath the stage and helps focus the light onto the specimen. Adjust the condenser's height and aperture to control the amount and angle of light reaching the specimen.
4. Choose the appropriate illumination technique. There are several techniques available, including brightfield, darkfield, phase contrast, and fluorescence. Select the technique that best suits your needs and adjust the microscope accordingly.
5. Adjust the brightness and contrast. Use the microscope's controls to adjust the brightness and contrast of the image. This will help enhance the visibility of the specimen and improve image quality.
6. Consider using filters. Depending on the specimen and illumination technique, filters can be used to enhance contrast and reduce glare. Polarizing filters, for example, can be used to minimize reflections and improve image clarity.
7. Regularly clean and maintain the microscope. Dust and debris can affect the quality of the image. Clean the lenses, condenser, and light source regularly to ensure optimal performance.
In recent years, advancements in microscope technology have led to the development of new lighting and illumination techniques. For example, some microscopes now incorporate advanced LED lighting systems that provide consistent and adjustable illumination. Additionally, there has been a growing focus on the use of fluorescence microscopy, which utilizes fluorescent dyes to label specific structures within a specimen. This technique allows for the visualization of specific molecules or cellular components, providing valuable insights in various fields of research.
Overall, setting up the lighting and illumination for a microscope requires careful consideration of the microscope's features and the specific requirements of the specimen. By following these steps and staying updated with the latest advancements, researchers can ensure optimal imaging conditions and obtain accurate and detailed results.

4、 Sample Preparation and Mounting on the Microscope
Sample Preparation and Mounting on the Microscope
Setting up a microscope properly is crucial for obtaining accurate and clear images. Here is a step-by-step guide on how to set up a microscope for sample preparation and mounting:
1. Clean the microscope: Start by cleaning the microscope thoroughly to ensure that there is no dust or debris that could interfere with the image quality. Use a soft cloth or lens paper to clean the lenses and other surfaces.
2. Adjust the lighting: Proper lighting is essential for obtaining clear images. Adjust the light intensity and position to achieve optimal illumination. Some microscopes have adjustable light sources, while others may require external lighting.
3. Prepare the sample: Depending on the type of sample, different preparation techniques may be required. For example, biological samples may need to be fixed, stained, or sectioned before mounting on the microscope slide. Follow the appropriate protocols for sample preparation to ensure accurate results.
4. Mount the sample: Place a clean microscope slide on a flat surface and carefully transfer the prepared sample onto the slide. Ensure that the sample is evenly distributed and covers the entire slide. If necessary, use a cover slip to protect the sample and prevent it from drying out.
5. Focus the microscope: Start with the lowest magnification objective lens and gradually increase the magnification as needed. Use the coarse and fine focus knobs to bring the sample into focus. Adjust the condenser and diaphragm to optimize the contrast and resolution.
6. Capture images: Once the sample is in focus, use the appropriate camera or imaging system to capture images. Ensure that the camera settings are adjusted correctly for optimal image quality.
It is important to note that the latest advancements in microscopy techniques, such as confocal microscopy and super-resolution microscopy, have revolutionized the field by providing higher resolution and three-dimensional imaging capabilities. These techniques often require specialized sample preparation and mounting procedures, as well as specific microscope settings. Therefore, it is essential to consult the manufacturer's instructions and relevant scientific literature for the specific requirements of these advanced microscopy techniques.


