How To Set Up Monopod Wired On Android ?
To set up a monopod wired on an Android device, follow these steps:
1. Ensure that your monopod is compatible with Android devices and has a wired connection option.
2. Connect the wired end of the monopod to the headphone jack of your Android device.
3. Open the camera app on your Android device.
4. Extend the monopod to the desired length.
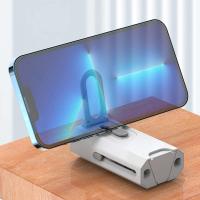
5. Hold the monopod firmly and position your Android device on the monopod's phone holder.
6. Use the buttons or controls on the monopod's handle to control the camera functions, such as capturing photos or recording videos.
7. Adjust the angle and position of the monopod as needed to capture the desired shots.
8. Once you are done, disconnect the monopod from your Android device.
Please note that the specific steps may vary depending on the brand and model of your monopod and Android device. It is recommended to refer to the user manual of your monopod for detailed instructions.
1、 Connecting a Monopod to an Android Device via Wired Connection
Connecting a Monopod to an Android Device via Wired Connection
Setting up a monopod wired connection on an Android device is a straightforward process that allows you to enhance your photography and videography experience. Here's a step-by-step guide on how to do it:
1. Check compatibility: Ensure that your Android device supports wired connections for external accessories like monopods. Most Android devices have a 3.5mm headphone jack, which can be used to connect the monopod.
2. Purchase a compatible monopod: Look for a monopod that specifically mentions compatibility with Android devices. These monopods usually come with a wired connection option and a button on the handle for capturing photos or videos.
3. Connect the monopod: Plug the monopod's wired connector into the headphone jack of your Android device. Make sure it is securely connected.
4. Launch the camera app: Open your preferred camera app on your Android device. Most camera apps automatically detect the monopod's wired connection and enable the shutter button on the monopod's handle.
5. Start capturing: Once the camera app is open, you can use the monopod's shutter button to capture photos or start/stop video recording. The monopod acts as a remote control, allowing you to take shots from a distance or capture stable videos.
It's worth noting that as technology evolves, some newer Android devices may not have a 3.5mm headphone jack. In such cases, you may need to use an adapter or consider wireless monopods that connect via Bluetooth.
Overall, setting up a monopod wired connection on an Android device is a simple process that can greatly enhance your photography and videography capabilities.
2、 Android Monopod Setup: Wired Connection Guide
To set up a monopod wired connection on an Android device, follow these steps:
1. Check compatibility: Ensure that your monopod is compatible with Android devices and has a wired connection option. Most monopods come with a 3.5mm audio jack that can be plugged into the headphone jack of your Android device.
2. Attach your Android device: Securely attach your Android device to the monopod's phone holder. Make sure it is tightly held to prevent any accidental drops.
3. Connect the wire: Plug one end of the wire into the monopod's 3.5mm audio jack and the other end into the headphone jack of your Android device. Ensure that the connection is secure.
4. Launch the camera app: Open the camera app on your Android device. Some monopods have a built-in shutter button on the handle, which can be used to capture photos or start/stop video recording. If your monopod has this feature, you can use it instead of the camera app's shutter button.
5. Adjust the monopod: Extend or retract the monopod to the desired length for capturing photos or videos. Some monopods also have a tilting or rotating head, allowing you to adjust the angle of your device.
6. Capture photos/videos: Use the monopod's shutter button or the camera app's shutter button to capture photos or start/stop video recording. The wired connection ensures a stable connection between the monopod and your Android device, reducing the chances of any connectivity issues.
Remember to refer to the user manual of your specific monopod model for any additional instructions or features.
In recent years, wireless monopods have gained popularity due to their convenience and ease of use. They eliminate the need for wired connections and often come with Bluetooth connectivity, allowing you to control your Android device remotely. However, if you prefer a more reliable and stable connection, a wired monopod setup is still a viable option.

3、 Step-by-Step: Setting Up a Wired Monopod on Android
Step-by-Step: Setting Up a Wired Monopod on Android
Using a monopod with your Android device can greatly enhance your photography and videography experience. Whether you're capturing stunning landscapes or taking group selfies, a wired monopod can provide stability and flexibility. Here's a step-by-step guide on how to set up a wired monopod on your Android device:
1. Check compatibility: Ensure that your Android device supports wired monopods. Most Android smartphones and tablets have a 3.5mm headphone jack, which is required for connecting the monopod.
2. Purchase a compatible monopod: Look for a wired monopod that is specifically designed for Android devices. These monopods usually come with a built-in shutter button and a 3.5mm audio jack connector.
3. Connect the monopod: Plug the monopod's 3.5mm connector into the headphone jack of your Android device. Make sure it is securely connected.
4. Adjust the monopod: Extend the monopod to your desired length. Some monopods have adjustable heights, allowing you to capture shots from different angles.
5. Launch the camera app: Open your camera app on your Android device. Most camera apps automatically detect the monopod's shutter button, but if not, you may need to go into the camera settings and enable the shutter button function.
6. Start capturing: Once your camera app is open and the monopod is connected, you can start capturing photos or videos. Use the monopod's shutter button to take pictures or start/stop recording videos.
7. Review and edit: After capturing your shots, review them in your gallery app. You can edit, crop, or enhance your photos and videos using various editing apps available on the Google Play Store.
It's worth noting that as technology evolves, some newer Android devices may no longer have a 3.5mm headphone jack. In such cases, you may need to use a USB-C or Lightning adapter to connect the monopod to your device.
Setting up a wired monopod on your Android device is a straightforward process that can greatly improve your photography and videography capabilities. So grab your monopod, follow these steps, and start capturing amazing shots with ease!
4、 Wired Monopod Setup for Android Devices: Quick Guide
Setting up a wired monopod on an Android device is a relatively simple process that allows you to capture stable and high-quality photos and videos. Here's a quick guide on how to set up a wired monopod on your Android device:
1. Check compatibility: Ensure that your Android device supports wired monopods. Most Android devices have a 3.5mm headphone jack, which is required for connecting the monopod.
2. Purchase a compatible monopod: Look for a monopod that specifically mentions compatibility with Android devices. This ensures that the necessary wiring and controls are compatible with your device.
3. Connect the monopod: Plug the monopod's 3.5mm jack into the headphone jack of your Android device. Once connected, your device should recognize the monopod.
4. Adjust settings: Open your camera app and go to the settings menu. Look for an option that allows you to assign the volume buttons as the shutter release. Enable this option to use the monopod's controls for capturing photos or videos.
5. Start capturing: Extend the monopod to your desired length and position your Android device securely on the monopod's mount. Use the monopod's controls, usually located on the handle, to capture photos or start/stop video recording.
It's worth noting that as technology evolves, some newer Android devices may not have a 3.5mm headphone jack. In such cases, you may need to use an adapter or consider a wireless monopod that connects via Bluetooth.
Remember to always refer to the manufacturer's instructions for your specific monopod model, as the setup process may vary slightly.

